Fall is undoubtedly the best time of the year. On top of having the best weather and activities — apple picking, anyone? — it's also the season of Halloween!
People all over the country absolutely adore Halloween. Whether you're a fan of the fun parts (trick-or-treating and pumpkin carving) or the spooky parts (visiting haunted houses and corn mazes), Halloween truly has something for everyone.
It even offers a great number of things to do for fans of DIY projects. From making adorable pumpkin crafts to baking tasty miniature cheesecake pies, fall is the best time to hone your crafting and cooking skills.
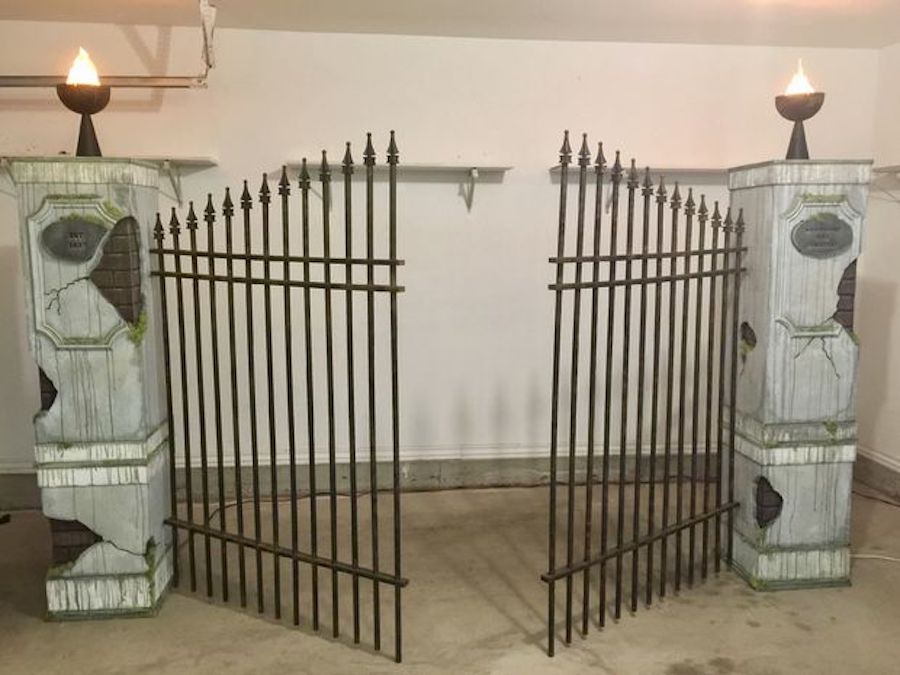
One man did just that last year, when he decided to built his very own DIY cemetery gate.
Some people go all-out when they decorate their front yards for Halloween, and this guy is no exception. The cemetery gate he was able to build was so realistic that it might even fool some of his friends!
[H/T: Instructables]
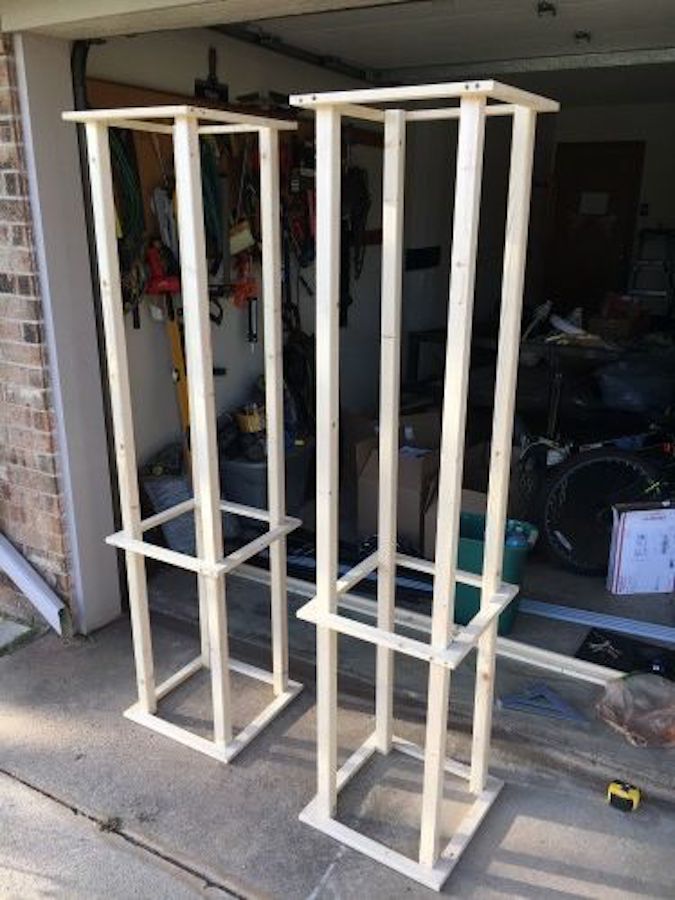
The builder of the cemetery fence, who goes by jarame on Instructables, shared his construction process.
To begin, he decided how tall he wanted the pillars to be, then measured and cut thin pieces of wood to build the structure.
Once he cut the side pieces, he put it all together, forming the bones of the pillars.
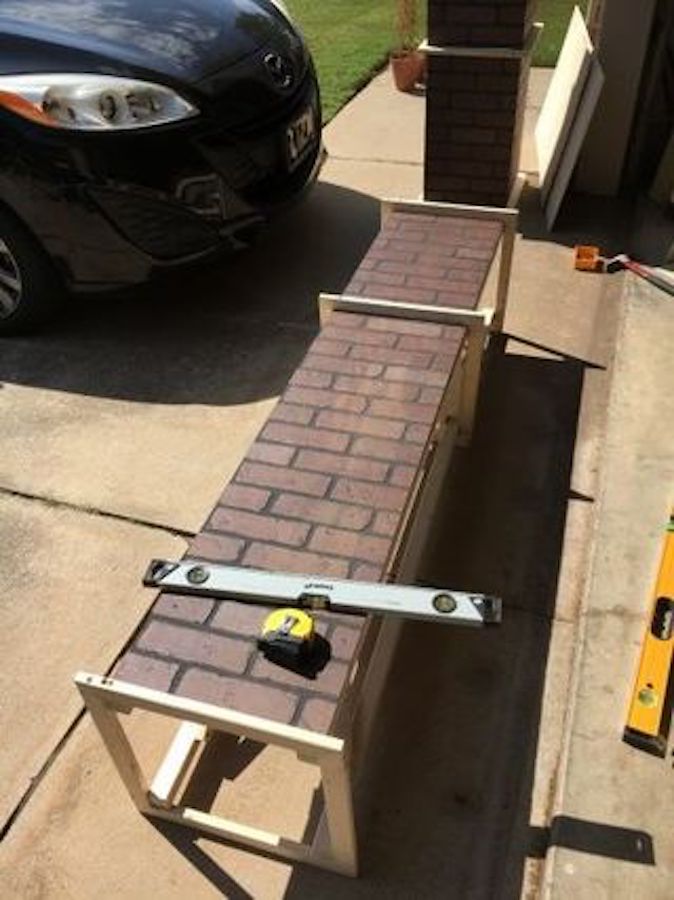
Next, he "covered the completed frames with a brick veneer hardboard panel."
He put brick on all four sides, even though he knew he'd cover some of the veneer with gray "stone."
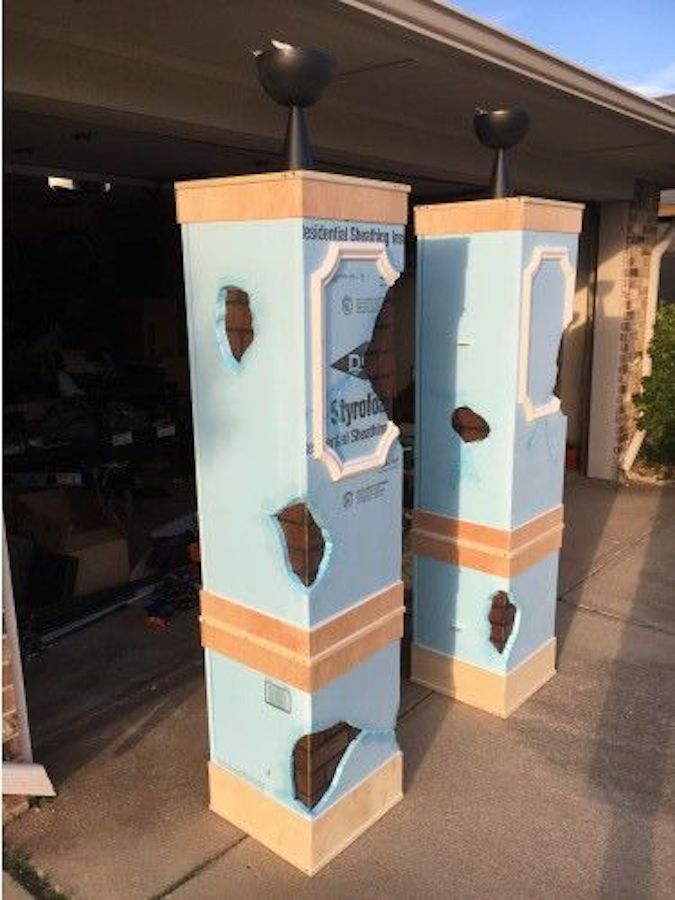
Next, he added styrofoam sheathing to each of the four sides, leaving some holes so the pillars would look somewhat destroyed.
After all the styrofoam was measured, he cut out the parts he wanted to look damaged and distressed. Then he attached the styrofoam to the "brick" using glue.
Once the styrofoam was in place, he added some trim to the top, middle, and bottom, and placed some picture frame moulding on the front of each pillar.
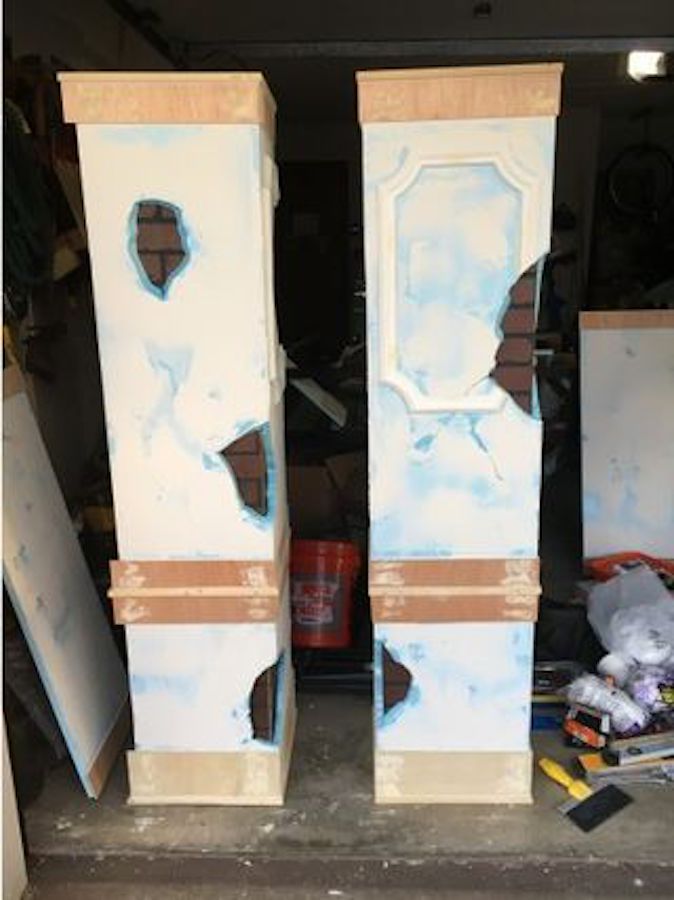
He had "Finally reached a point that they will start to look like something worthy of Halloween."
Wanting to give the pillars some texture, he decided to stucco over the styrofoam. Once it was dried and sanded, he painted the stucco (and covered the brick so as to not accidentally paint it).
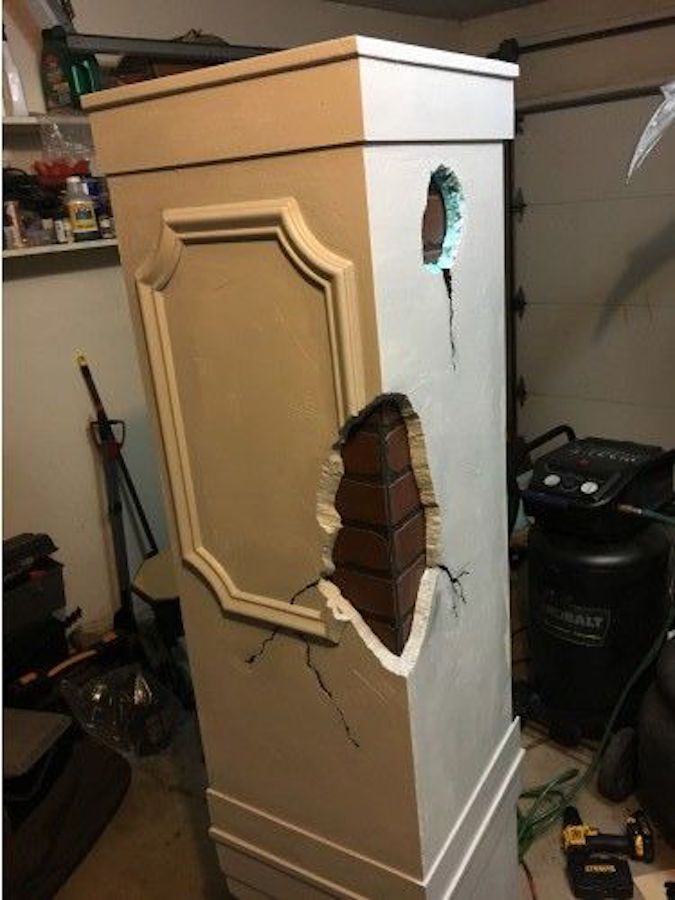
On the trim, he used an off-white paint mixed with sand for more texture.
Next, he went into the dry brushing stage, which "is a technique where you apply paint from an almost dry brush." He dry brushed two different colors over the base color to give the appearance of age and depth.
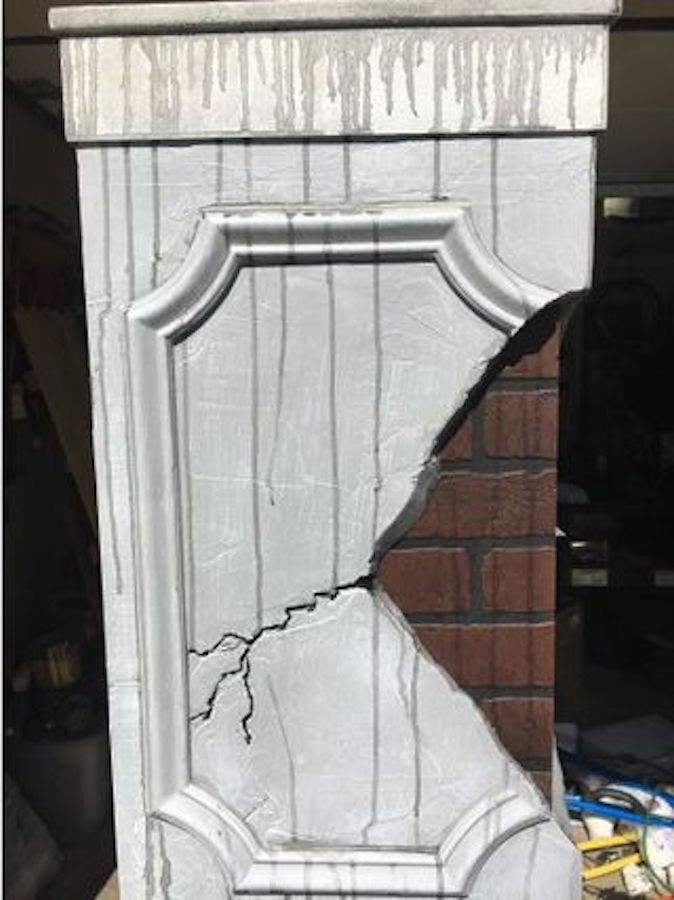
Once the paint was dry, he used "very watered down black acrylic paint and sprayed it on with a spray bottle." The watery paint dripped down on its own, making it look very authentic.
He also used black acrylic paint to darken the cracks.
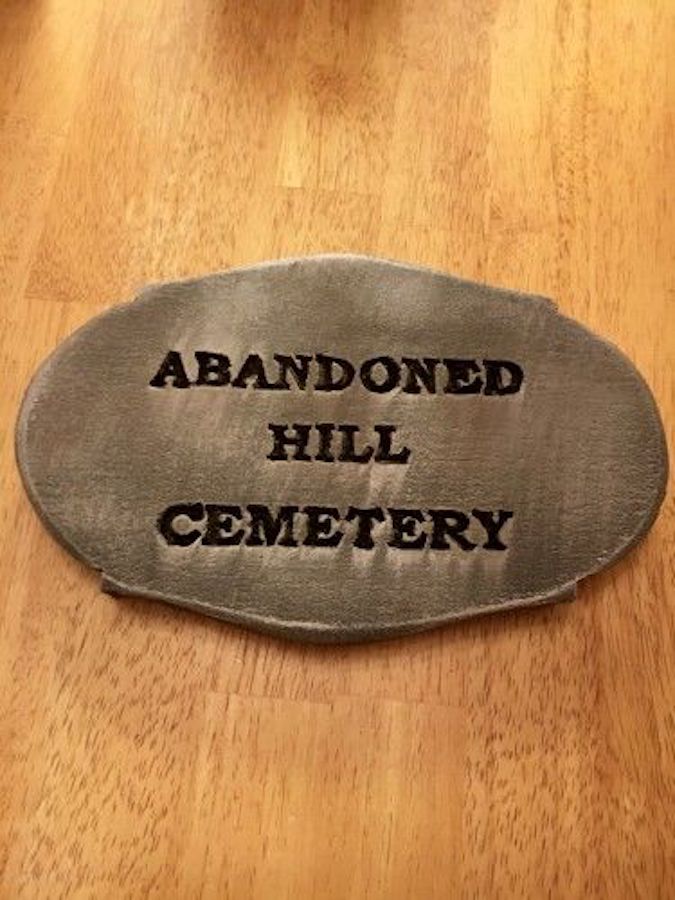
Next up, the stone plaques for the front of the pillars. Using an outline, he traced the design onto a thick piece of styrofoam, then cut it out.
Once he was satisfied with the shape of the plaques, he went back in to cut the lettering, which he then painted with black acrylic paint.
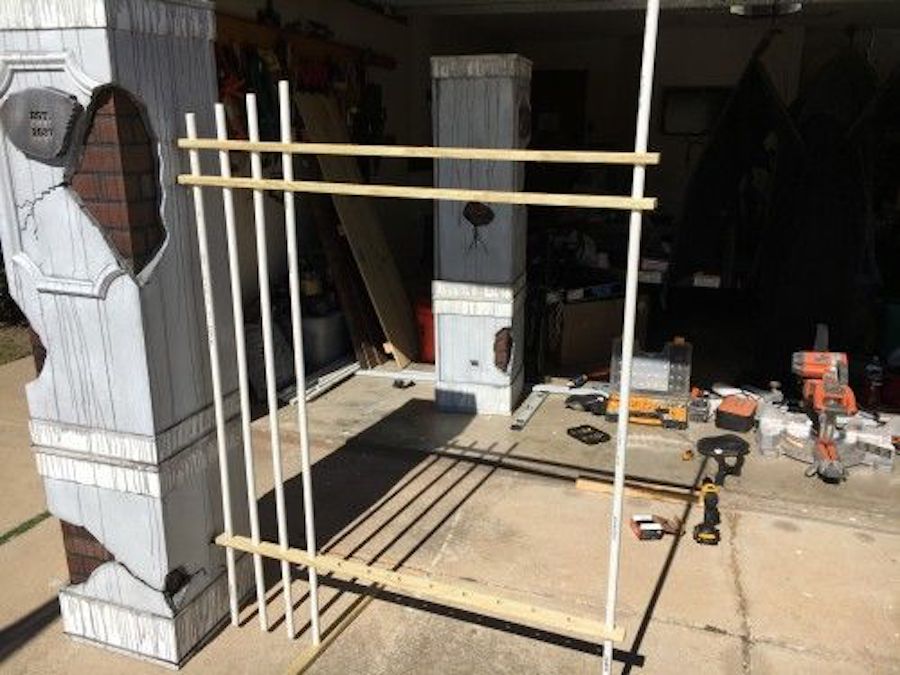
Once the pillars were complete, it was time to move onto the actual gate pieces. Instead of using real metal gates, which would have been expensive and heavy, he made his own with wood and PVC pipes.
After cutting the pipes to size, he set them in place using drywall screws.
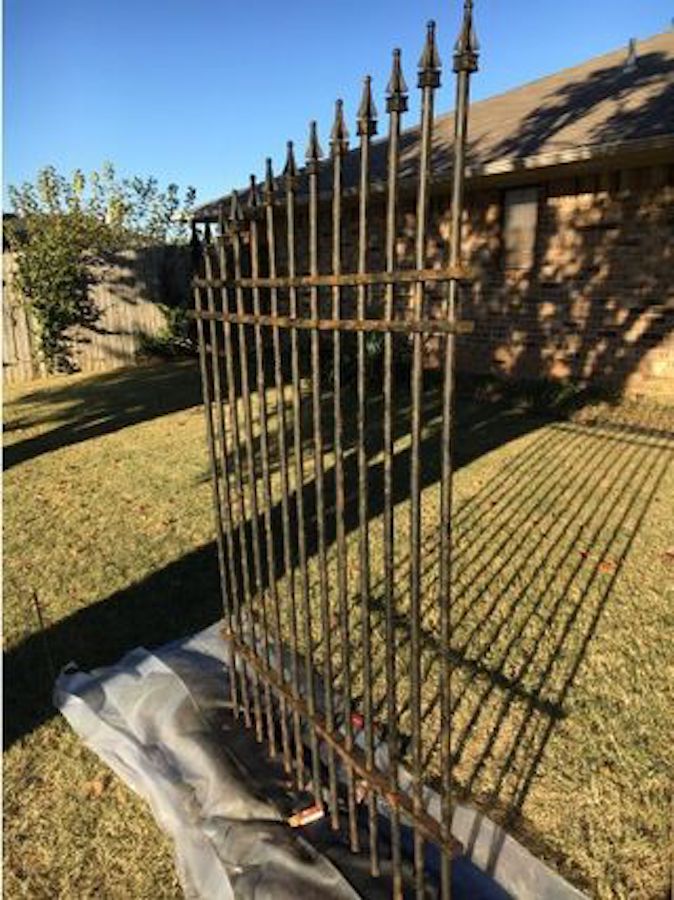
When both of the gates were done, he spray painted them with a base coat of black.
"After the base coat was dry, I used acrylic paints (black, brown and orange) to give a rusting effect to the gates," he explained.
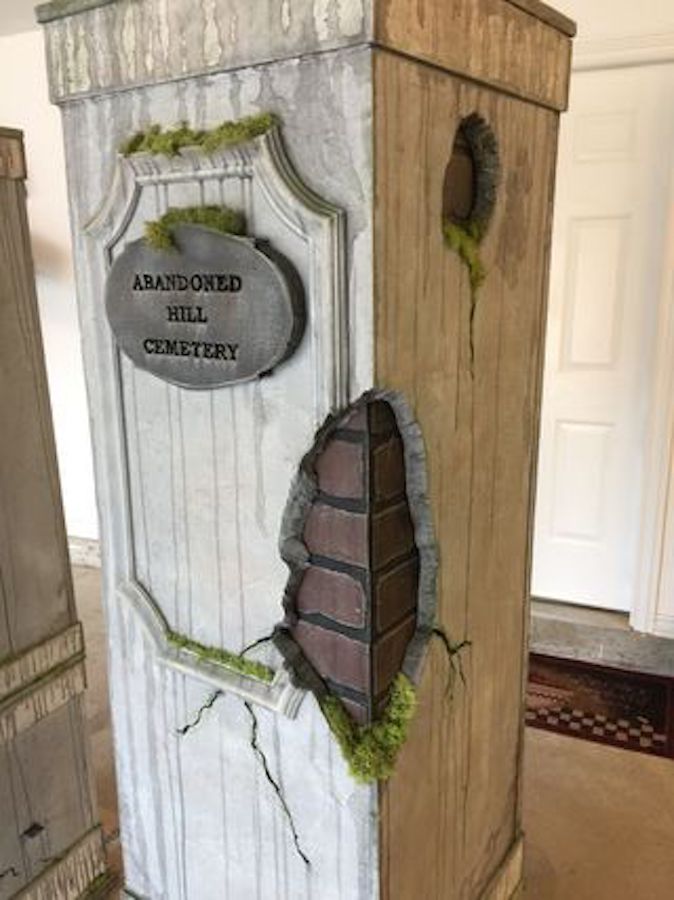
Finally, he added some additional paint to the pillars and some hobby moss "to give them more of a realistic (hopefully) weathered look."
He definitely achieved a realistic look with these incredible pillars!
If you love Halloween, please SHARE this article with your friends and family!


