No matter what season it happens to be — spring, summer, winter, or fall — there are always a few birds around who will appreciate it if you leave food out for them to snack on. And while you could always buy a bird feeder from the store and simply fill it with a few seeds, why not take this opportunity to make something fun and adorable that will please your flying friends?
When I decided to make my own DIY bird feeders, I took a quick peek around the internet to find some ideas and inspiration. I opted to go with two of the most popular versions that I noticed on various websites. They were both relatively easy, didn’t require any hard-to-find ingredients, and offered a very different way of making bird feeders.
You probably already have everything you need to make the DIY bird feeders from The Homeschool Scientist — that is, if you happen to keep birdseed around. But if you have peanut butter and an empty toilet paper roll or two, then you’re on your way. And these bird feeders are so easy to make that you can put a few together while spending an hour on your own, or you could assemble a bunch during an afternoon crafting with your kids.
If you want to get a little fancier, Honey & Pine Co has instructions for how to make cookie-cutter-shaped bird feeders that require gelatin, corn syrup, flour, and a few other ingredients. If you don’t have cookie cutters, don’t worry! I ended up using ramekins as well as cookie cutters, which means that any little bowl-like dishes or even cups will do.
Read on to see how I made out when I tried to create both kinds of DIY bird feeders, and learn how to make these fun, simple crafts for yourself.
Peanut Butter Bird Feeders: What You’ll Need
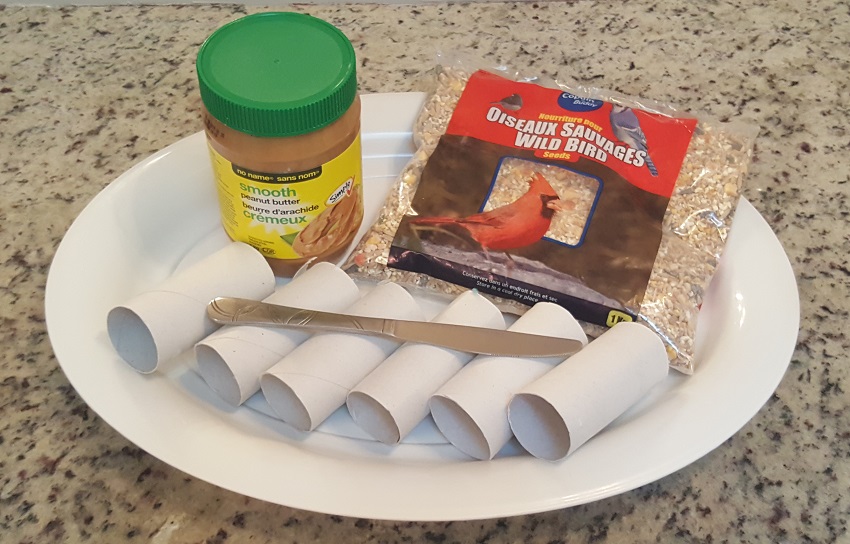
- Empty toilet paper rolls (or paper towel rolls, wrapping paper rolls, or anything of the sort)
- Peanut butter
- Birdseed
- String (optional, for hanging)
- Craft sticks (optional but a good idea, as I learned)
Step 1: Pour Birdseed on Plate
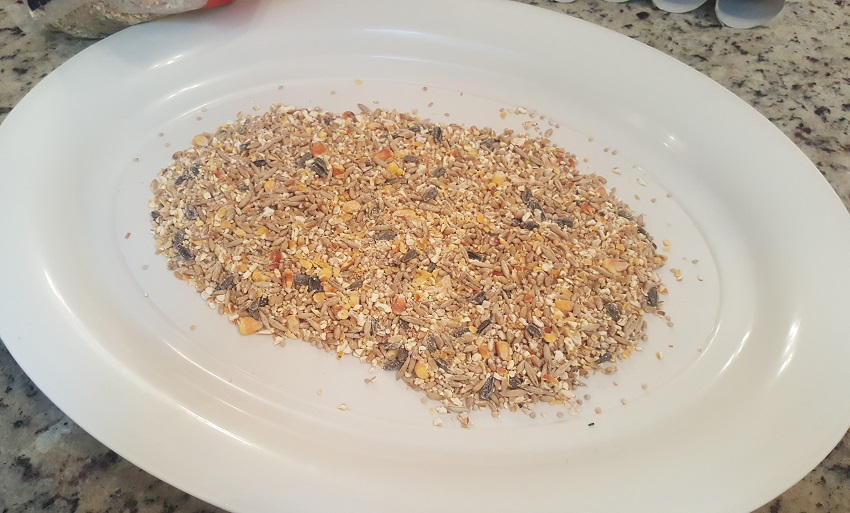
I started out by pouring some birdseed onto my plate. I didn't know how much I would need but made sure that there would be enough to fully coat the outside of the toilet paper rolls I was using. I also spread the birdseed out a bit. That way, I would be able to roll my DIY bird feeders around to make sure that they were covered in seeds on all sides.
Step 2: Cover Paper Roll With Peanut Butter
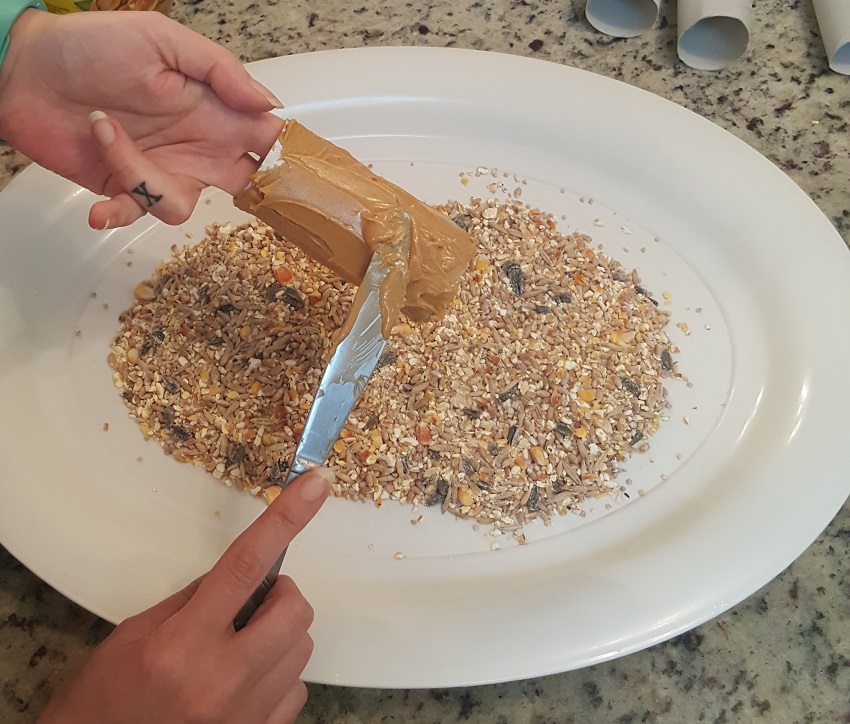
I then took the toilet paper rolls and spread a layer of peanut butter around the outside of each one. I made sure that the layer of peanut butter was somewhat thick so that the birdseed would stick to it. I did notice that if it was too thick, the peanut butter would start to slide off in big globs, which is something you definitely want to avoid.
Step 3: Roll in Birdseed
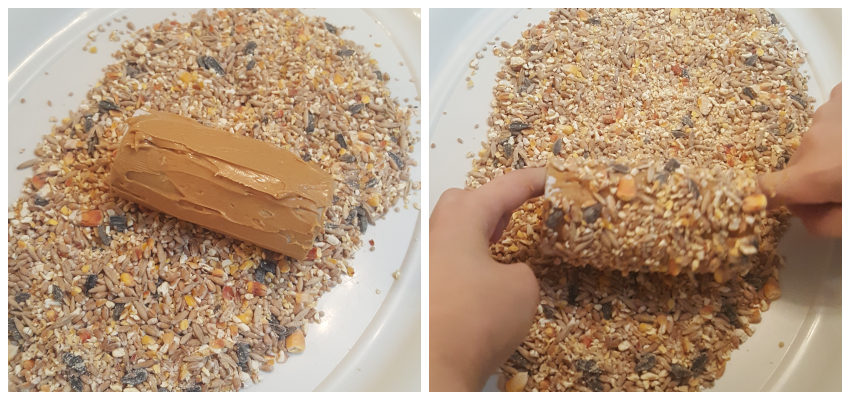
Once my toilet paper rolls were completely covered in sticky peanut butter, I rolled them around the birdseed, pressing down just a little bit to make sure I picked up as many seeds as possible. Thanks to the decent layer of peanut butter, the seeds stuck pretty well with just one pass. But there were a couple of small spots that were bare, so I sprinkled a few seeds on top to fill them up.
Step 4: Allow to Dry
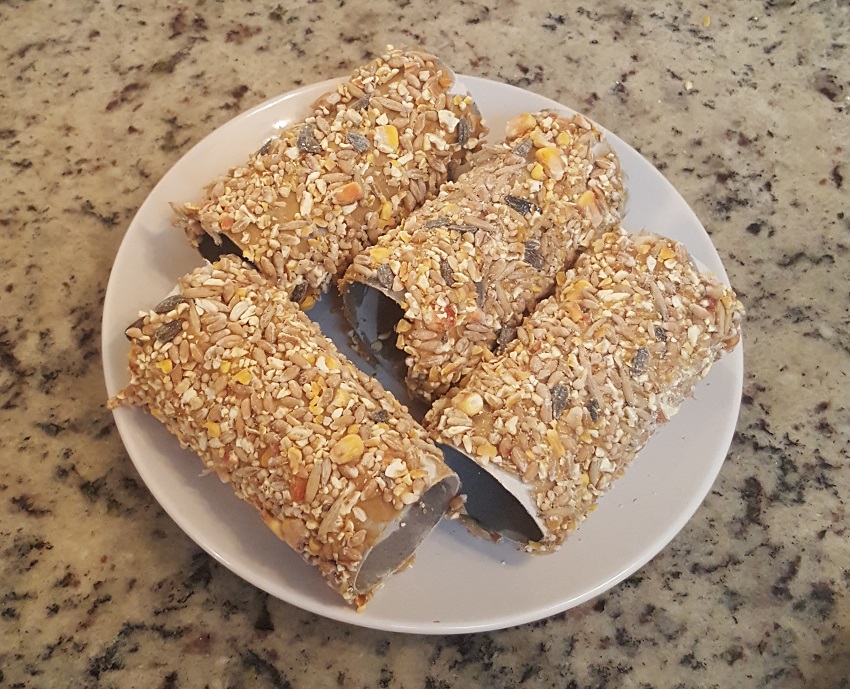
I had collected four toilet paper rolls to make my bird feeders and decided to use them all. After covering each one in peanut butter and rolling them in the seeds, I set them aside to dry overnight.
Step 5: Attach String for Hanging
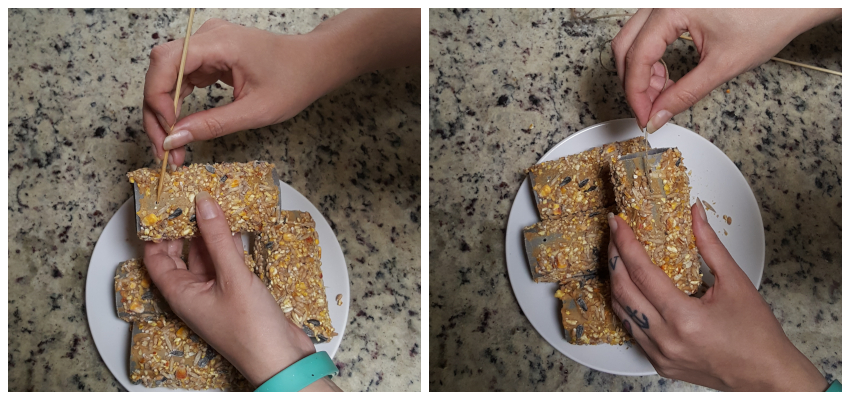
By the next day, the peanut butter had dried, and the seeds were still firmly stuck in place. Now it was time to get the feeders ready to hang up for the birds.
I first poked a hole in each of the bird feeders using a wooden skewer, then looped a string through and tied it up. A few of the seeds fell off while I was poking the hole, so if I try this again, I might make the holes before I put the peanut butter and seeds on.
Peanut Butter Bird Feeders: Final Result
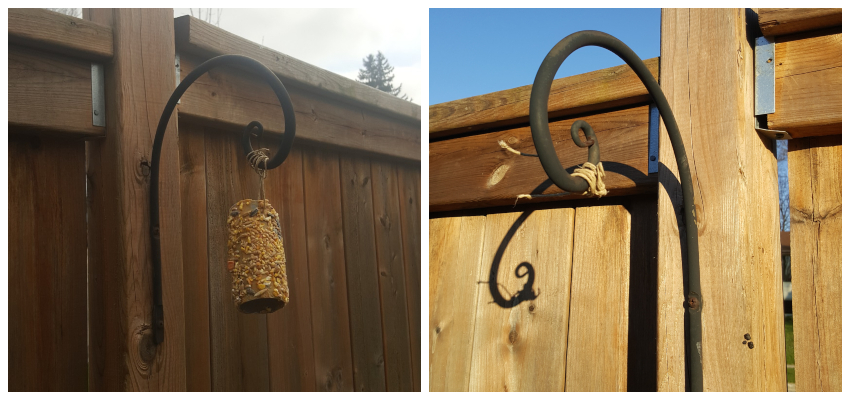
It was finally time to put the bird feeders outside! Since they were made from toilet paper rolls, they honestly weren’t the most attractive things in the world. Because I was worried that they would get soggy overnight, I hung them around my backyard so that my neighbors wouldn’t have to look at them if they ended up all nasty.
I then took a seat and waited around to see if the birds would like them, but the finches who came around just seemed confused by the new feeders. While they kept flying around the rolls, they weren’t stopping for a snack. It soon occurred to me that the birds had nothing to hold onto even if they wanted to eat the food, so perhaps I need to add little perches. (It turns out The Homeschool Scientist had also come to this conclusion and added craft sticks for a perch, although the site also suggests simply sliding the roll onto a branch.)
So in the end, these bird feeders might need a few adjustments before they’re bird pleasers.
Update: The next morning, this bird feeder was GONE! Did a squirrel make off with it?!
Cookie-Cutter Bird Feeders: What You’ll Need
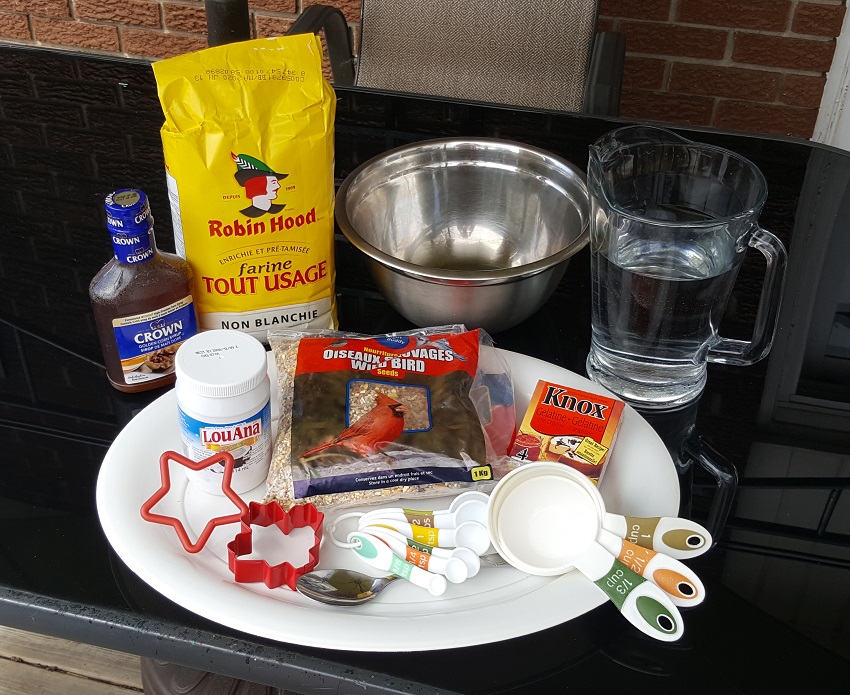
- ¾ cup all-purpose flour
- ½ cup water (the Honey & Pine Co instructions said cold water, but the gelatin package said hot water, so I went with hot)
- 2½ tsps. unflavored gelatin (1 envelope)
- 3 tbsps. corn syrup
- 4 cups birdseed
- Cookie cutters (or ramekins or cups)
- Oil or cooking spray
- Skewer (or something to poke a small hole)
- A cookie sheet or plate
- Wax paper or parchment paper (optional)
- String (not pictured)
Step 1: Mix Edible Ingredients
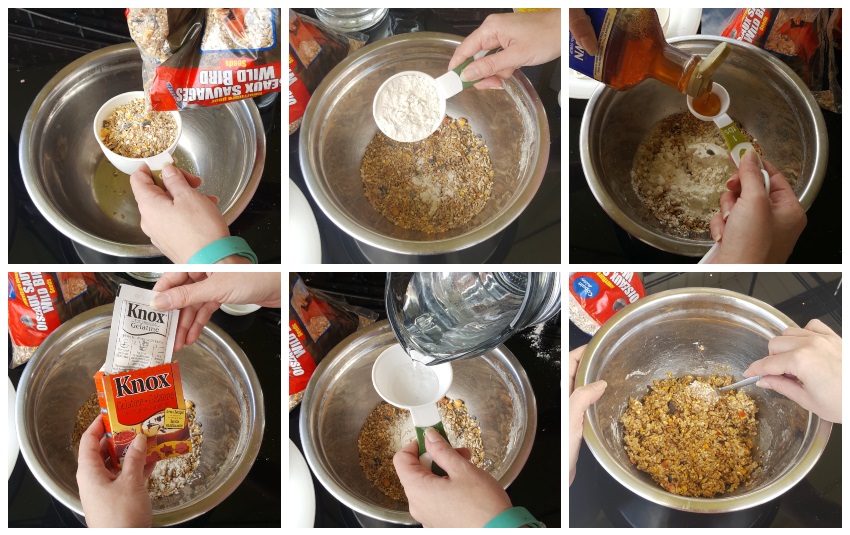
The first step was to mix everything together. The instructions said to use 4 cups of birdseed, but when I poured that into my bowl, it was WAY too much. I cut the amount down by about half, but you can make however much you need for your hungry bird friends.
I added birdseed, flour, corn syrup, gelatin, and water to a bowl and stirred it up. My mixture seemed really loose and not sticky at all, so I added a little more flour and gelatin as well as a tiny splash of water to help things bind together better, which they then did.
Step 2: Fill the Cookie Cutters
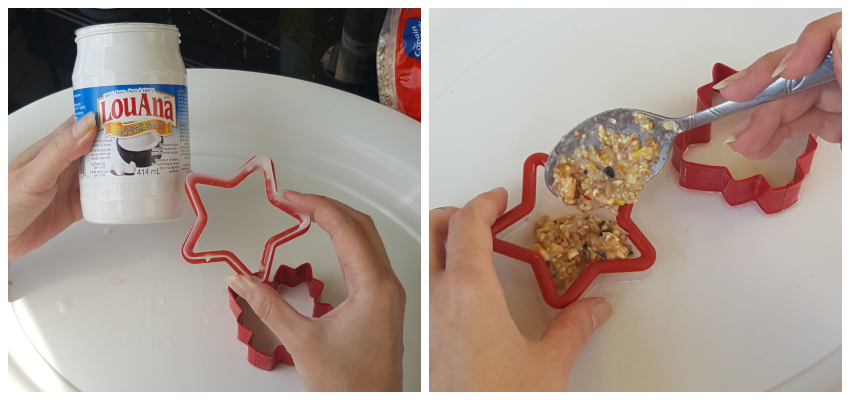
I didn’t have any cooking spray, so I took a little coconut oil and used it to coat the inside of each cookie cutter. In theory, this would prevent the mixture from sticking to the sides. And instead of using wax paper or parchment paper underneath, I simply spread a little bit of the coconut oil onto the plate as well.
I then put some of the mixture into each of the cookie cutters, filling every nook and making sure to pack the seeds down firmly.
Step 3: Poke Holes for Hanging
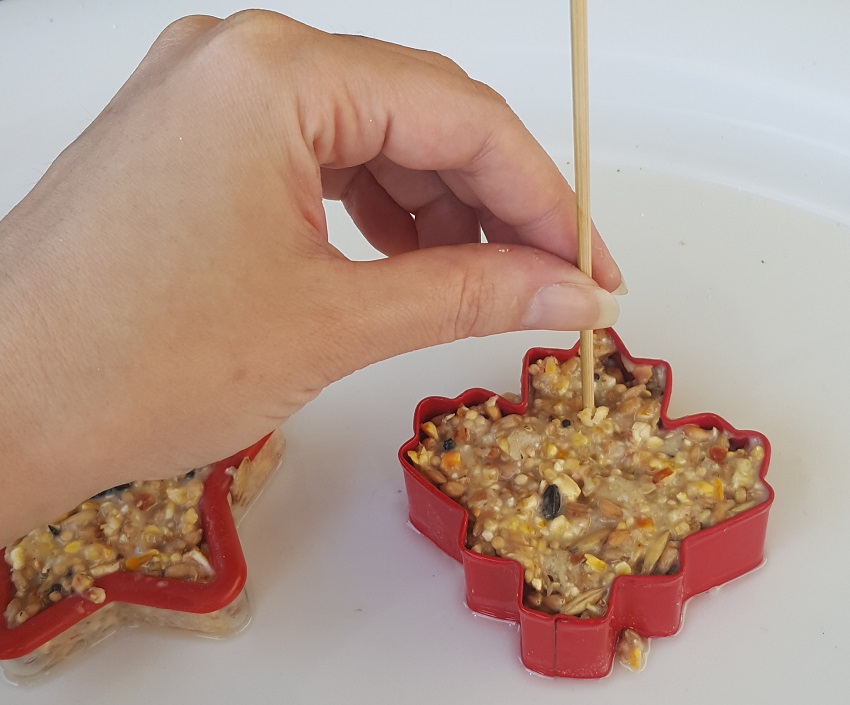
Finally, I used a skewer to poke a little hole into the top of what would be my bird feeders so that I would be able to add a string to them later on. I made sure not to put the hole too high, and I left a little room at the top so that the bird feeder would be strong enough to hold itself up.
Step 4: Allow to Dry
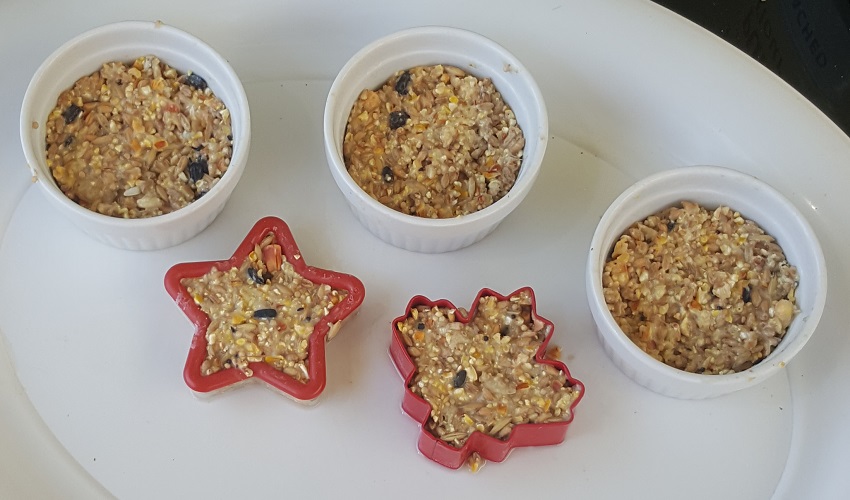
Despite the fact that I made only about half of what the recipe had called for, I still ended up with a fair share of the mixture left over. But I couldn’t find any of my other cookie cutters, so I grabbed a few ramekins, and after rubbing coconut oil on the inside, I filled them about a quarter of the way up with the mixture and poked a hole in each one before setting them aside with the others to dry.
I was supposed to leave them for at least six to eight hours before hanging them up, but figured I might as well leave them overnight to let them completely dry.
Step 5: Remove From Molds and Attach String
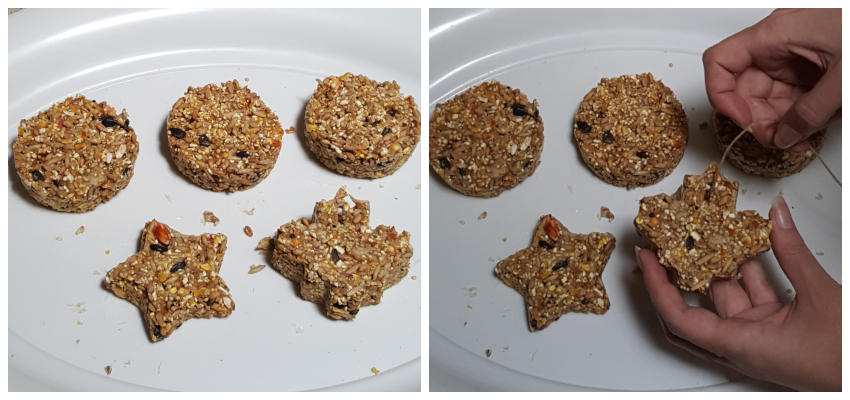
The next day, they were dry and almost ready to go. After removing them from the cookie cutters and ramekins, which was easy thanks to the slippery coconut oil, I merely had to loop some string through the holes and tie them up.
Cookie Cutter Bird Feeders: Final Result
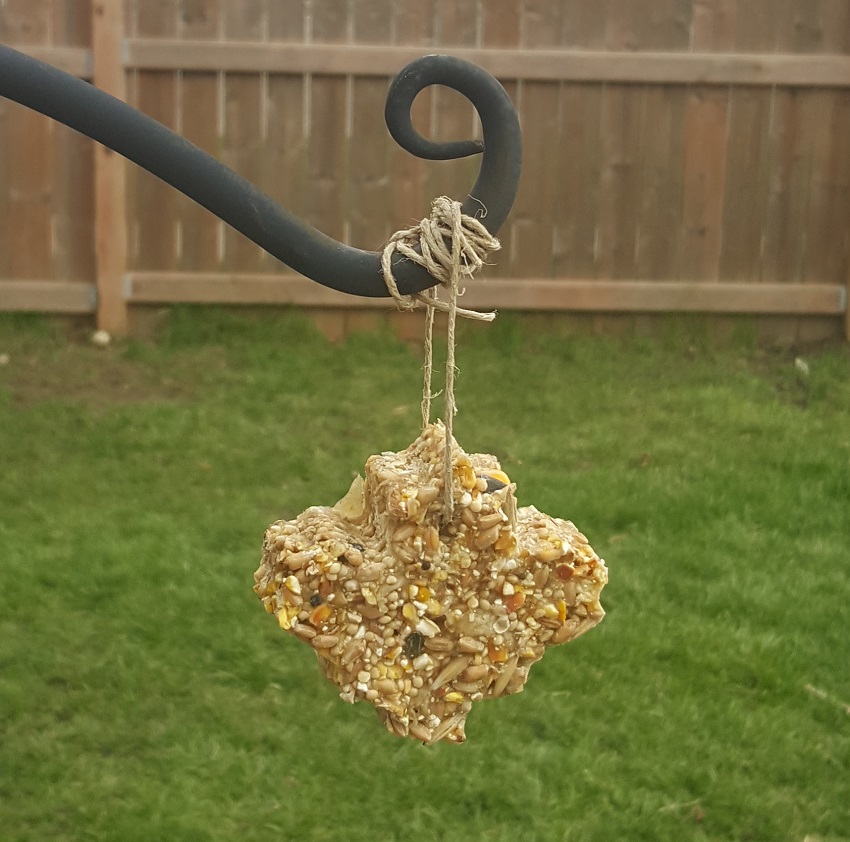
It was finally time to put them outside!
I have to admit that I was a little confused by this design. They had hardened up into little pucks, and I couldn’t understand how birds were supposed to get the seeds, since they seemed to be firmly stuck into place. I started to wonder if this would end up being an unintentional prank on the birds by teasing them with seeds that they would never be able to eat.
However, I figured if the birds hated it, squirrels might still be interested, since they could chew out the seeds. Or did I just end up with birdseed decorations that aren't really edible?
Either way, the bird feeders were cute, and they were fun to make, so I was pretty pleased. And I hope the critters outside are just as happy!


