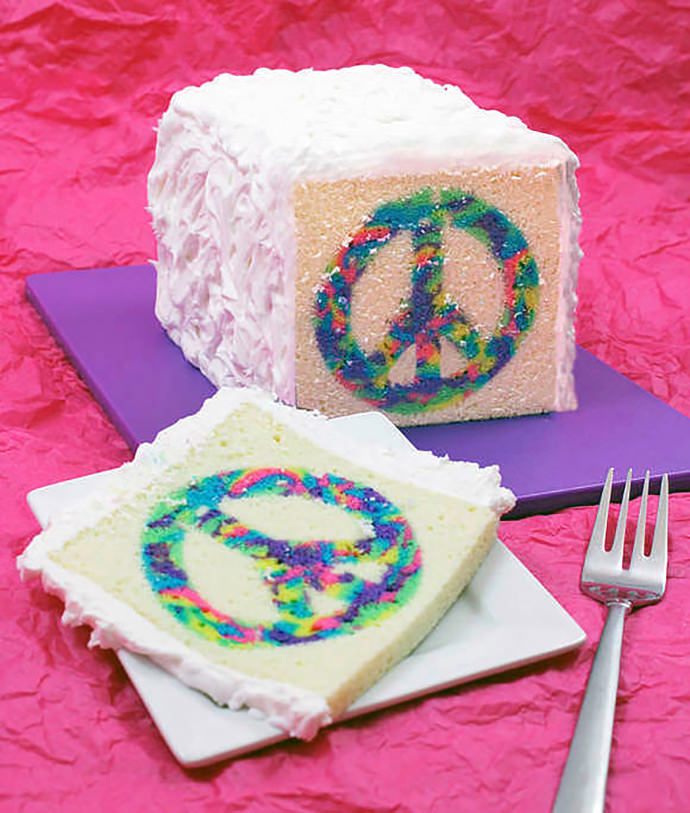
Every time I see an incredible cake like this, my first thought is, "Wow, I want to do that!" — then I remember that I'm horrible at baking, so my very next thought is always, "Wow, there's no way I could do that…"
But when I found this amazing recipe on Homemade Charlotte, I was instantly intrigued. With her helpful hints and step-by-step photos, she makes it look so easy! And the end result is so adorable — perfect for a springtime birthday party — that it's definitely worth a try.
If you decide you'd like to make it, too, here are the ingredients you'll need:
- 4 boxes Betty Crocker Pound Cake Mix
- 2 2/3 cups milk (use 2/3 cup per box)
- 1 cup softened butter (use 1/4 cup per box)
- 8 eggs (use 2 eggs per box)
- Food coloring: blue, purple, pink, green, and yellow
- Disposable pastry bags or Ziploc bags
- Frosting
- Peace sign cookie cutter
- Two 6″ x 6″ x 2″ baking pans
- Nonstick cooking spray and flour (for dusting the pans)
Be sure to scroll to the bottom for a video tutorial, too! And please SHARE if you’d like to try this far-out cake!
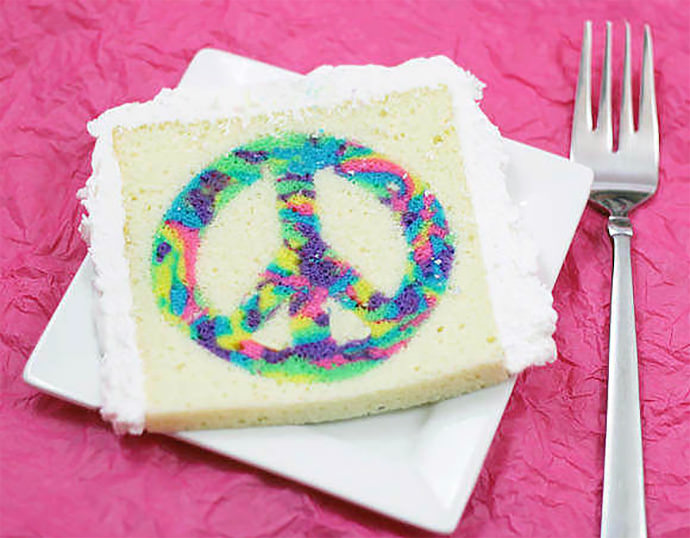
This is the beautiful final product. With these oh-so-simple instructions, I think it'll be a breeze!
Step 1: Spray your pans with non-stick baking spray, then dust with flour. Preheat your oven to 350 degrees. Then, we're going to start making the tie-dye part of the cake!

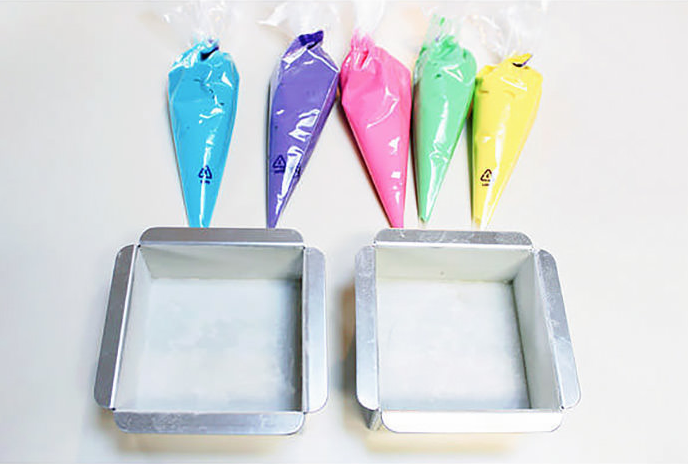
Step 2: Mix one box of cake mix with 2/3 cup milk, 1/4 cup butter, and 2 eggs. Split this into 5 equal portions, then add a different food coloring to each portion. Pour the colored batter into pastry or Ziploc bags.
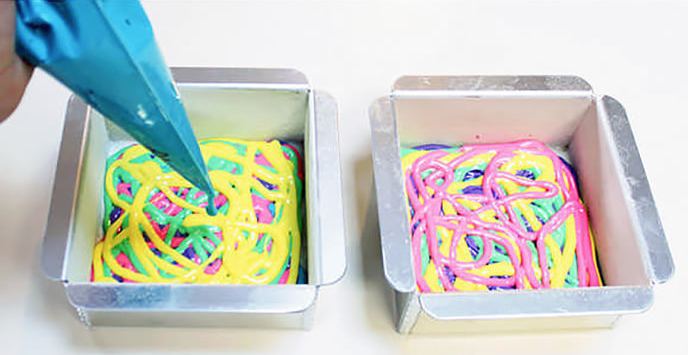
Step 3: Cut off the tips of the batter bags and swirl the batter into the pans, alternating the colors often. Tap the pans on the counter to get rid of air bubbles.
Step 4: Bake each tie-dye cake (4 total) for 35 to 40 minutes. After being cooled and frozen, slice them to the thickness of your cookie cutter. Cut shapes from each slice, then stack the shapes in the center of your baking pans.

Step 5: Spray your pans with non-stick baking spray, then dust with flour. Preheat your oven to 350 degrees.
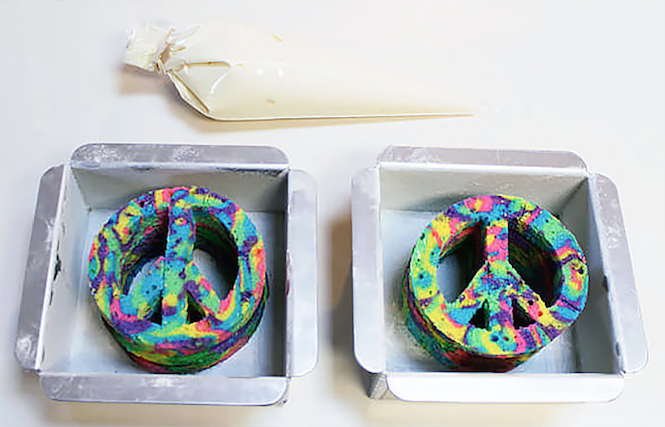
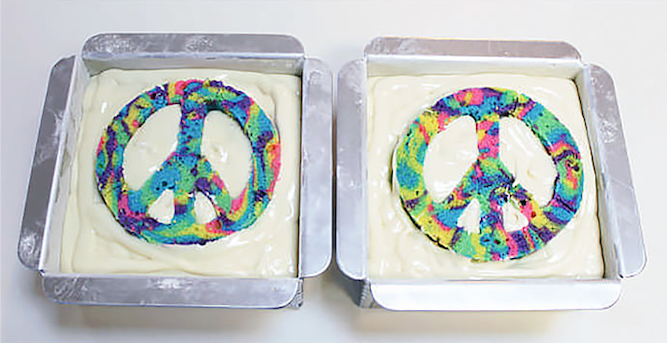
Step 6: Mix one box of cake mix with 2/3 cup milk, 1/4 cup butter, and 2 eggs. Pour the batter into a pastry or Ziploc bag. Cut off the tips of the batter bags and begin squeezing batter into the inner shapes of the peace sign. Once those are filled, pour batter all around the outside.
Step 7: Bake for 40 to 45 minutes, or until a toothpick inserted comes out clean. Allow the cakes to cool.

Step 8: While still in the pans, cut off the top portion of the cakes, to make them flush with the pan.

Step 9: Repeat this step for each cake.

Step 10: Remove the cakes from their pans and trim all four sides neatly. Repeat the previous steps to make two more cakes with peace signs inside.

Step 10: After all four cakes are trimmed to the same size, put a thin layer of frosting on the tops of three of them. Stand them upright and stick them together on your cake plate.

Step 11: Frost the entire cake with a thin, crumb coat of frosting.

Step 12: Refrigerate for an hour, then frost the entire cake with a thicker, more decorative layer of frosting.

Step 13: Throw some candles on top, then dig in!

The final product! A sweet, colorful cake that would liven up any groovy party!
Please be sure to watch the video below, and SHARE if this cake brought some color to your day!


