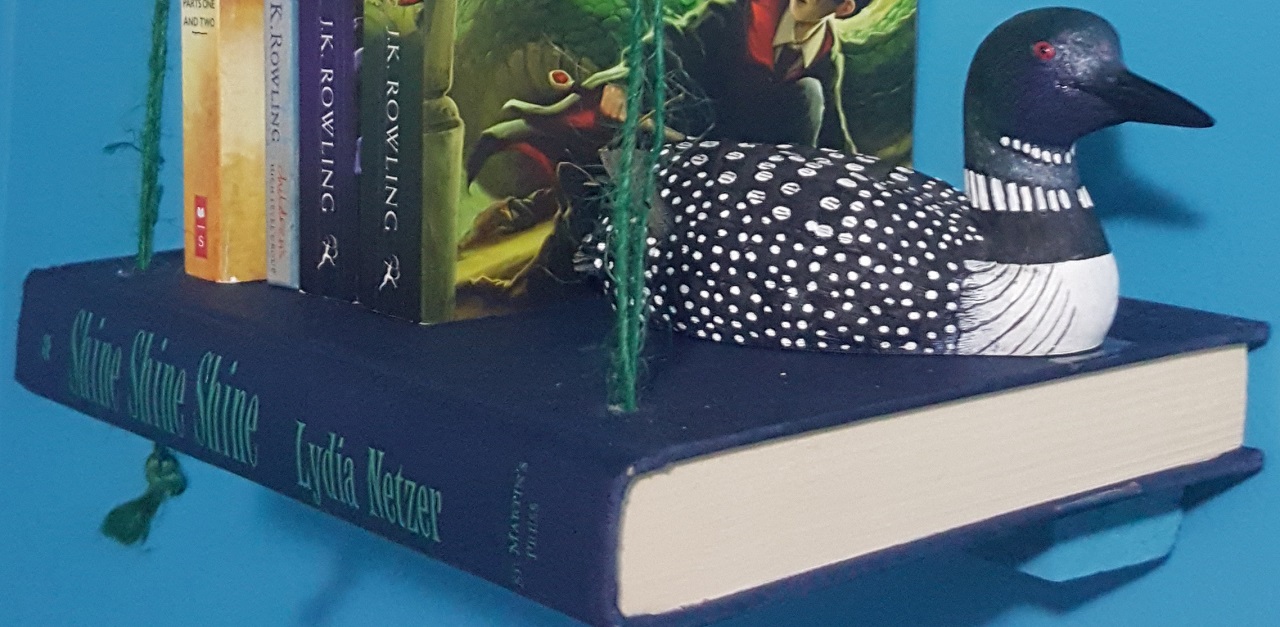
If you’re a booklover but have more things to read than space on your shelves, then perhaps you should try to use your books as shelves themselves. While poking around on Pinterest, I came across an adorable-looking setup from Real Simple that was created by using old books and brackets to make individual shelves. Totally charmed by the simple yet stylish idea, I decided to try it for myself.
However, I also happened to notice a second method on Pinterest that used old books as shelves once again. But instead of attaching them to the wall using brackets, this version used thin pieces of wood to secure the books to the wall and rope for suspension.
I wasn’t sure which method would work best, and since both looked relatively easy, I decided to try each of them.
Before I started, my first issue was trying to track down books that were not only attractive enough to have on display as shelves but also ones that I was willing to essentially ruin thanks to the fact that I would be drilling into each book. And yes, the thought of drilling into books wasn’t easy for me to accept. But I consoled myself with the notion that I was saving these books from a lonely, forgotten fate and was in fact giving them a second chance at life. Overly dramatic? Perhaps. But I am a hardcore booklover.
I also didn’t want to pay a fortune for books that might end up totally destroyed. Thankfully, I was able to score a handful of secondhand hardcover books from my local library for 50 cents each.
With my pile of books and a few other supplies, I was ready to go. Scroll through below to see how I made two different kinds of bookshelves using actual books.
Bracket Bookshelf: Materials and Tools
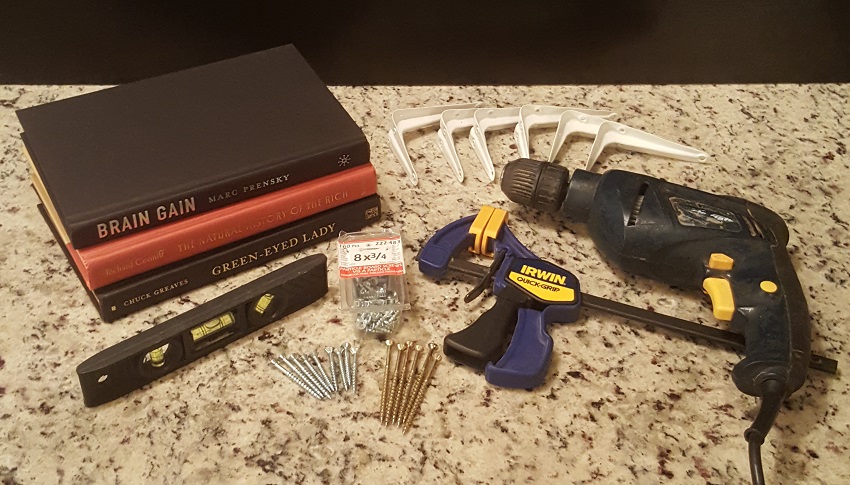
For the first set of shelves, I needed only a few items:
- Hardcover books
- 2 brackets for each shelf
- Screws and a drill
- Level
Real Simple suggested using a third bracket on the top of each shelf. But I didn’t like the way that looked and was hoping that by screwing the bottom brackets into the books, my shelves would be nice and secure.
When it came to the books I chose, I opted for ones with seemingly apt titles as opposed to favorites that I could never bring myself to ruin. Since I was making this shelf for myself and wanted to set it up in my home office, I nabbed Green-Eyed Lady, which felt pretty perfect since I have green eyes. The second book was The Natural History of the Rich and the third was Brain Gain, both of which felt like great motivation for my workspace.
Bracket Bookshelf: Picking the Placement
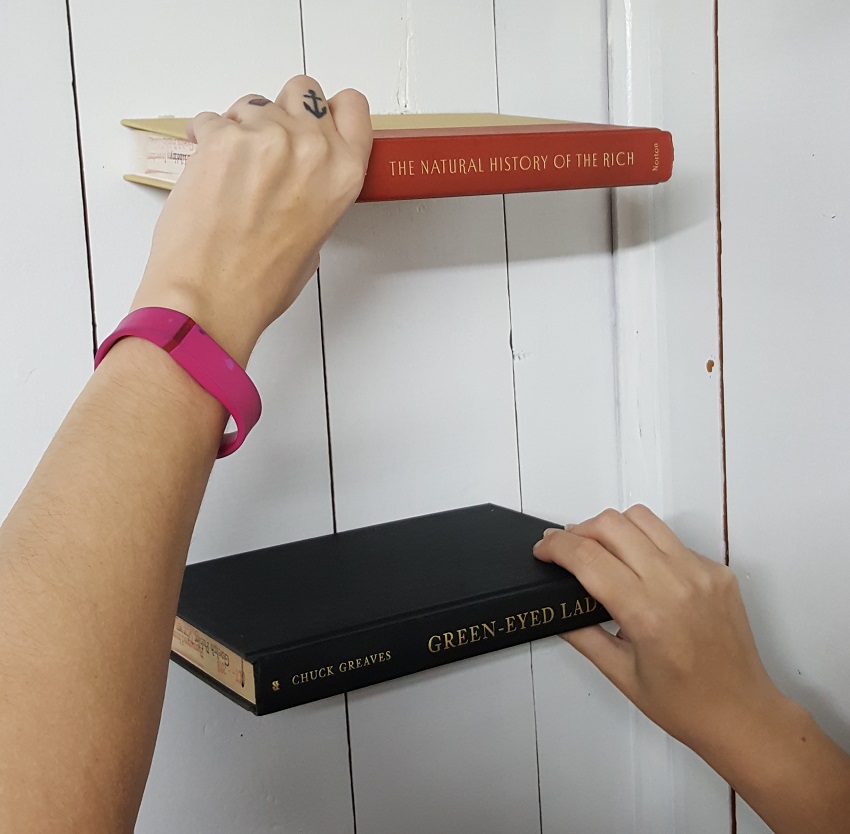
Before I started drilling the books and brackets into the wall, I picked the exact spots where I wanted to place each shelf. I debated staggering the books in a diagonal row or placing them in random spots, but ultimately decided that I wanted them in one vertical row.
I also decided which book I wanted on the top, in the middle, and on the bottom. Since I was using two dark books and one with a burnt orange cover, it made sense to put the pop of color in the middle.
Bracket Bookshelf: Measuring Placement and Keeping Them Level
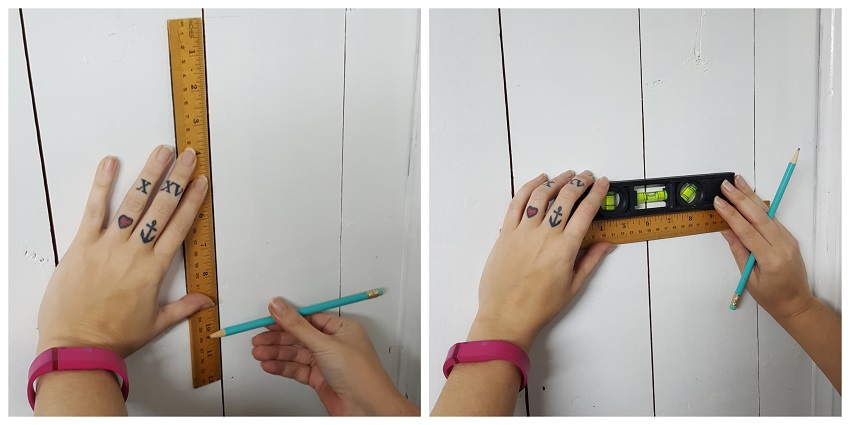
Once I had decided where I wanted to place the books, I measured things out so that each shelf would be lined up and so that there would be the same amount of space between each book. I used a level to make a line so that I could be sure each book would be perfectly straight on the wall.
Bracket Bookshelf: Drilling the Brackets Into the Books
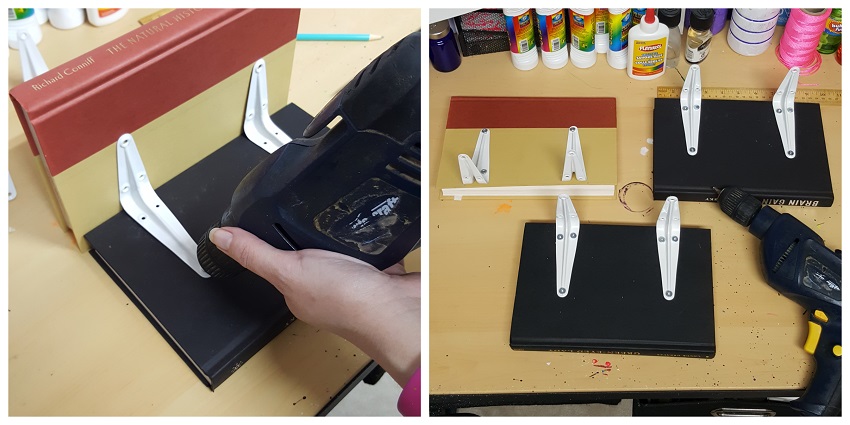
I had initially planned to drill the brackets into the wall first and then drill them into the books afterward, but I realized that it would be easier to do it the other way around. So I began by measuring 1 inch in from each side of the book to make sure that the brackets were evenly placed, and then I used a second book to keep the brackets right at the edge. From there, I used three screws to attach two brackets to each book, going right through the cover and into the pages within.
Let’s be honest: As a booklover, this wasn’t easy to do. I definitely cringed while drilling the screws into the books, but I kept my final goal in mind.
Bracket Bookshelf: Drilling the Books Onto the Wall
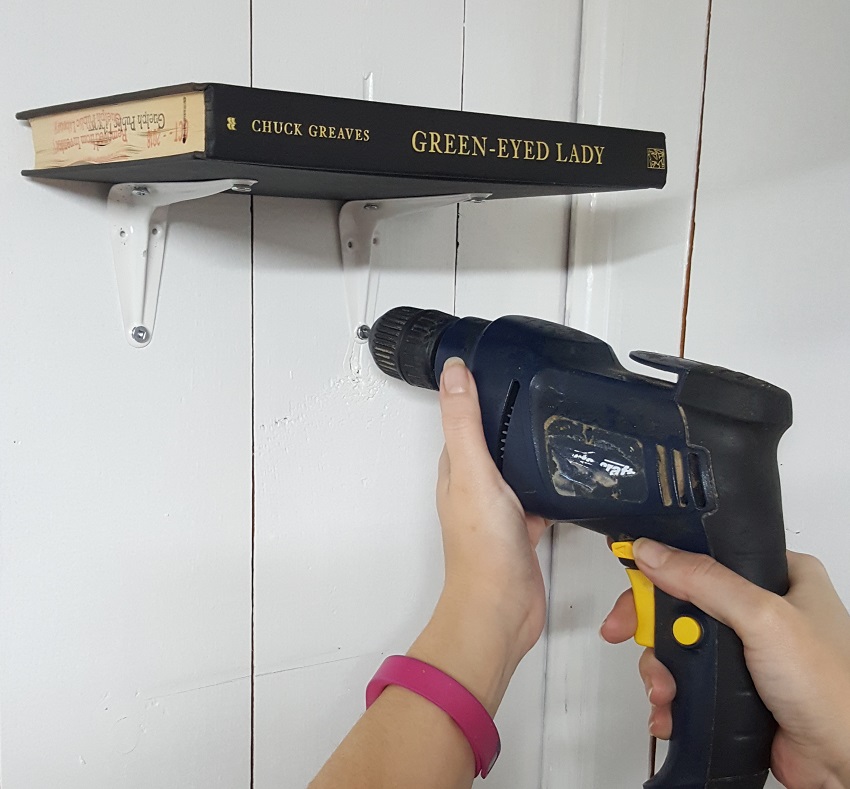
Once the brackets were firmly attached to the books, I placed the books against the lines I had earlier drawn on the wall. I then used three more screws for each bracket to attach them to the wall.
While you could certainly do this by hand, having a drill was definitely a bonus and made things much easier and a lot faster than it would have been otherwise.
Bracket Bookshelf: Result
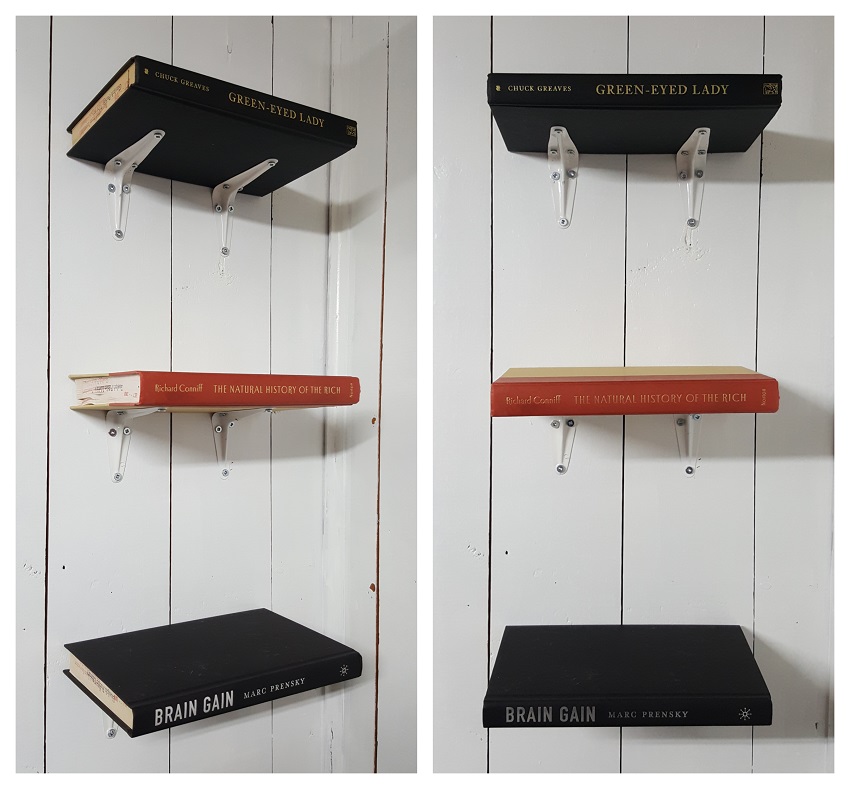
I was a little worried that the books wouldn’t be secure enough despite screwing the brackets into each one. I just wasn’t sure if the pages would hold tight to the screws or if the entire thing would flop and fall. Thankfully, everything worked perfectly, and the shelves are still in place.
I loved the way the books looked as they hovered on the wall and was definitely glad that I had taken the time to measure everything and make sure that the books were straight before I attached them to the wall.
The only change I might make would be to add a little white paint to the screws so that they blend in with the brackets and aren’t so noticeable.
Bracket Bookshelf: Final Thoughts
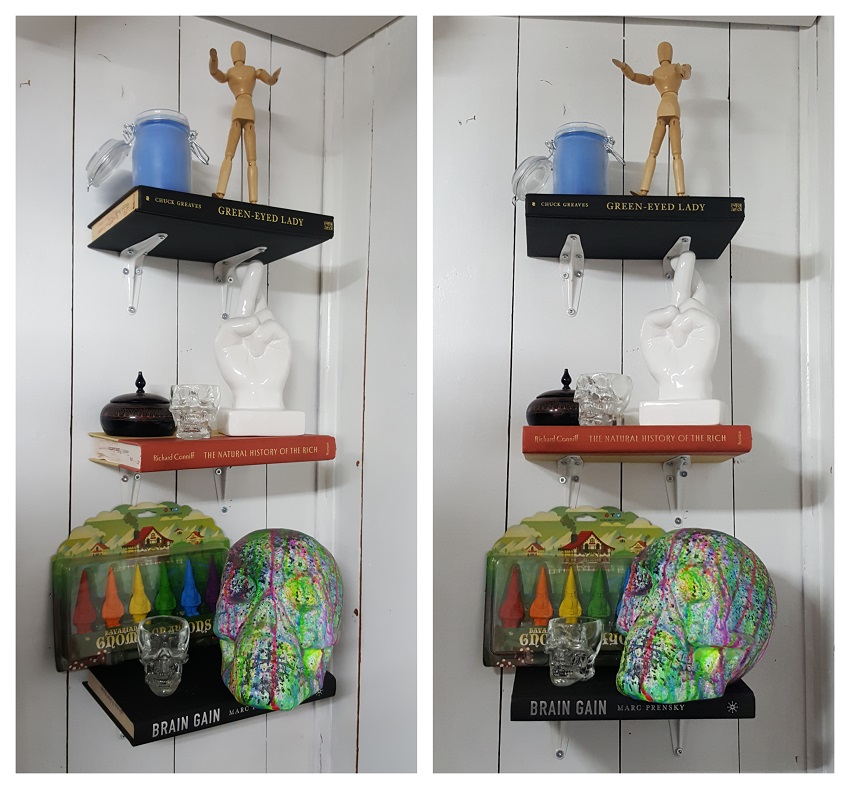
The bookshelves looked even better when I popped a few items onto each one. Again, I was worried that the shelves might fall off the wall if I put too much weight on them. But they seemed to be perfectly fine when I added a few lighter things, so I decided to be brave and add a slightly heavier sculpture (the adorable hand with its fingers crossed). I held my breath and hoped for the best, but I didn’t need to fear because the book held the weight with no trouble at all.
While the shelves might not be the fanciest addition to my decor, I felt like they were a cute choice for my office, especially since I happen to be a writer and a booklover.
Rope Ladder Bookshelf: Materials and Tools
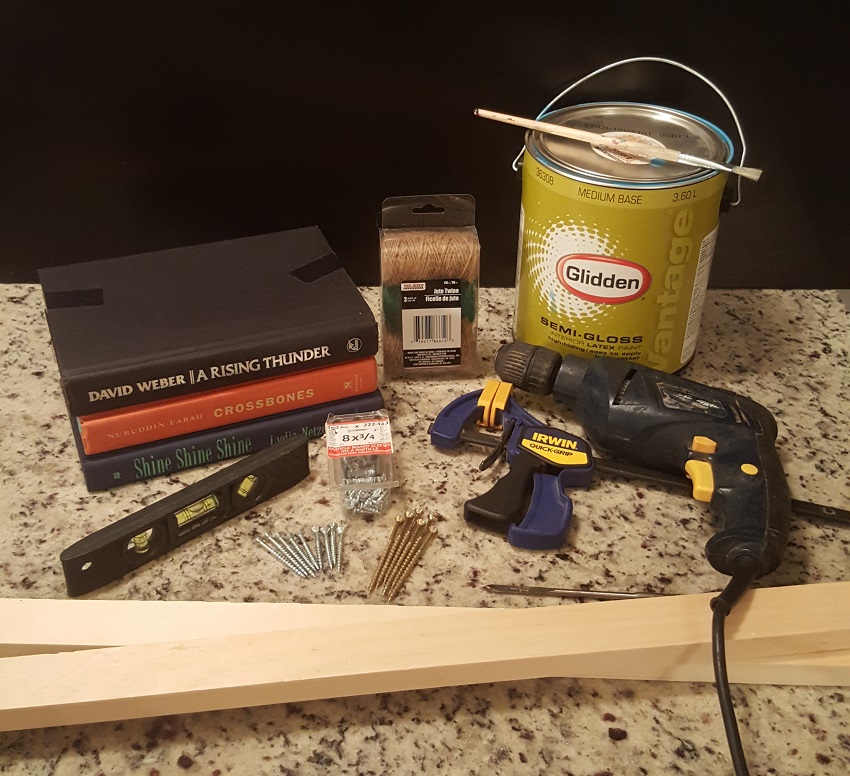
For the second type of shelves, I needed a few more items than for the bracket bookshelves:
- Hardcover books
- Screws and a drill
- Level
- Clamp (to hold the books while I drilled holes through them)
- Rope (to string through the books)
- A few slats of wood
- Paint and a paintbrush
It’s not necessary to paint the wood slats, but since this shelf was going in my son’s room and we had leftover paint from when we moved in, I thought it would look nice to paint the wood so that it would blend in with the wall.
I also ended up using a "drunken octopus" hook, but I made that decision when I was almost done creating the shelf, so the hook didn’t make it into this pic.
Rope Ladder Bookshelf: Prepping the Wood
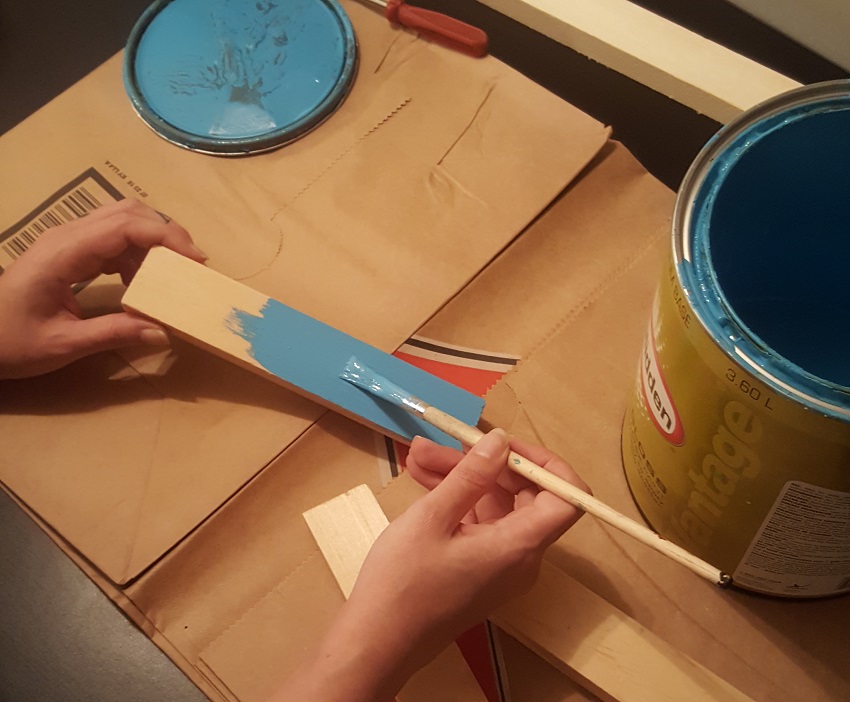
I first had to cut the pieces of wood to the proper size (i.e., just a little bit smaller than the length of the books themselves). I then painted each piece of wood using the same paint we had used on the walls so that the wood wouldn’t be too noticeable.
Rope Ladder Bookshelf: Placing the Books and Drilling the Wood Into the Wall

Just as I had with the first type of shelf, I again placed the three books against the wall to get an idea of where they should go. I wanted to make sure that they weren’t too far apart, but I also wanted enough room between each level so that items could be placed on top of the shelves.
I then measured 17 inches from the corner of the wall in three vertical spots and made small marks so that I could place my shelves in an exact row. Next, I popped the wood onto the wall, using my level to make sure that each piece was straight.
Rope Ladder Bookshelf: Drilling Holes in the Books
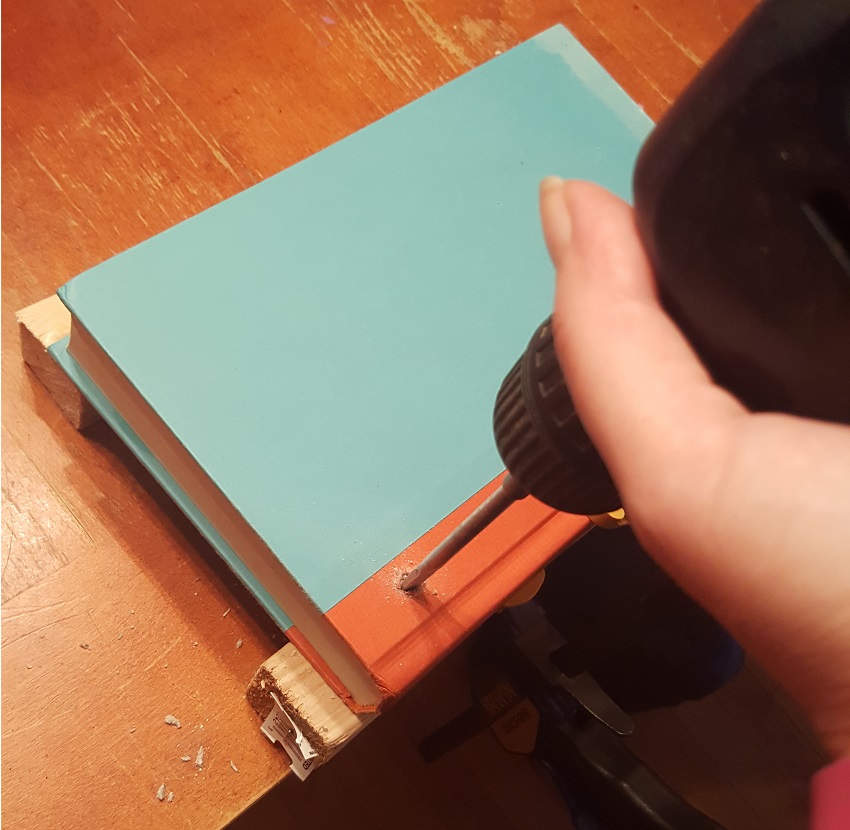
I then got to work drilling holes in the books, which is where the rope would thread through. I figured the books would be hard to keep still, so I clamped them down one at a time onto scrap pieces of wood (that way the drill could go right through the book, but not into my table). I needed one hole at each end of the spine-side of the book. I measured 1 inch in from each end and made a small mark, then started drilling.
Rope Ladder Bookshelf: Setting Up the Rope

Once I had holes in the books, I strung the rope through each one. I tied a knot in the string at the bottom of each book to keep it in place. Frankly, keeping the rope tight was a little trickier than I had expected, and it still ended up being looser than I would have liked.
This is also where I decided to use the "drunken octopus" hook. At the top of the shelf, I pulled the string upward and secured it to the wall using the hook (actually, I was too short for this part, so my husband stepped in to drill the higher bits). The added hardware not only helped to secure the rope to the wall but also gave the shelves a couple of little hooks, which will definitely come in handy.
Rope Ladder Bookshelf: Result
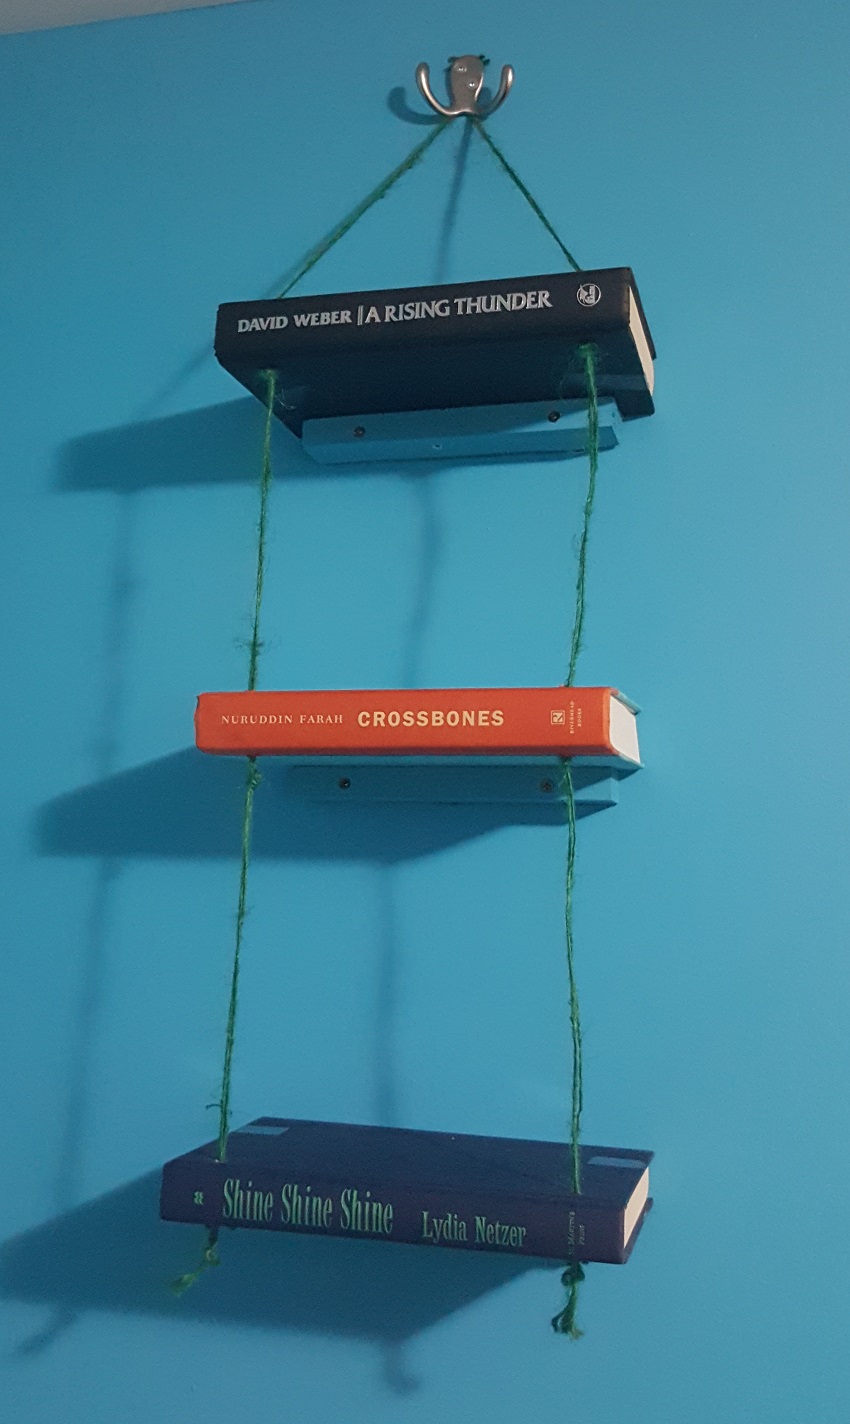
The books were still a little too wobbly for my liking, so I ended up adding additional screws going up through the middle of each piece of wood right into the hardcover. Once I was sure that the shelves were nice and secure, I was pretty happy with the outcome. I would have liked the rope to be a little tighter between each book and will probably end up trimming the rope at the bottom, but overall I felt like my bookshelf-making attempt was a success.
Rope Ladder Bookshelf: Final Thoughts
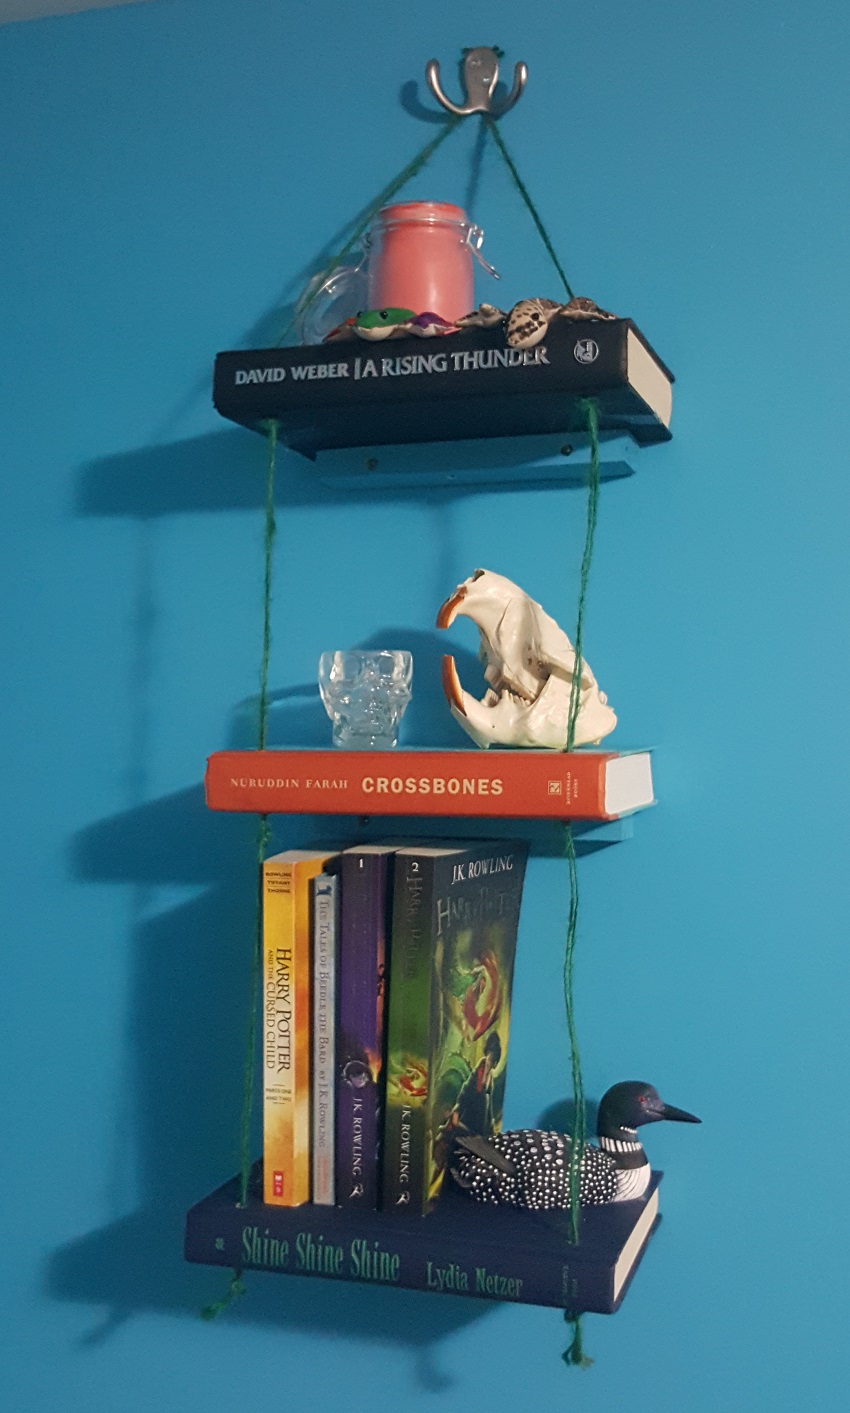
I popped a few items onto the shelves before I showed my kiddo the final product. When he took a look at his new bookshelf, he was as pleased as I was. There was just enough room to fit a few of his paperbacks as well as a few other knickknacks, including one of the homemade candles we made from scratch (another fun project you should try!).
Of course, he ended up rearranging everything to his liking. When he added a few more books to the lower shelf, the ropes actually pulled a little tighter and looked even better.
All in all, I thought this project was relatively easy, and I would certainly recommend the activity to any booklover who also likes to indulge in quirky DIY decor. Just be sure to take a deep breath before you drill into an oh-so-precious hardcover!


