Whether we'd like to admit it or not, Porta-Potties are an invention that makes a lot of our favorite activities possible.
Sure, a Porta-Potty doesn't exactly exude glamor or sophistication, but it does allow you to avoid having to bury your #2 in a hole while camping, or to enjoy an event like an outdoor concert without the burden of a painfully full bladder.
These portable toilets have even achieved crossover as a new form of housing: one man made an awesome tiny home out of an old Porta-Potty.
The truth is, Porta-Potties have revolutionized our ability to relieve ourselves in places where plumbing isn't available, and we're forever grateful.
Now, thanks to a brilliant DIY on Instructables, user MacGyver9 shows us how to create a personal portable potty, also known as a commode, that will be your new best friend on adventures this summer.
Make sure to SHARE this genius DIY with your friends on Facebook!
Step #1: Gather Materials
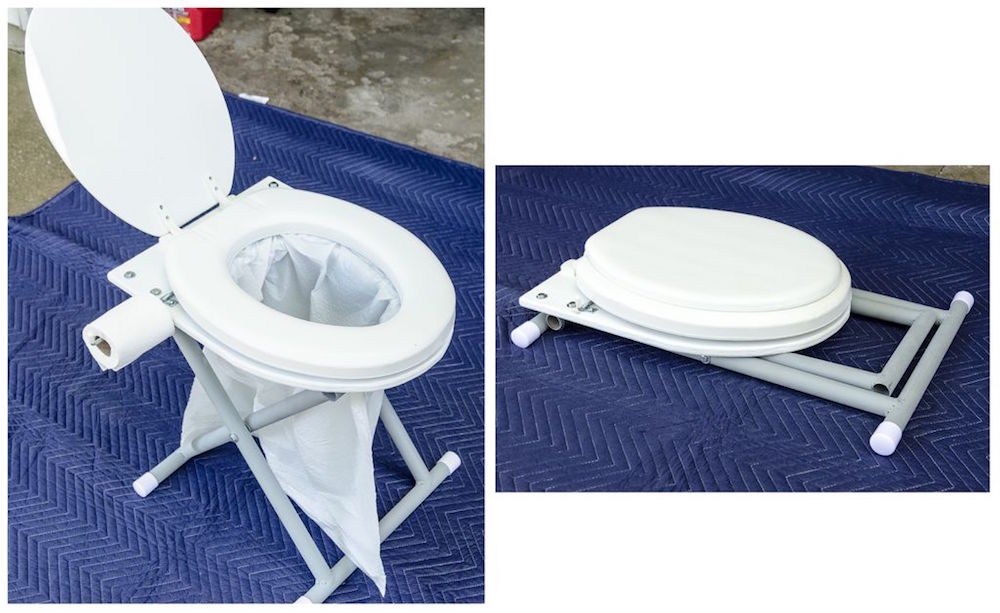
The first step for any project is to make sure you have all the supplies necessary.
You will need the following tools:
- Drill and drill bits
- Circular saw, table saw, or jig saw
- Screwdriver
- Welder
- Hacksaw
- 1-inch hole saw
- Router and round-over bit
And the following materials:
- Plywood
- Toilet seat
- Metal rods
- Nuts, bolts, screws, and washers
- Mini clipboard clamps
- Optional: Paint, sandpaper
Step #2: Cut Out Plywood
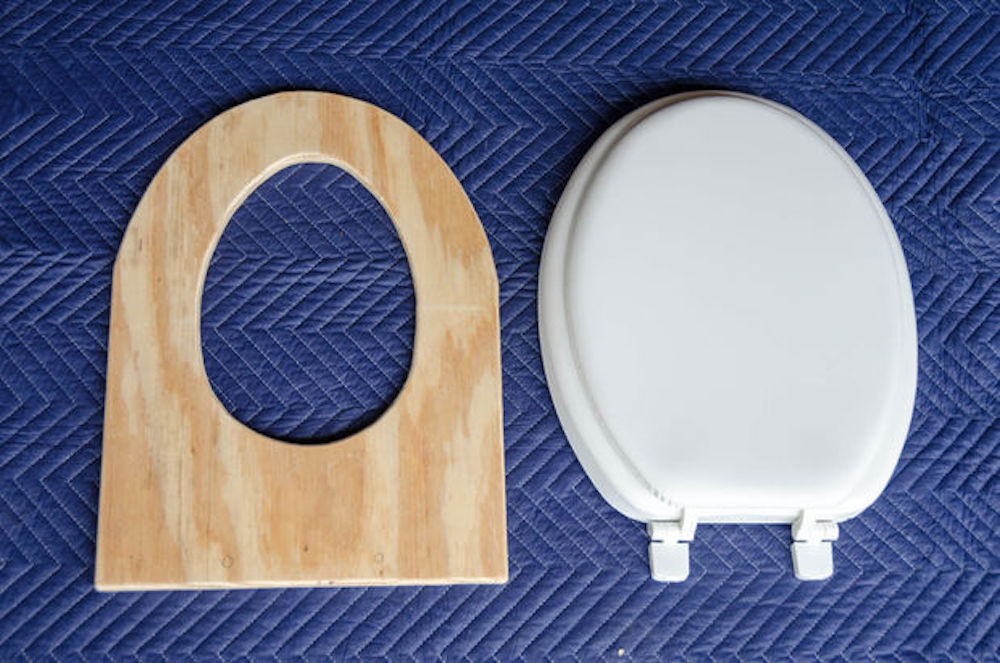
Place the new commode seat onto your piece of plywood and trace the seat shape onto the wood. Make sure to leave some room at the back so the seat has space to be attached.
Cut around the tracing with the saw of your choice and you'll be left with a base for your potty.
Step #3: Cut And Organize Metal Rods
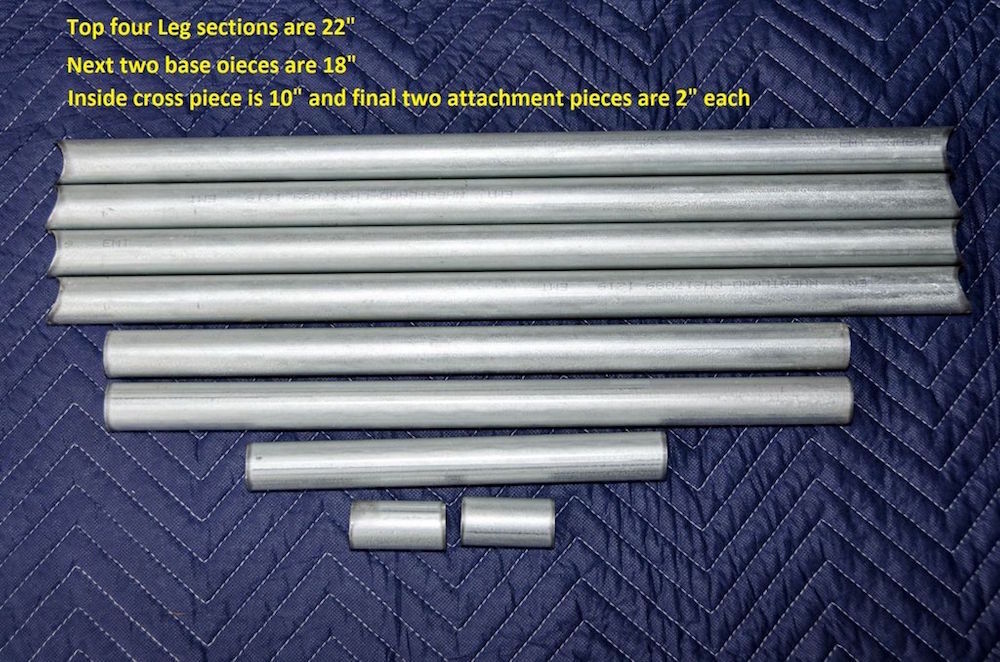
Cut the rods according to the measurements listed in the Instructable. These will be put together to create an "X" shape for stability and to be folded and stored.
When adding notches to the conduit, you can use a drill or a notcher. It is just important to make sure the notches are parallel and that the conduits are of the proper lengths.
Step #4: Assemble Leg Sections
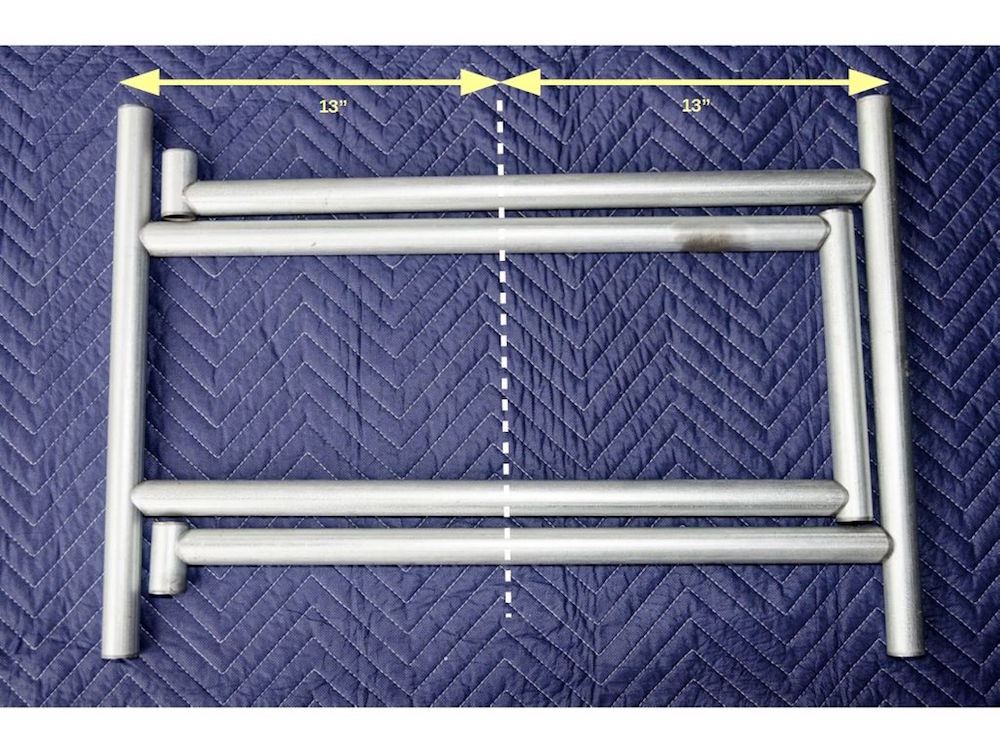
This is where you assemble the base for your Porta-Potty. Position the legs as shown in the photo.
Measure the midpoint between the bases and mark where to drill the pivot holes.
Painting is optional, but you can go ahead an pick a color if you want!
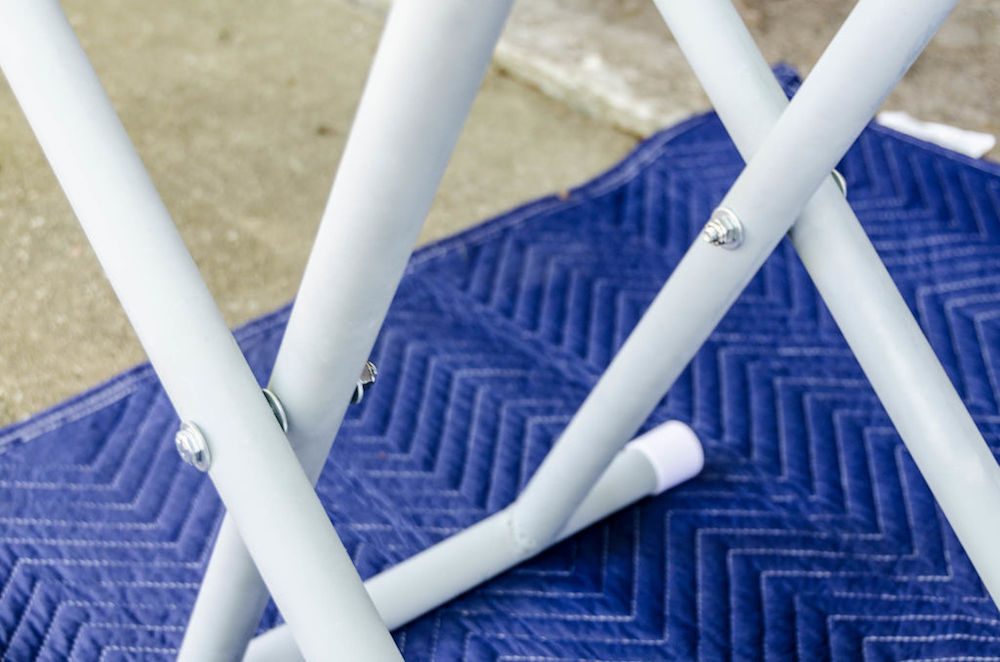
Remember, the conduit legs will create an "X" shape.
When everything is lined up properly and the holes are drilled, it's time to insert the bolts, washers, and lock nuts to secure the legs.
Step #5: Attach Toilet Seat
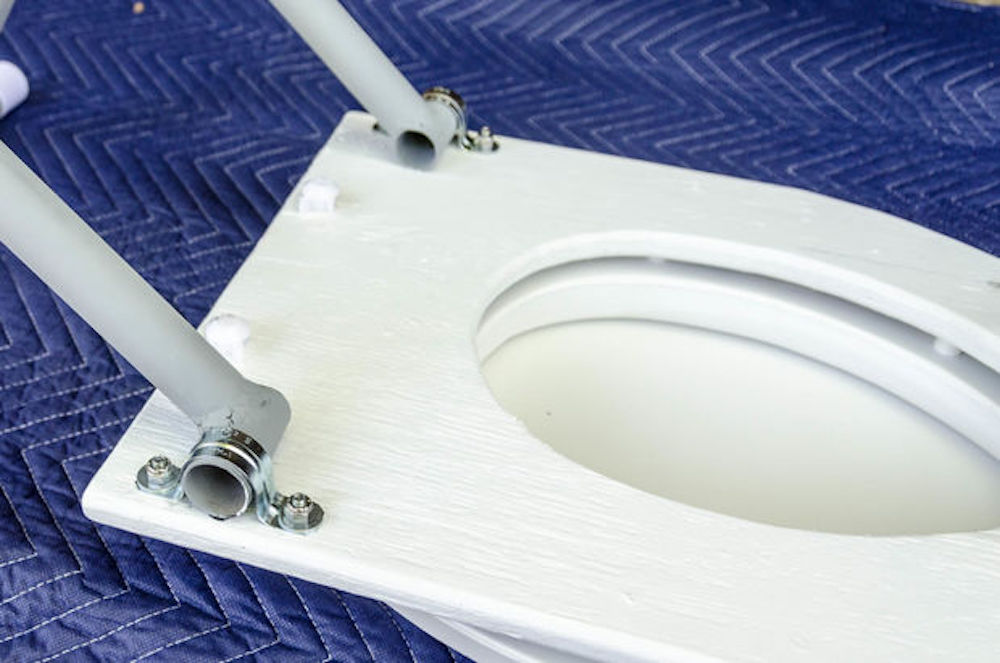
Now it's time to attach the seat to its base! Position the seat onto the base to determine where holes should be drilled.
It is best to paint the base after drilling holes if you so wish.
Step #6: Attach Folding Legs
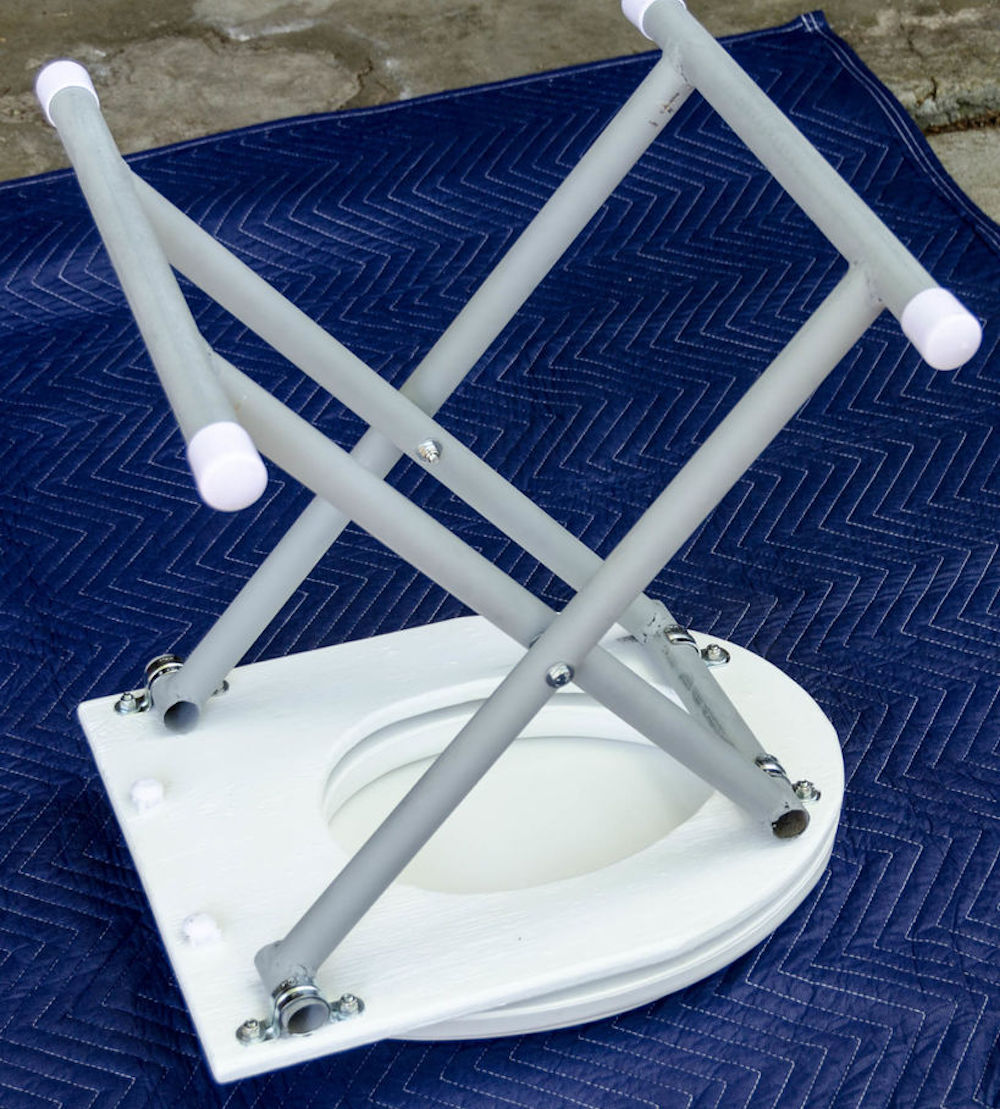
Next, place the seat upside down to attach the legs.
Position the legs onto the bottom on the base. This will help you determine where to place the holes for the straps that will hold the legs in place.
When their proper spot is chosen and the holes are drilled, use bolts, washers, and lock nuts to attach straps to the legs and to the toilet seat base.
Step #7: Attach Toilet Paper Holder
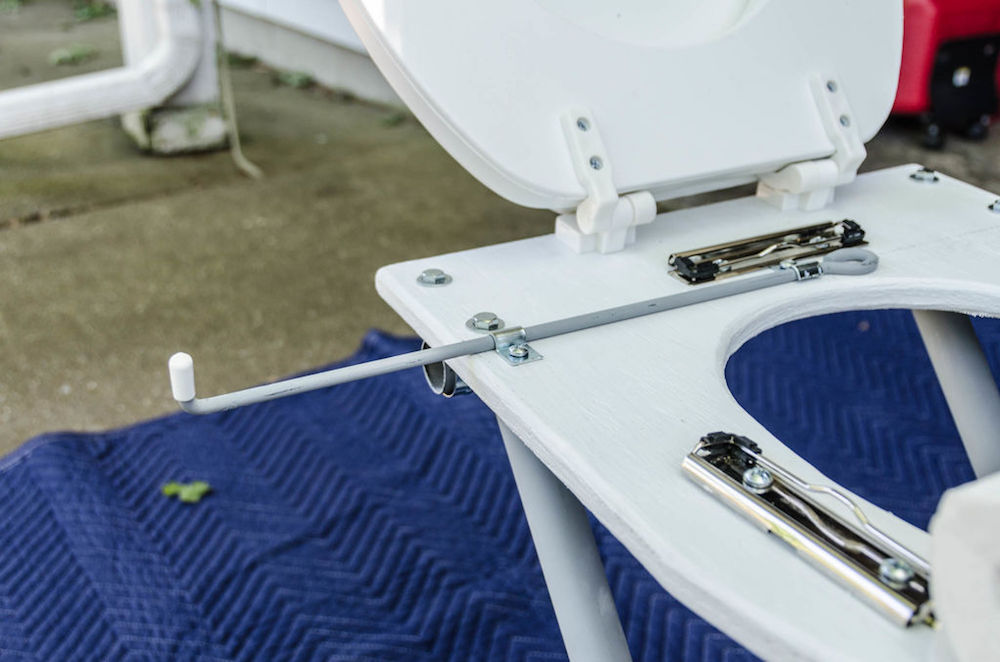
Stand your potty upright and pick a side to place a toilet paper roll. Attach a rod to act like a holder for toilet paper.
Find some clips that will help hold the waste bag in place. In this case, the builder decided to repurpose clips from a memo board. These can be attached with by drilling holes and securing them with screws, or even a hot-glue gun.
Step #8: Enjoy!
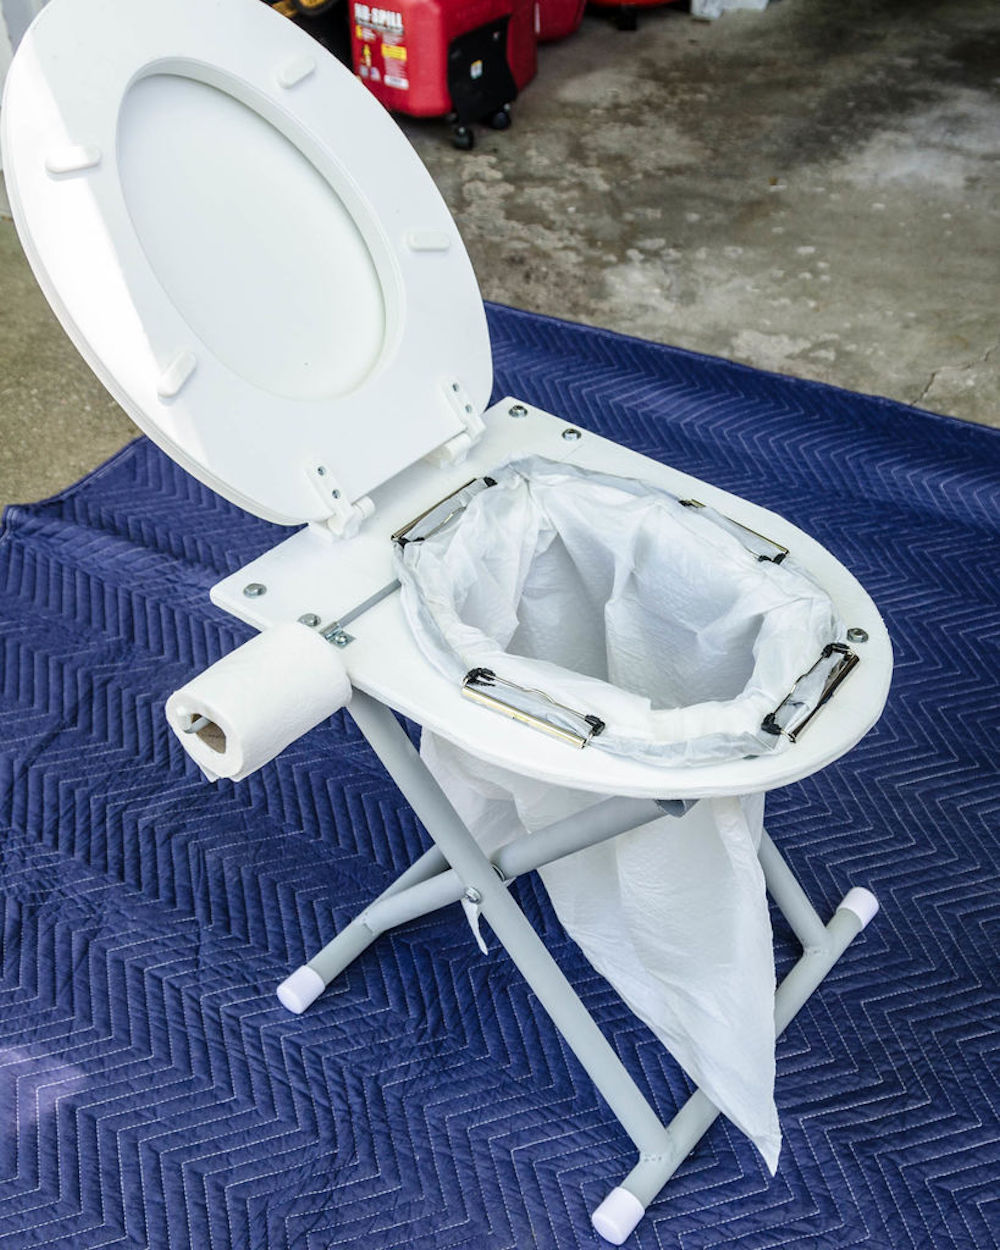
Place a tall kitchen bag or a privy bag on the inside of your new toilet and enjoy!
To make this handy craft at home, check out the Instructable for more details!
Make sure to SHARE this genius DIY with your friends on Facebook!


