When it comes to hosting dinner parties, I am usually focused more on the menu than the decor.
However, that doesn't mean there aren't a ton of unique DIY ideas for sprucing up my dinner table. From beautiful place settings to seasonal ideas for centerpieces, I can make any dinner at home both fun and personal.
So, naturally, when I saw this incredible way to use my DIY skills to create one-of-a-kind dinner napkins, I couldn't resist giving it a try.
This brilliant project came from DIY-er Rachel Denbow of A Beautiful Mess. Rachel put her imagination and creativity to work for these funky tie-dye cloth dinner napkins.
Not only are these fun and easy to make, but the results are sure to impress all of the guests around the dinner table.
Scroll through below to see just how simple it is to make these three unique dinner napkin patterns.
Would you want a set of these tie-dyed dinner napkins on your table? Let us know in the comments!
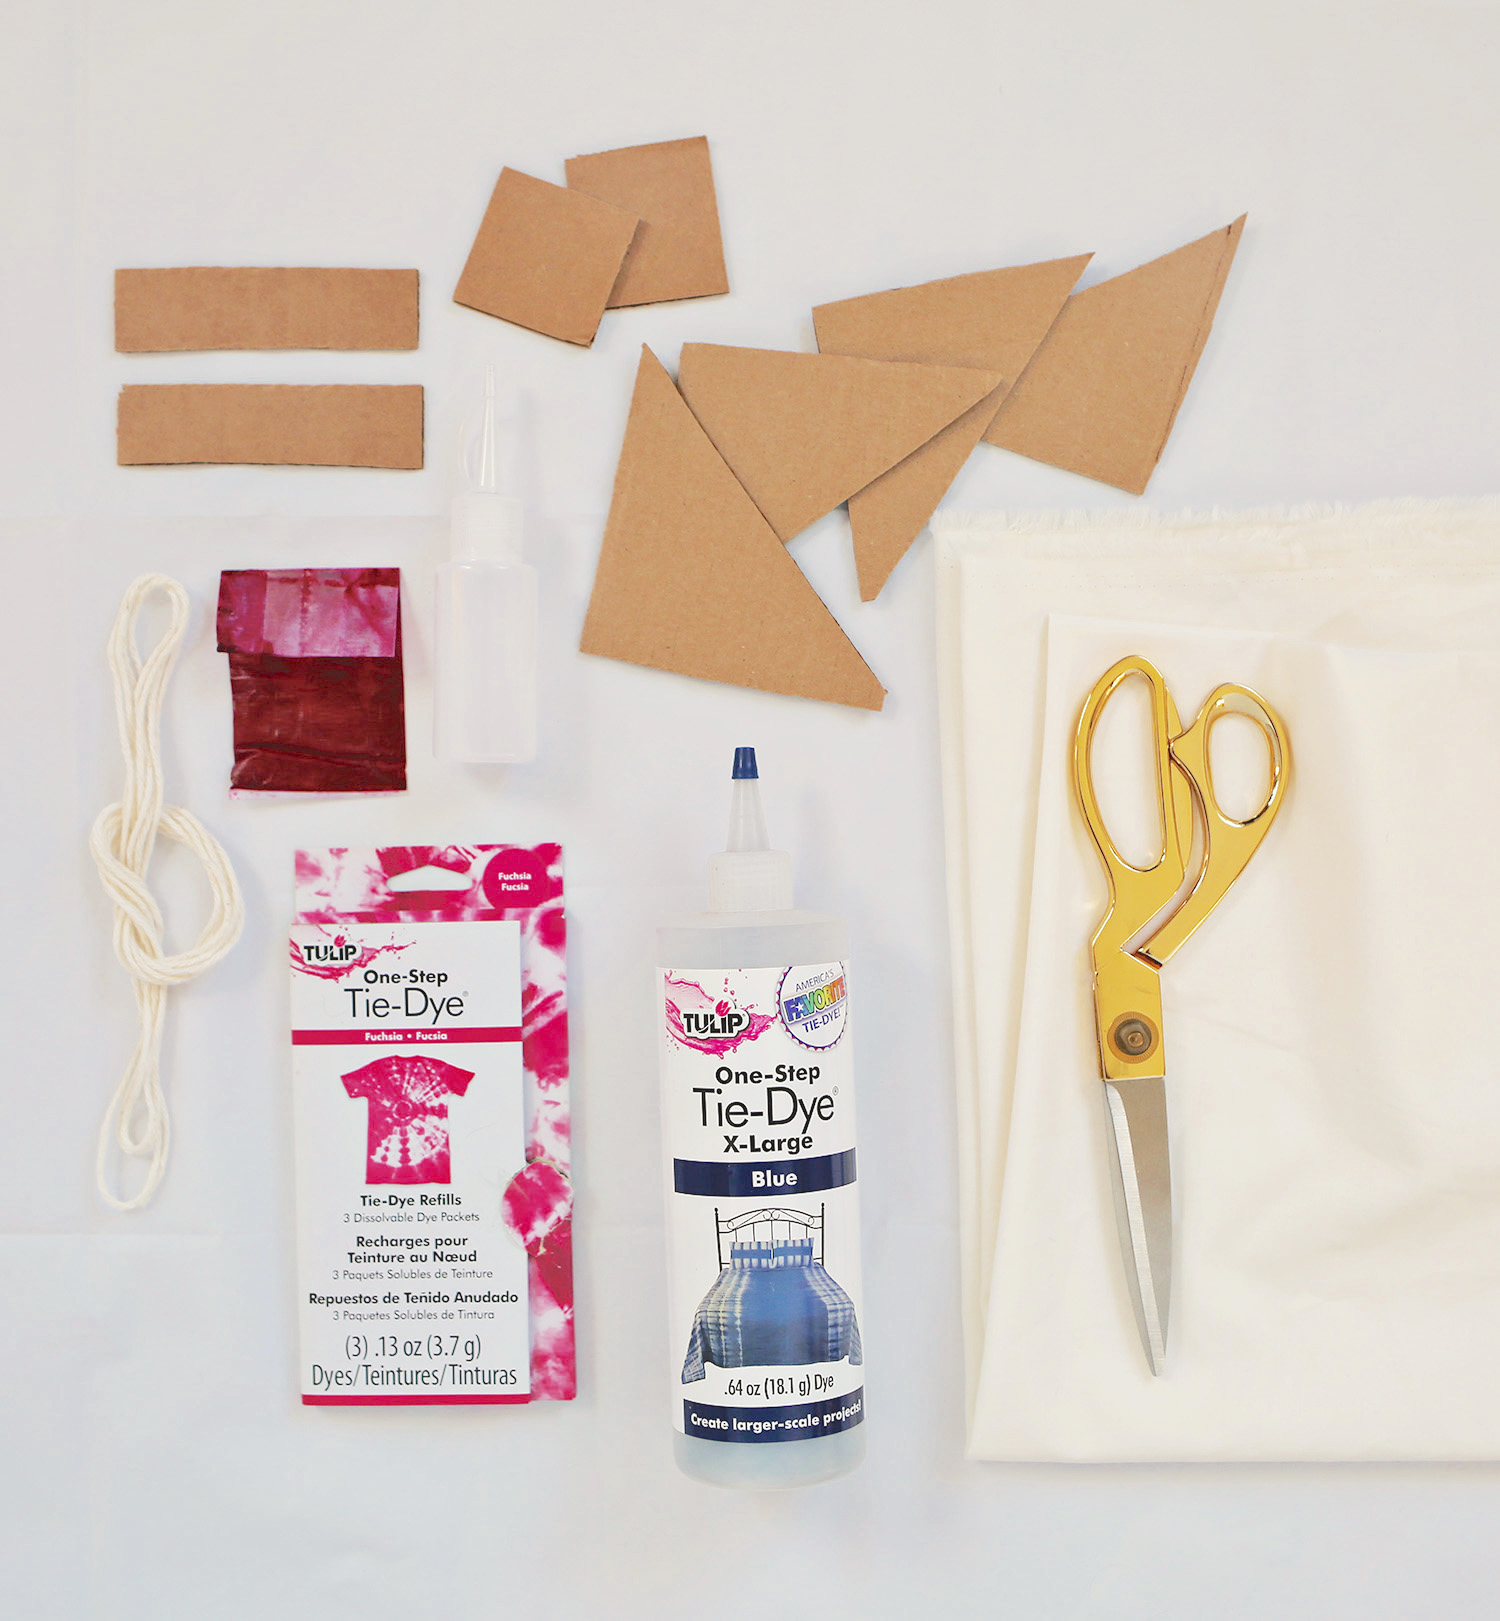
Rachel's DIY dinner napkins use a very specific form of tie-dye known as Shibori.
Rachel wrote on A Beautiful Mess, "Shibori is a much more exciting and ancient version of the tie-dye fun we all had at summer camp. It's the process of binding your fabric with twine, rope, clips, and clamps."
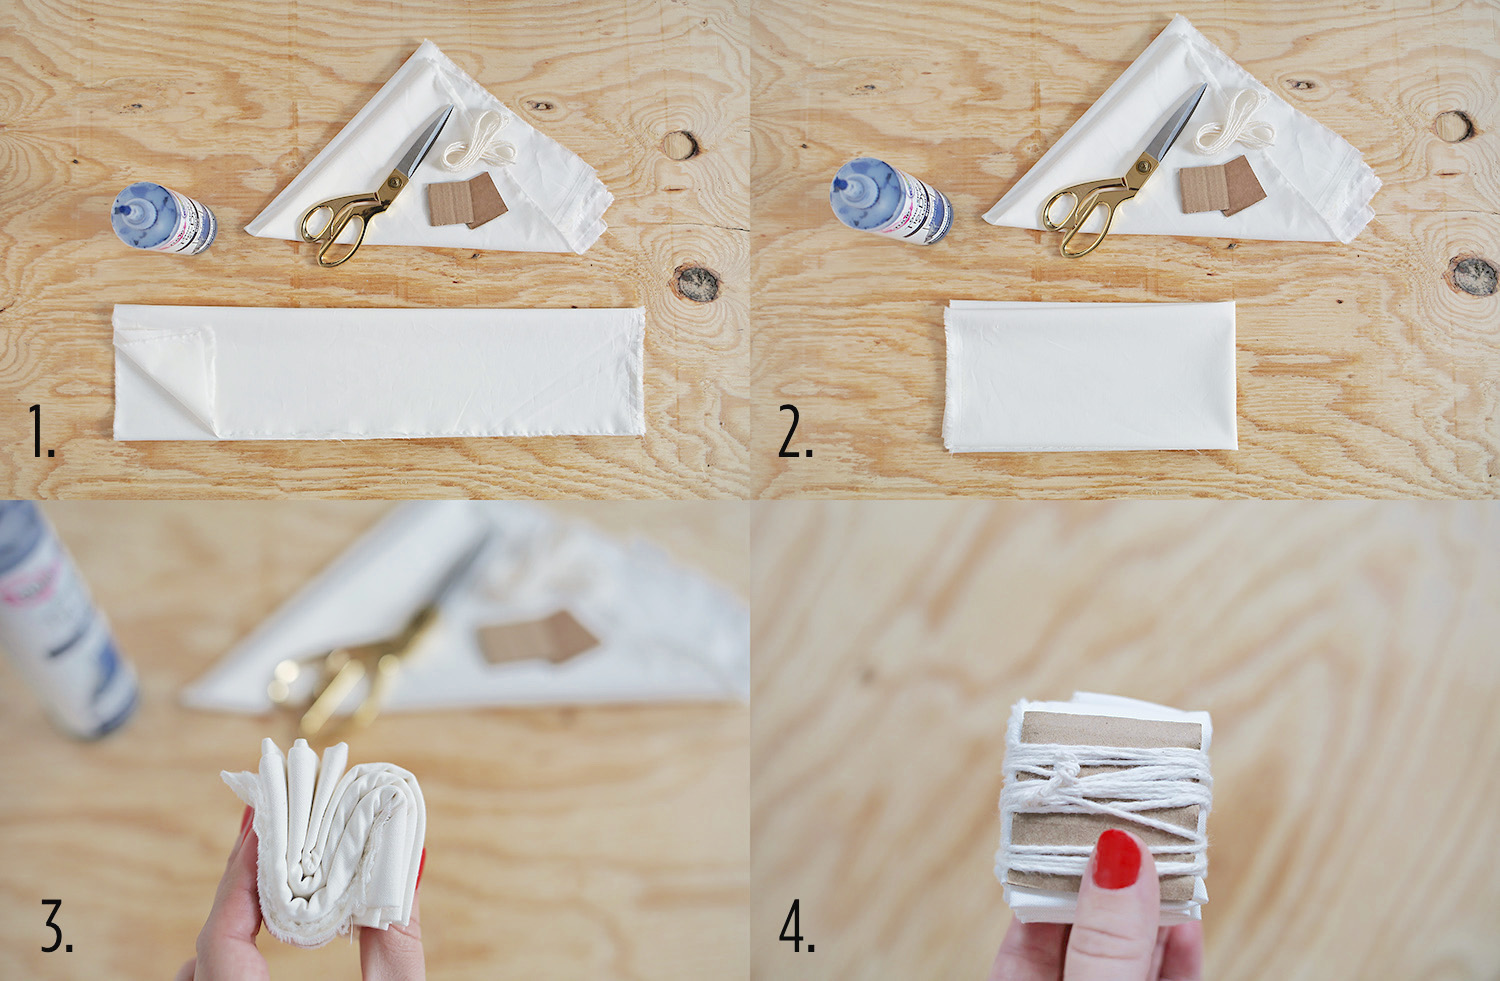
Rachel started her project with an 18" x 18" napkin cloth, cardboard shapes, tie-dye color, twine, scissors, and plastic wrap.
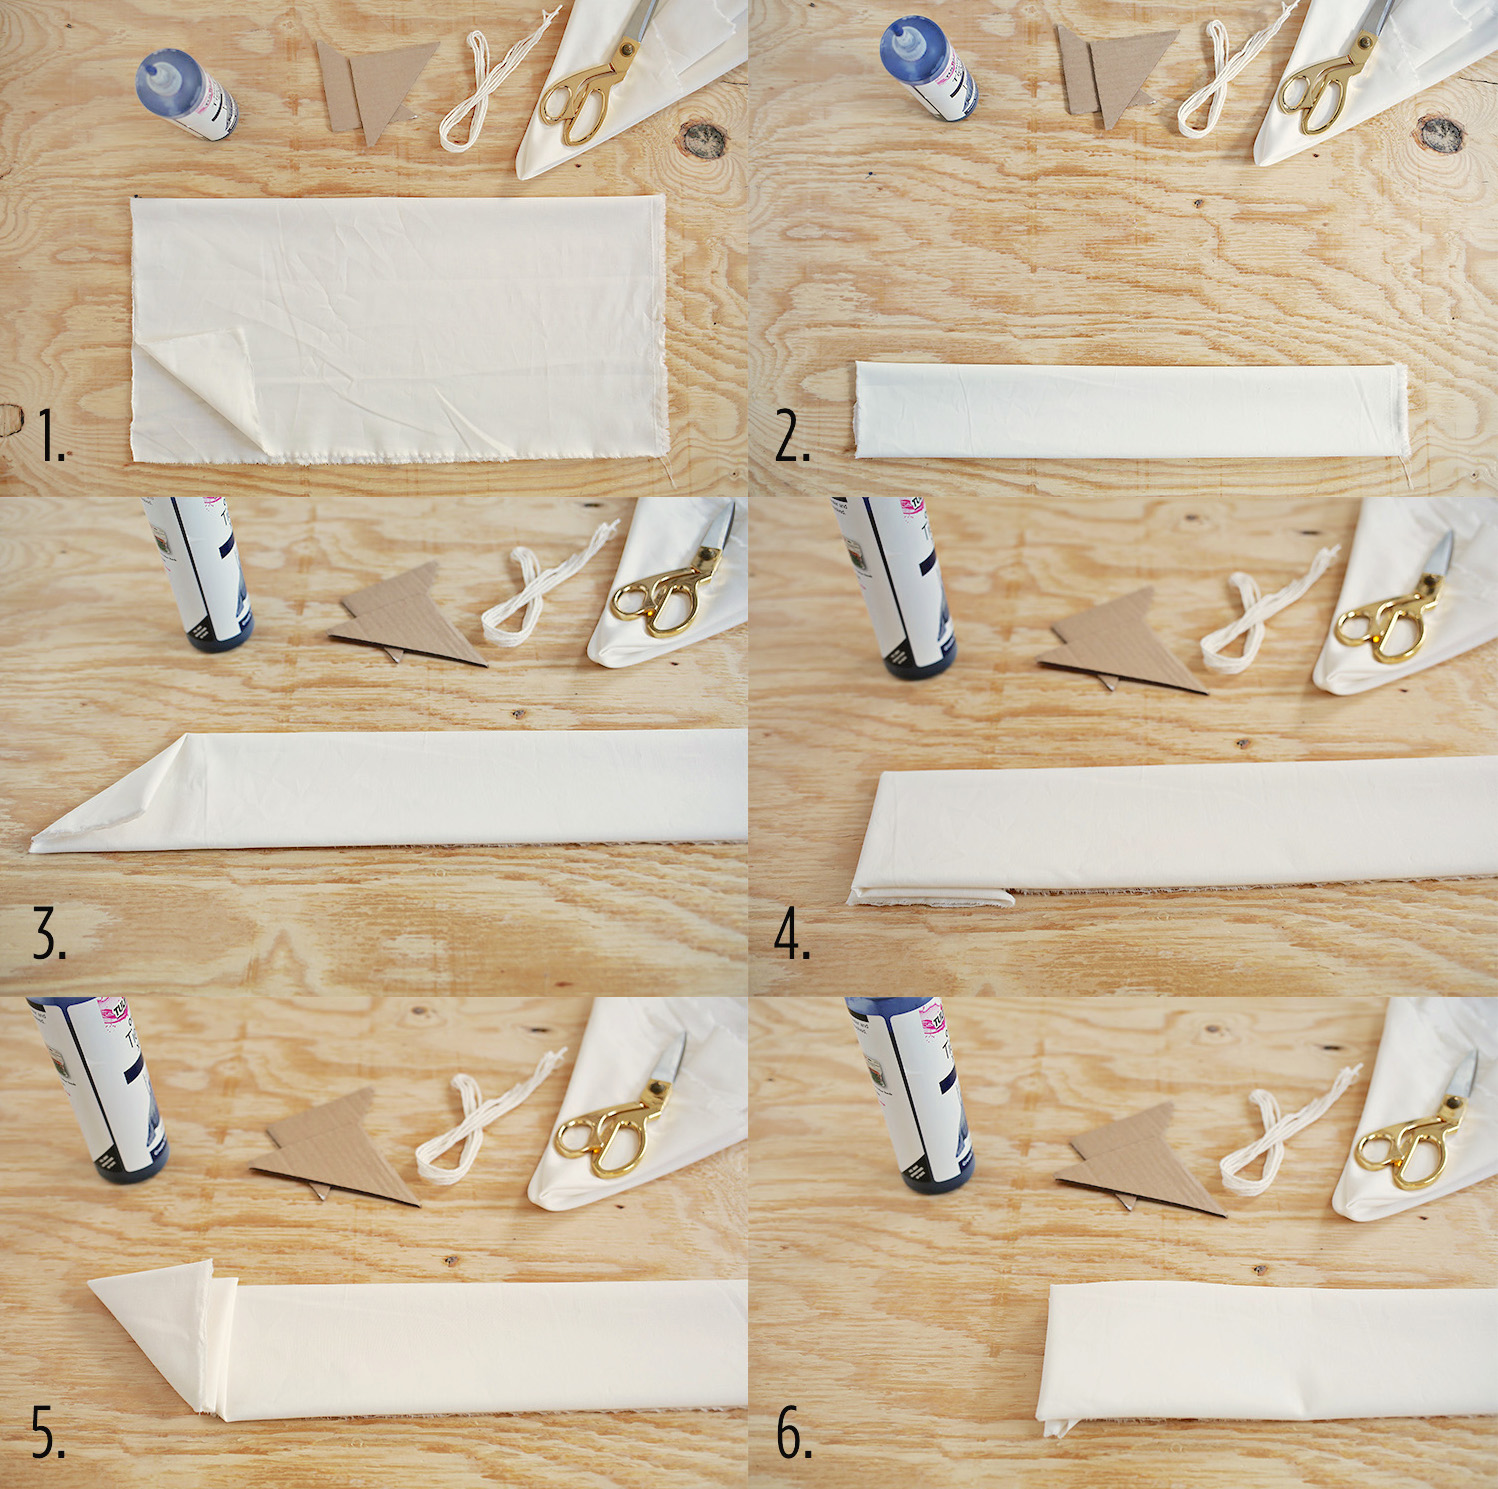
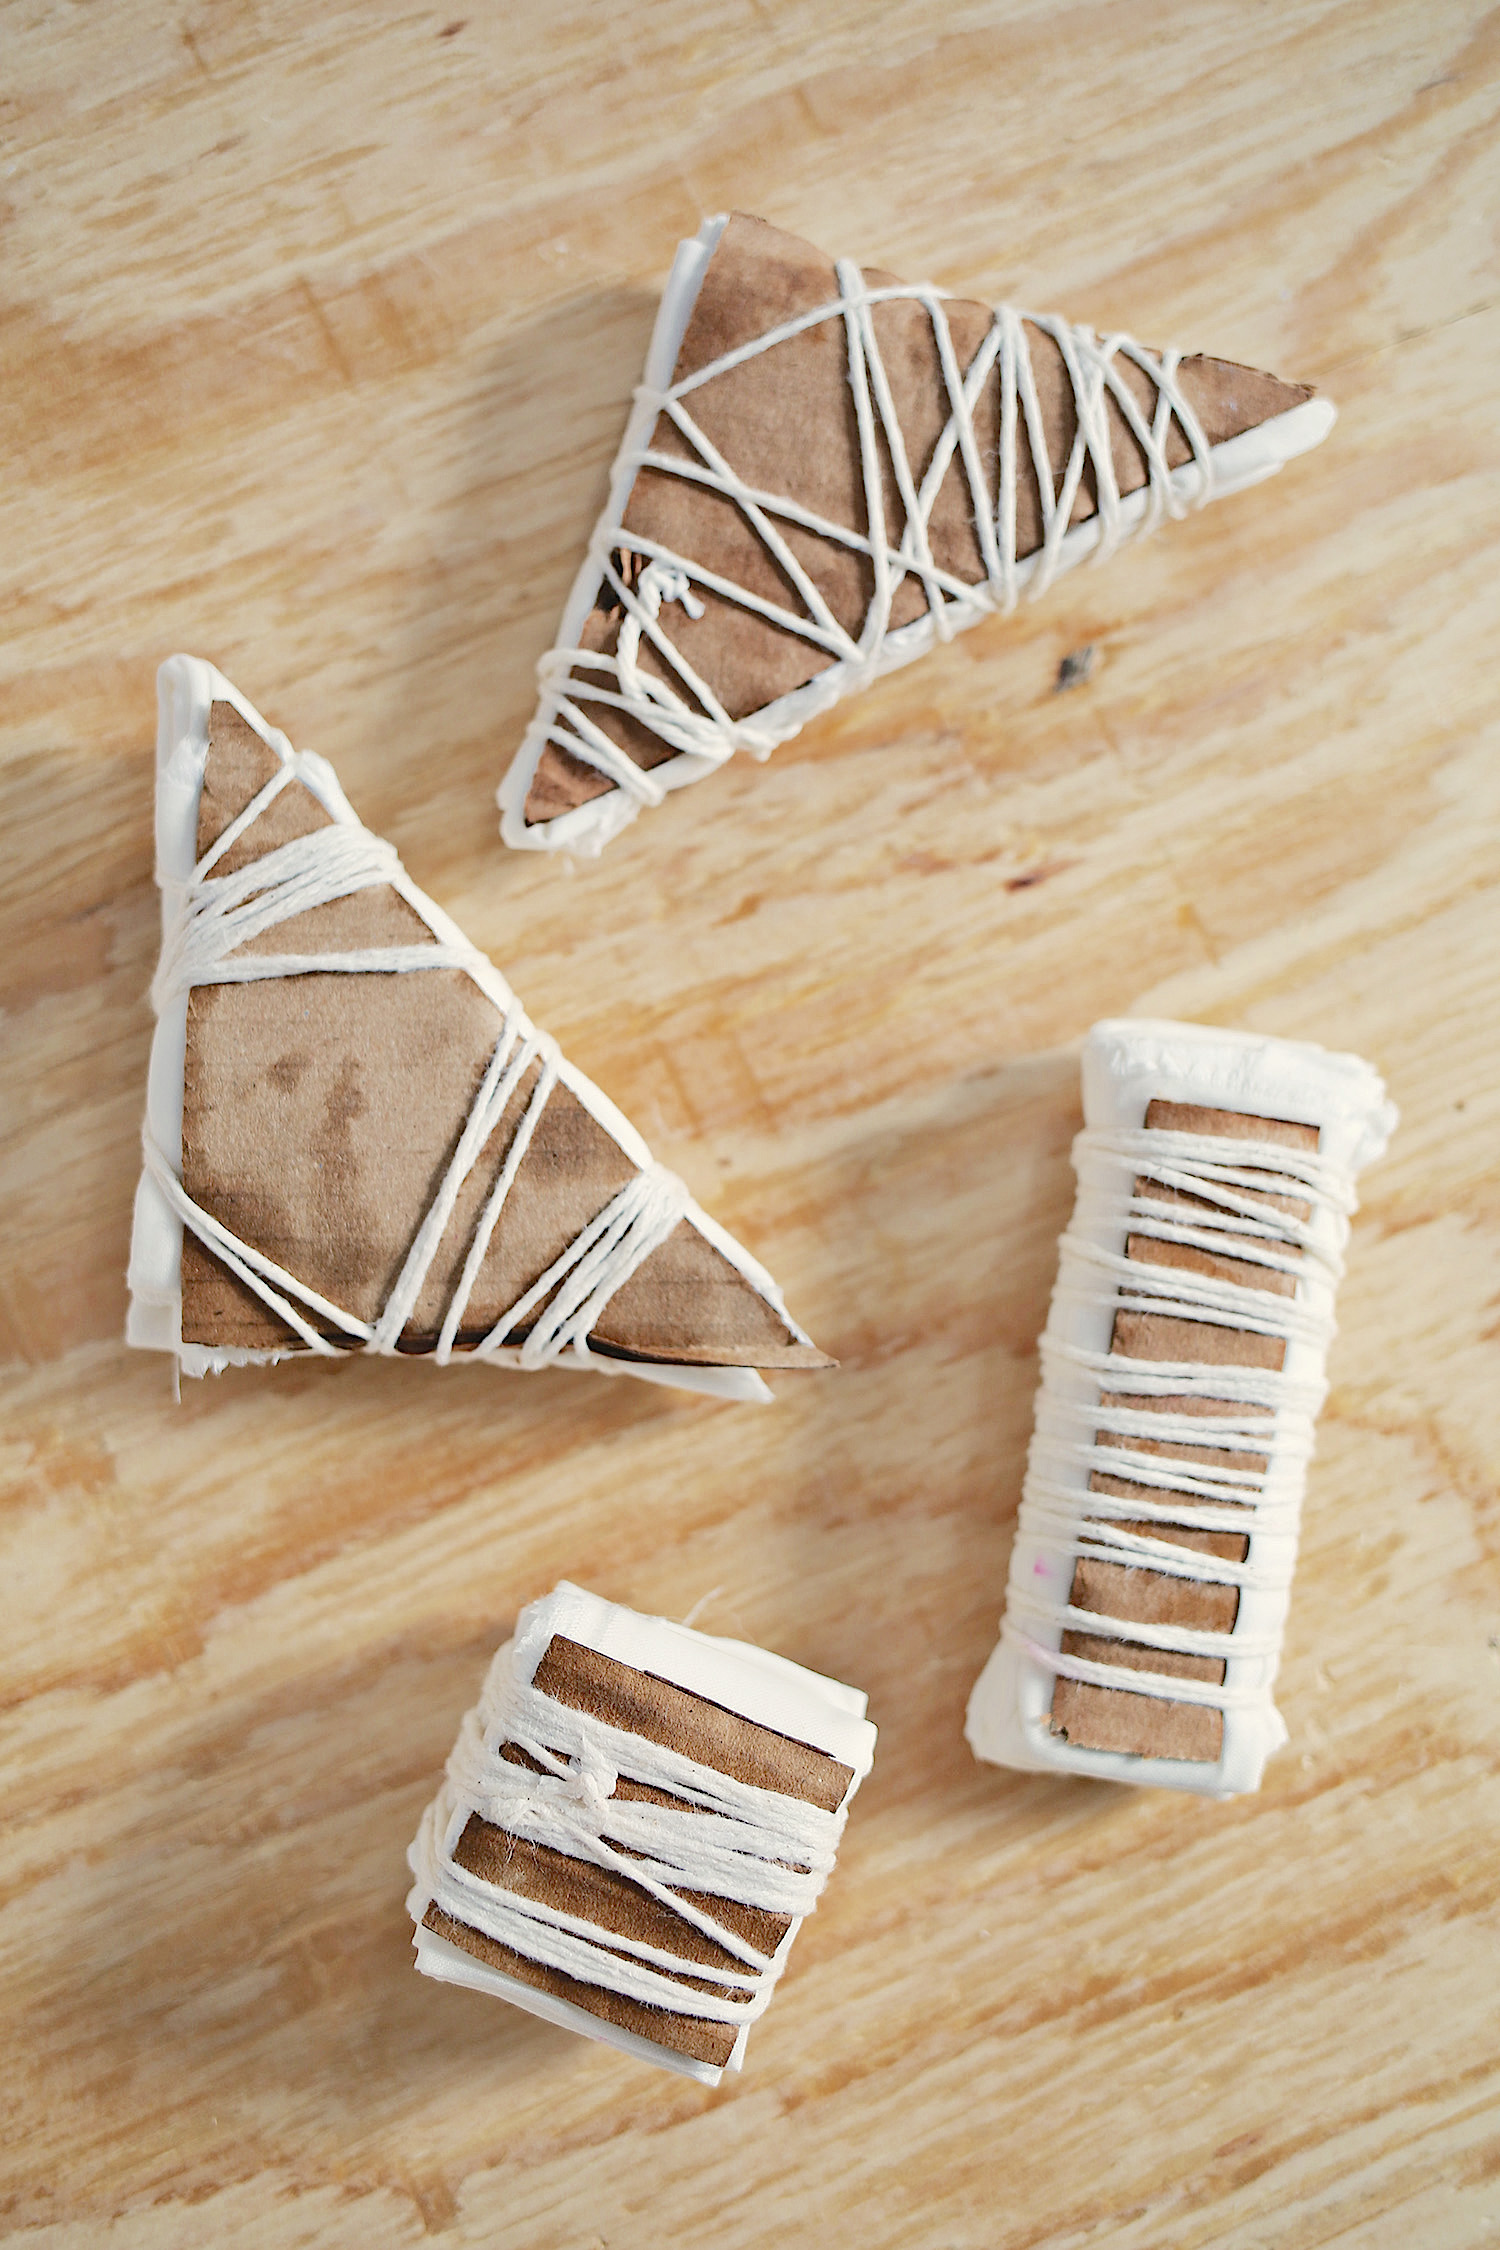
For each individual tie-dye pattern, Rachel used different cardboard cutout shapes and folding steps.
For the first pattern, Rachel used a triangle shape. She folded her cloth until it was the same size as her small cardboard cutouts.
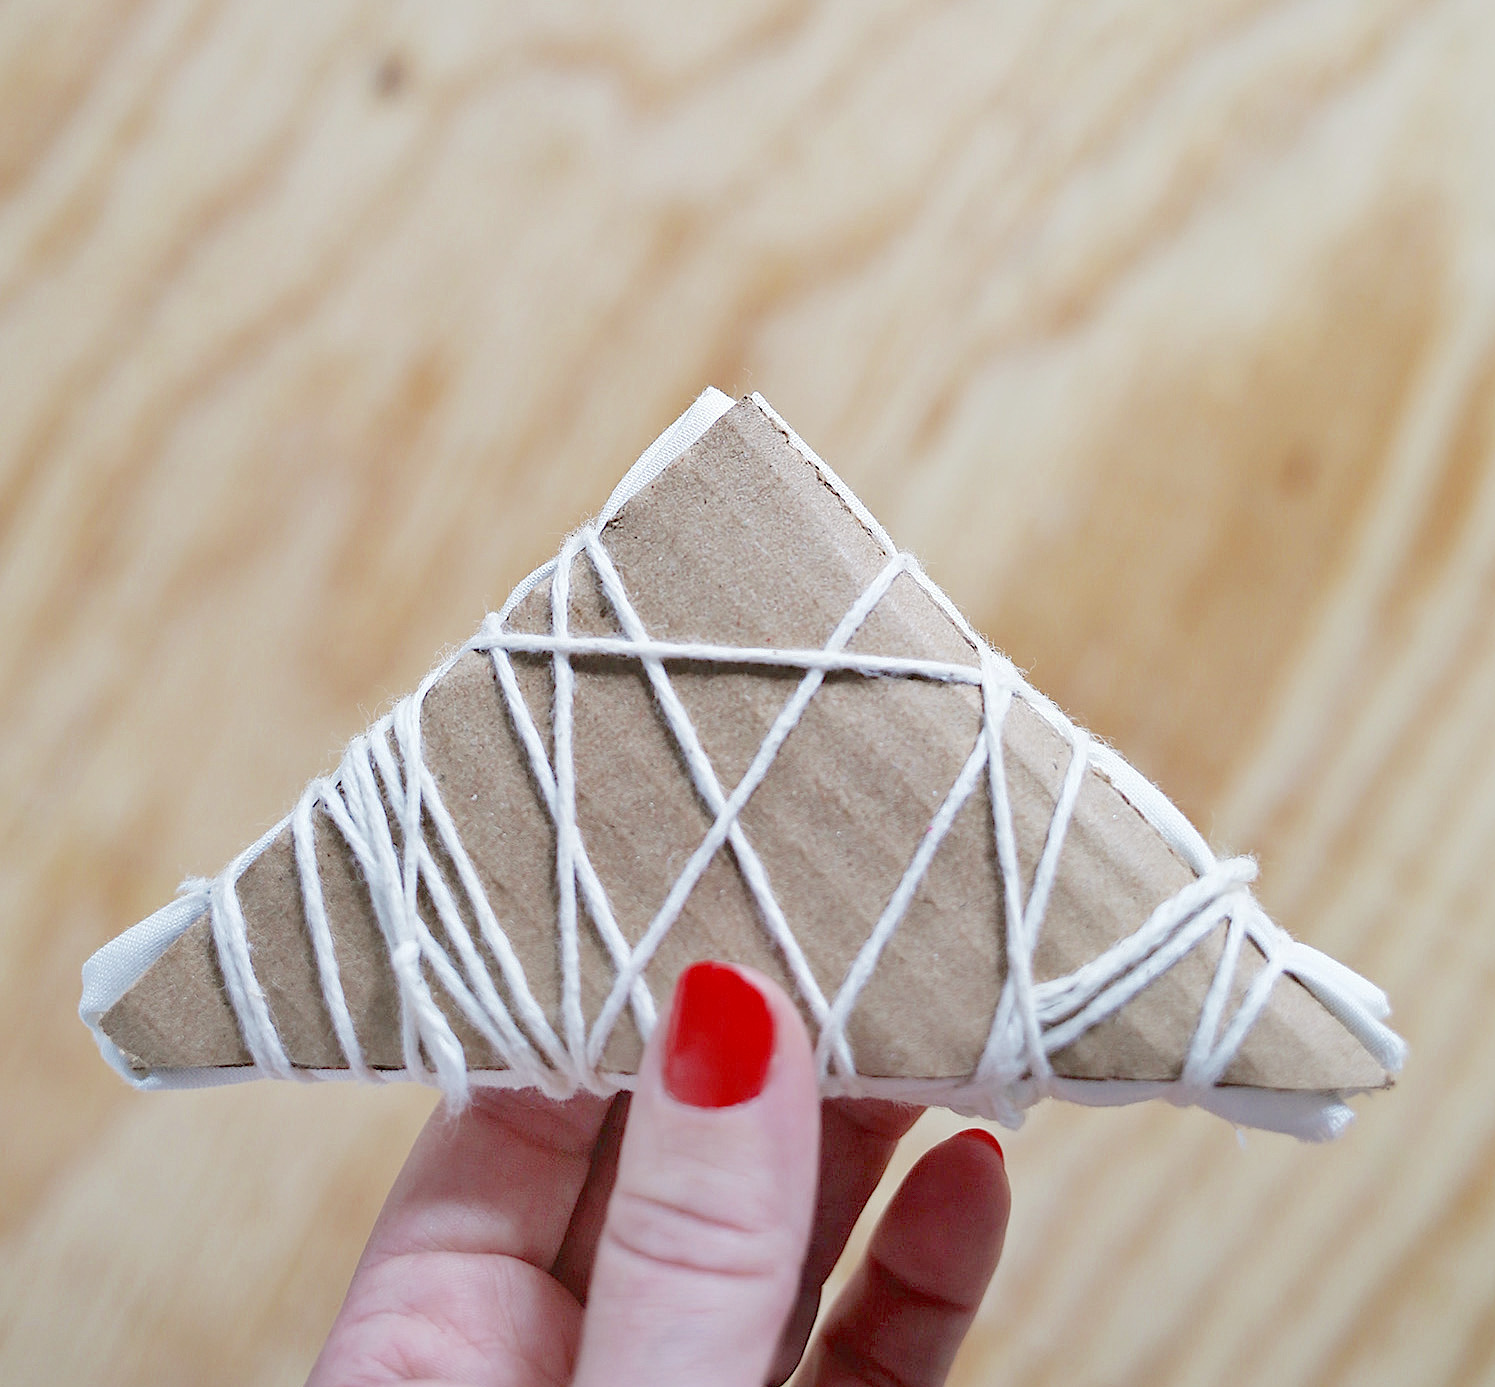
With one cutout on each side of the folded cloth, Rachel wrapped the entire "fabric sandwich" securely in twine.
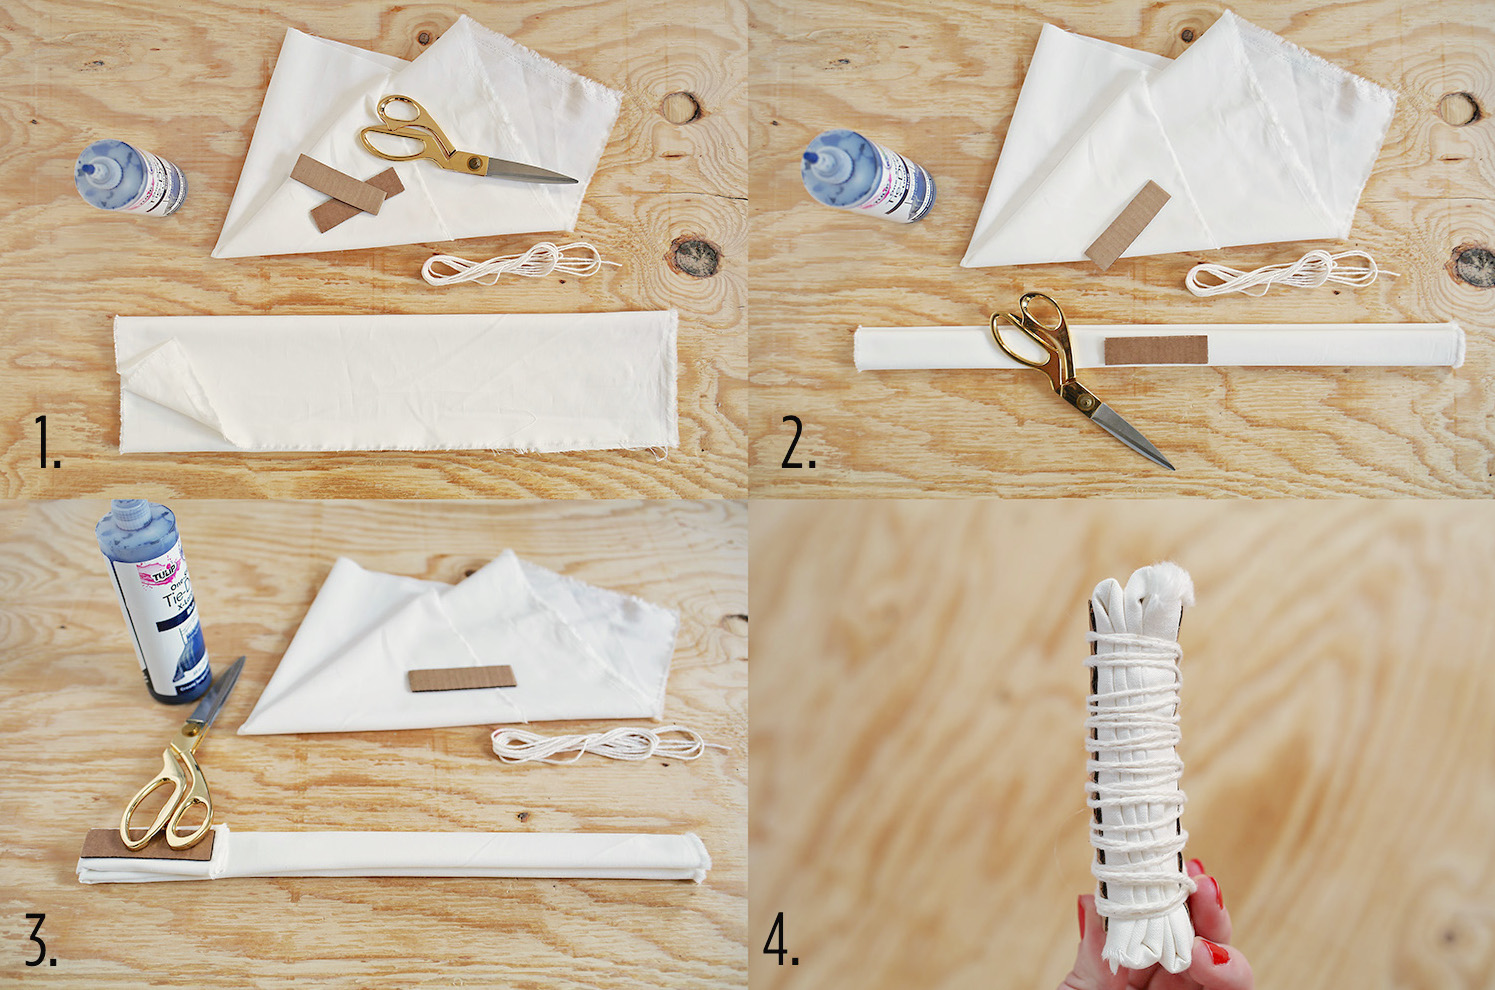
She folded her next cloth slightly differently, for a longer rectangle shape. Because tie-dye isn't an exact science, she wasn't worried about it being perfectly even.
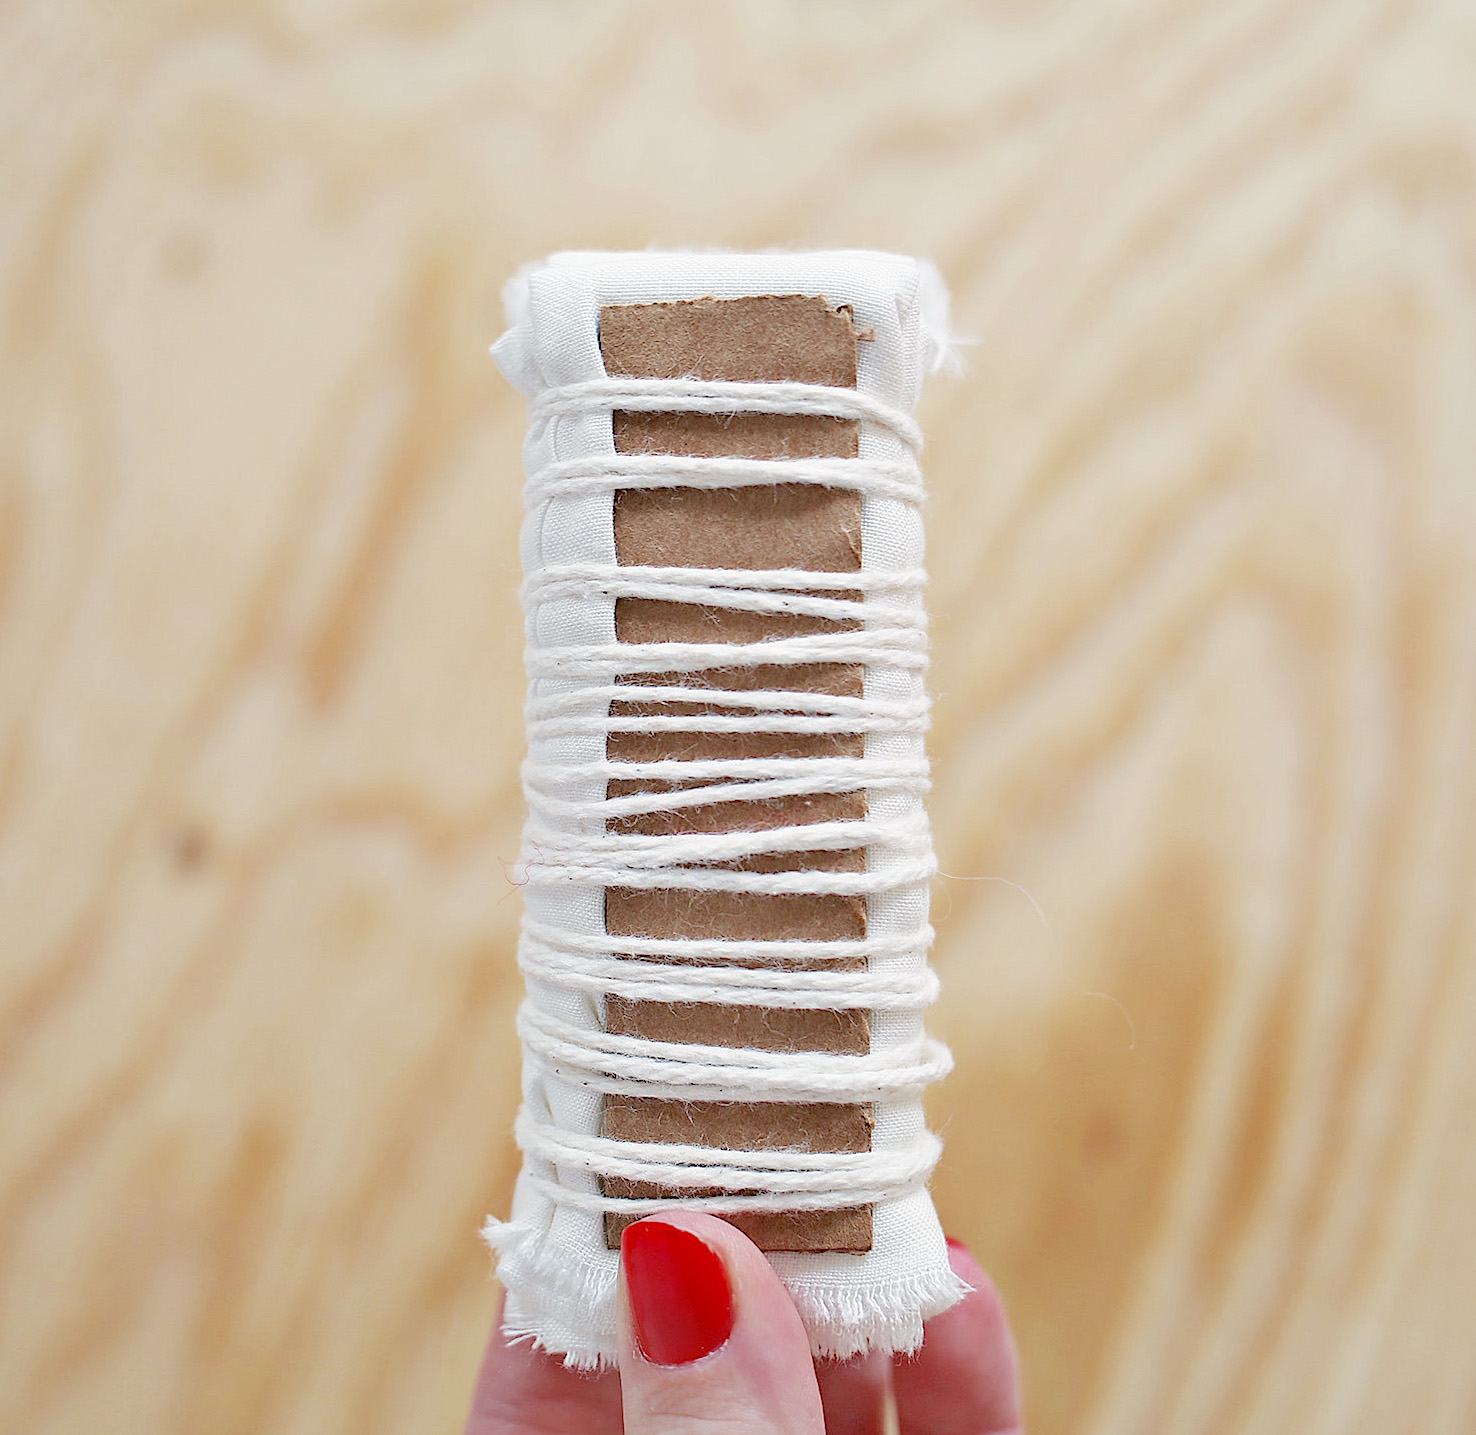
Once again, she secured the cardboard to the cloth in a twine-wrapped fabric sandwich.
For her third pattern, she folded her fabric until it fit between a pair of 2" x 2" squares.
With her fabric secure, Rachel held each bound piece under a running faucet, allowing them to get a little wet.
She wrote, "You don't want it dripping wet, but enough for it to absorb the dye a little easier."
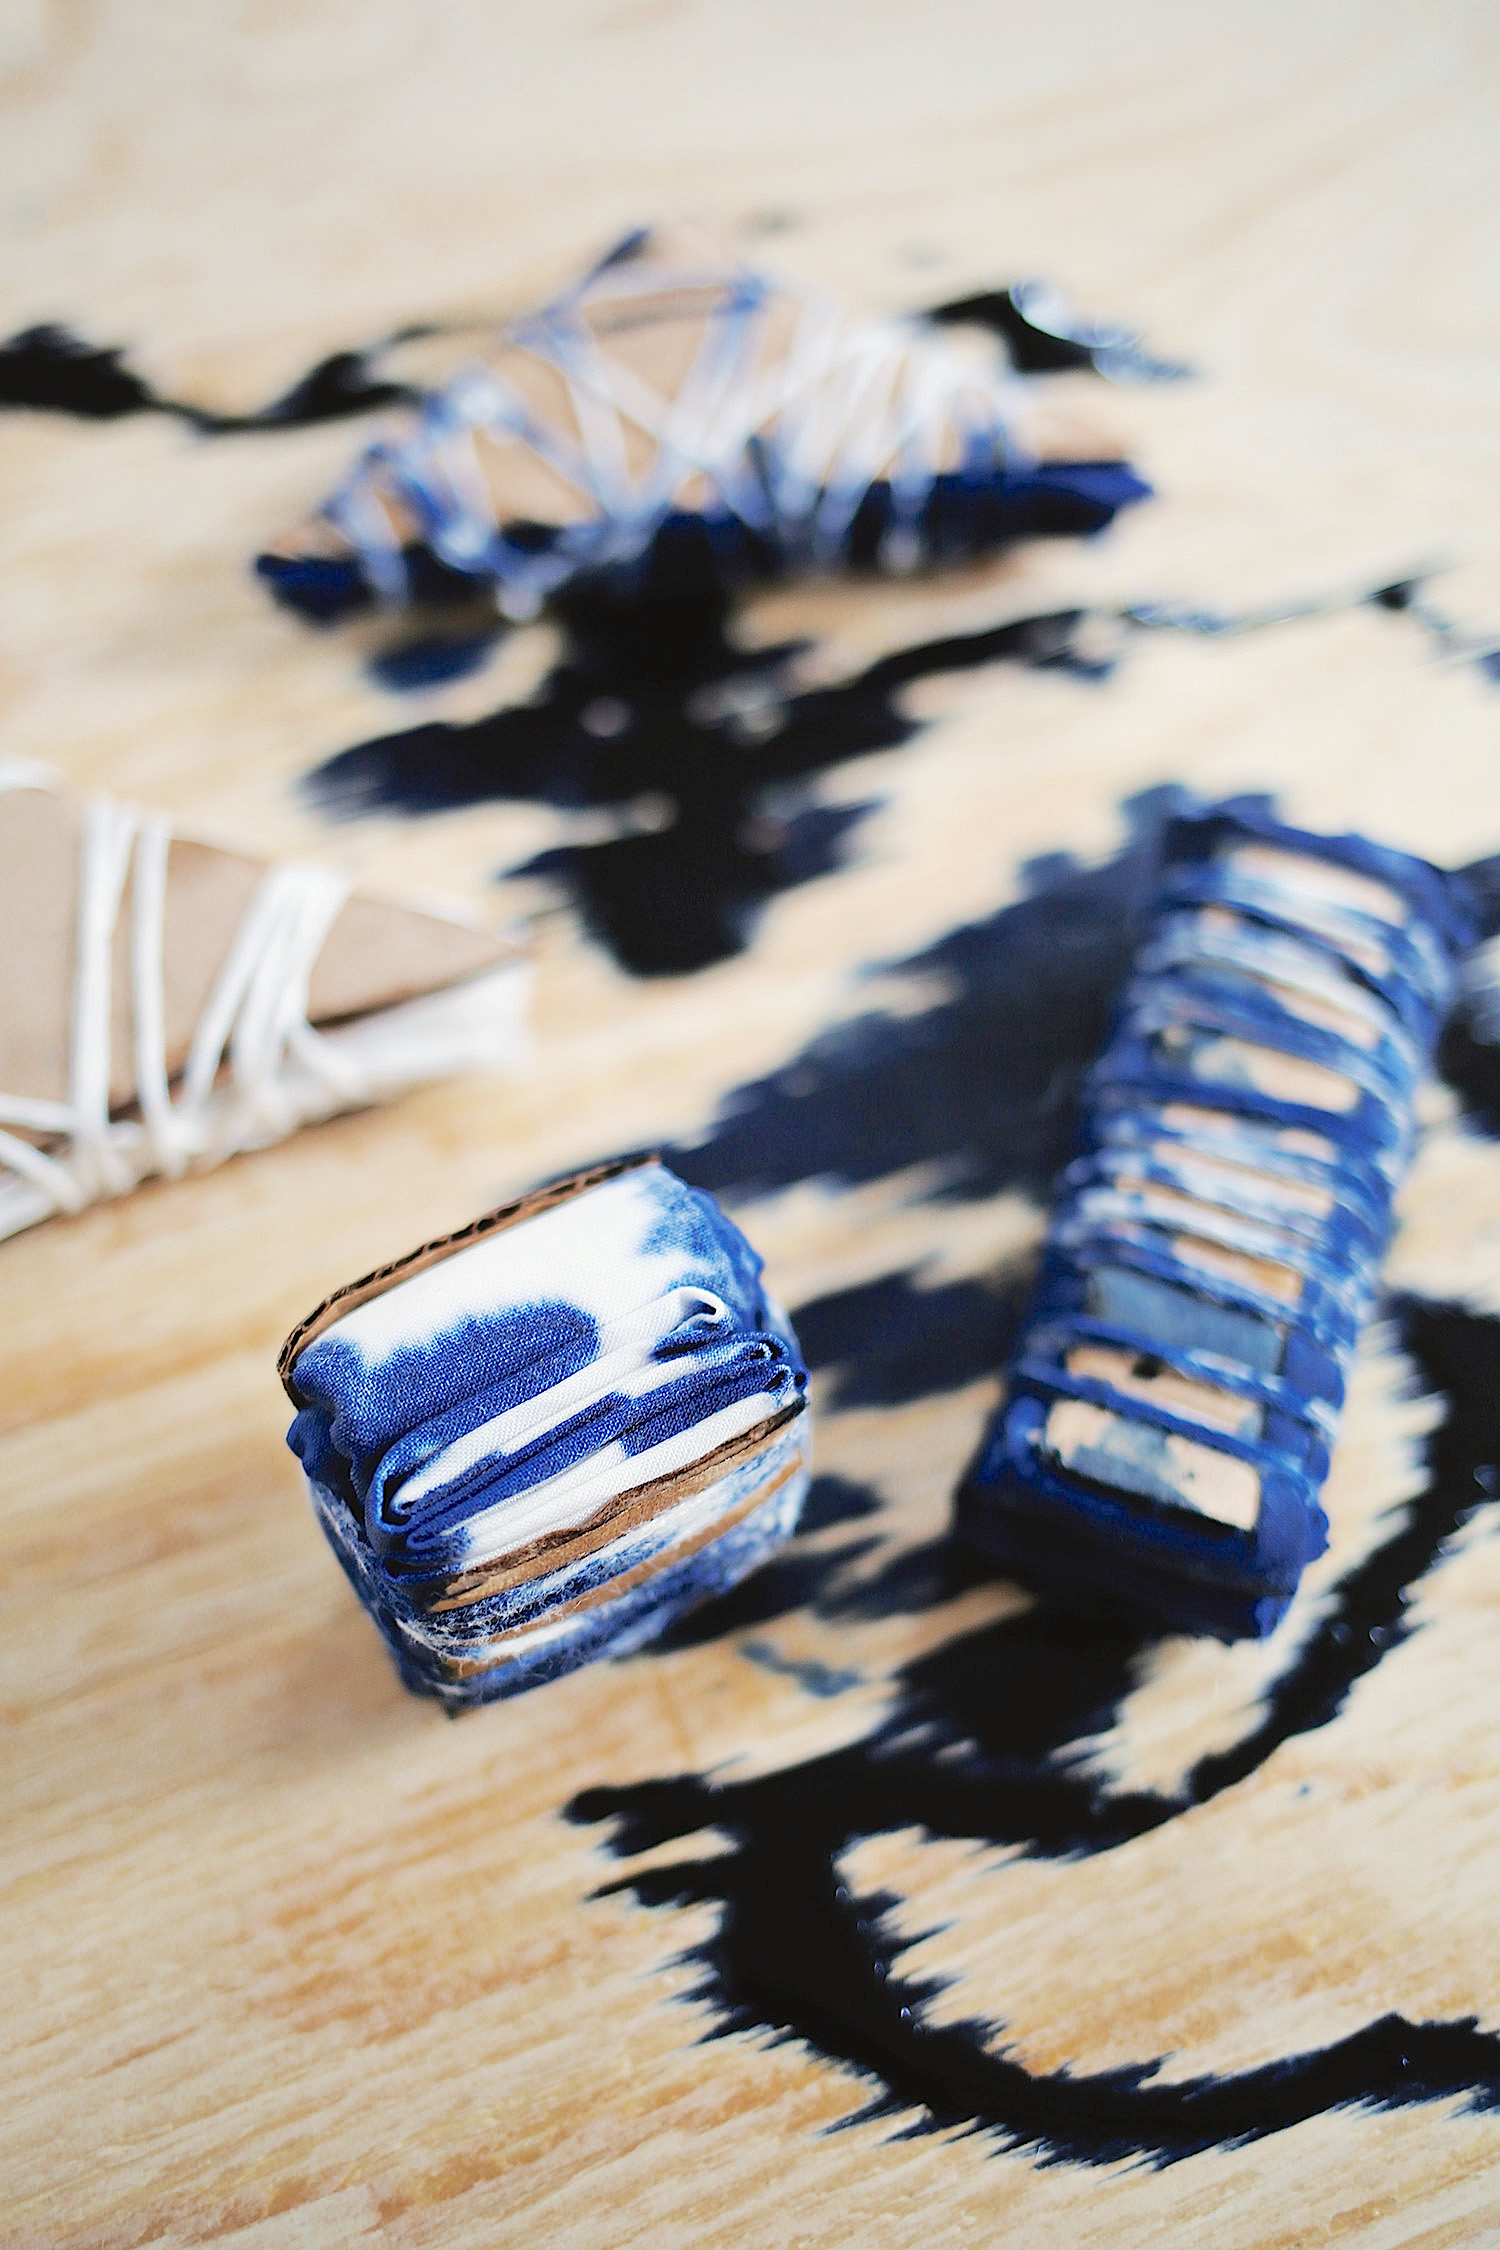
She then applied the dye according to the directions on the package, making sure to work on a surface that wouldn't be ruined, like this piece of scrap wood.
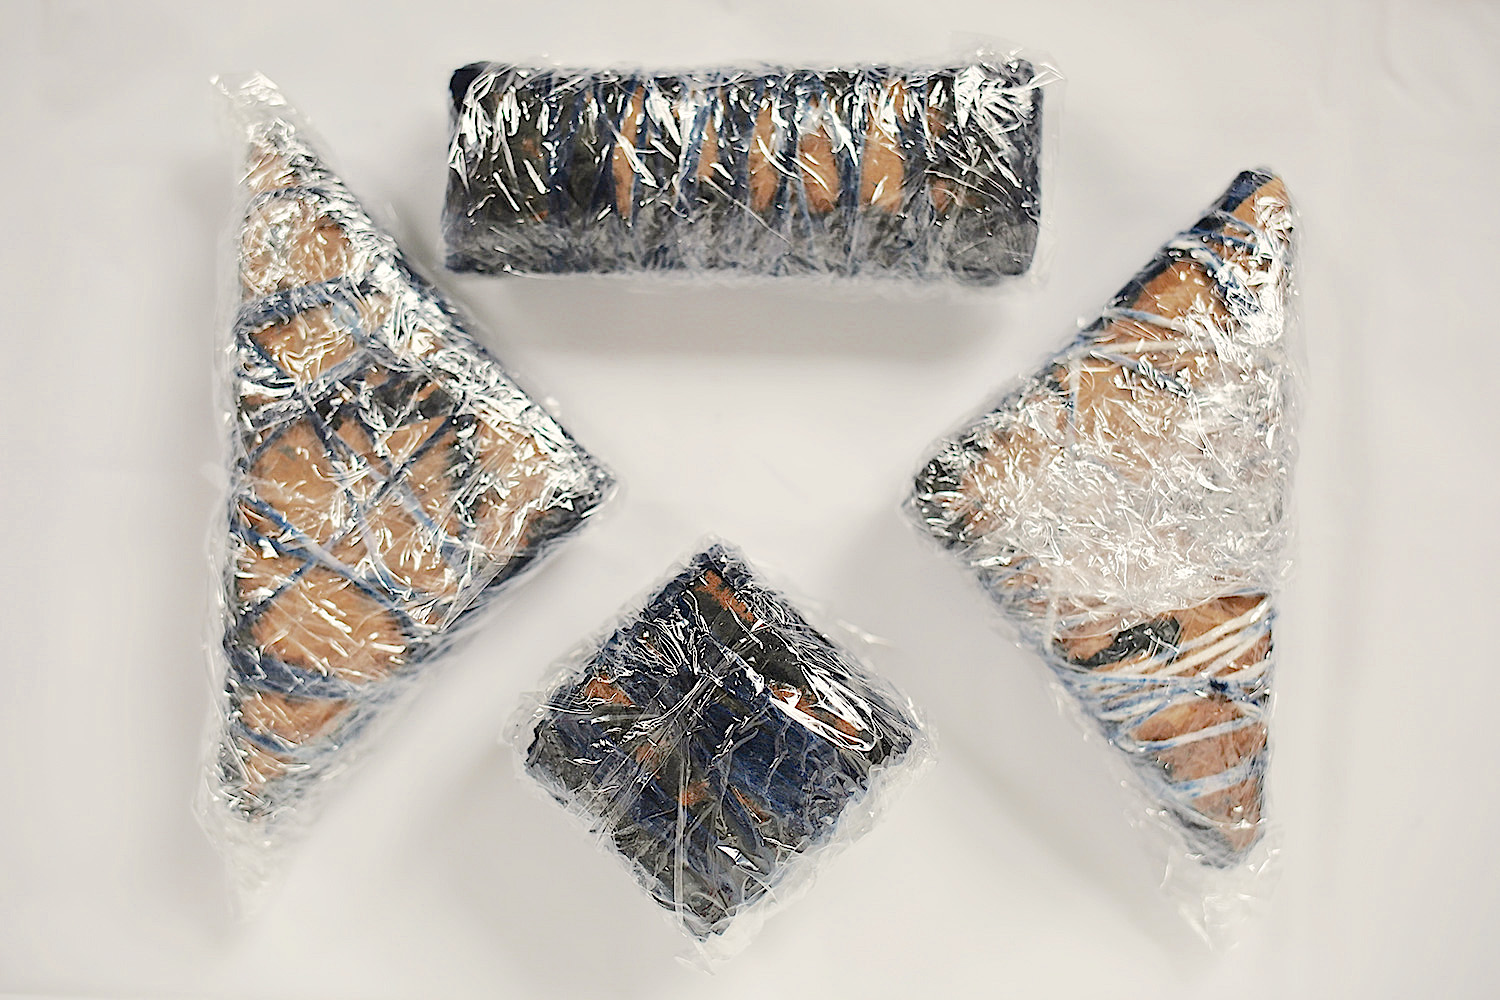
The final step for Rachel was to cover each of the pieces of bound fabric with plastic wrap. She let them sit for eight hours, while the dye was fully absorbed.

Each dinner napkin was then ready to be "rinsed, dried, and ironed." The results were quite different for each of the cardboard shapes utilized.
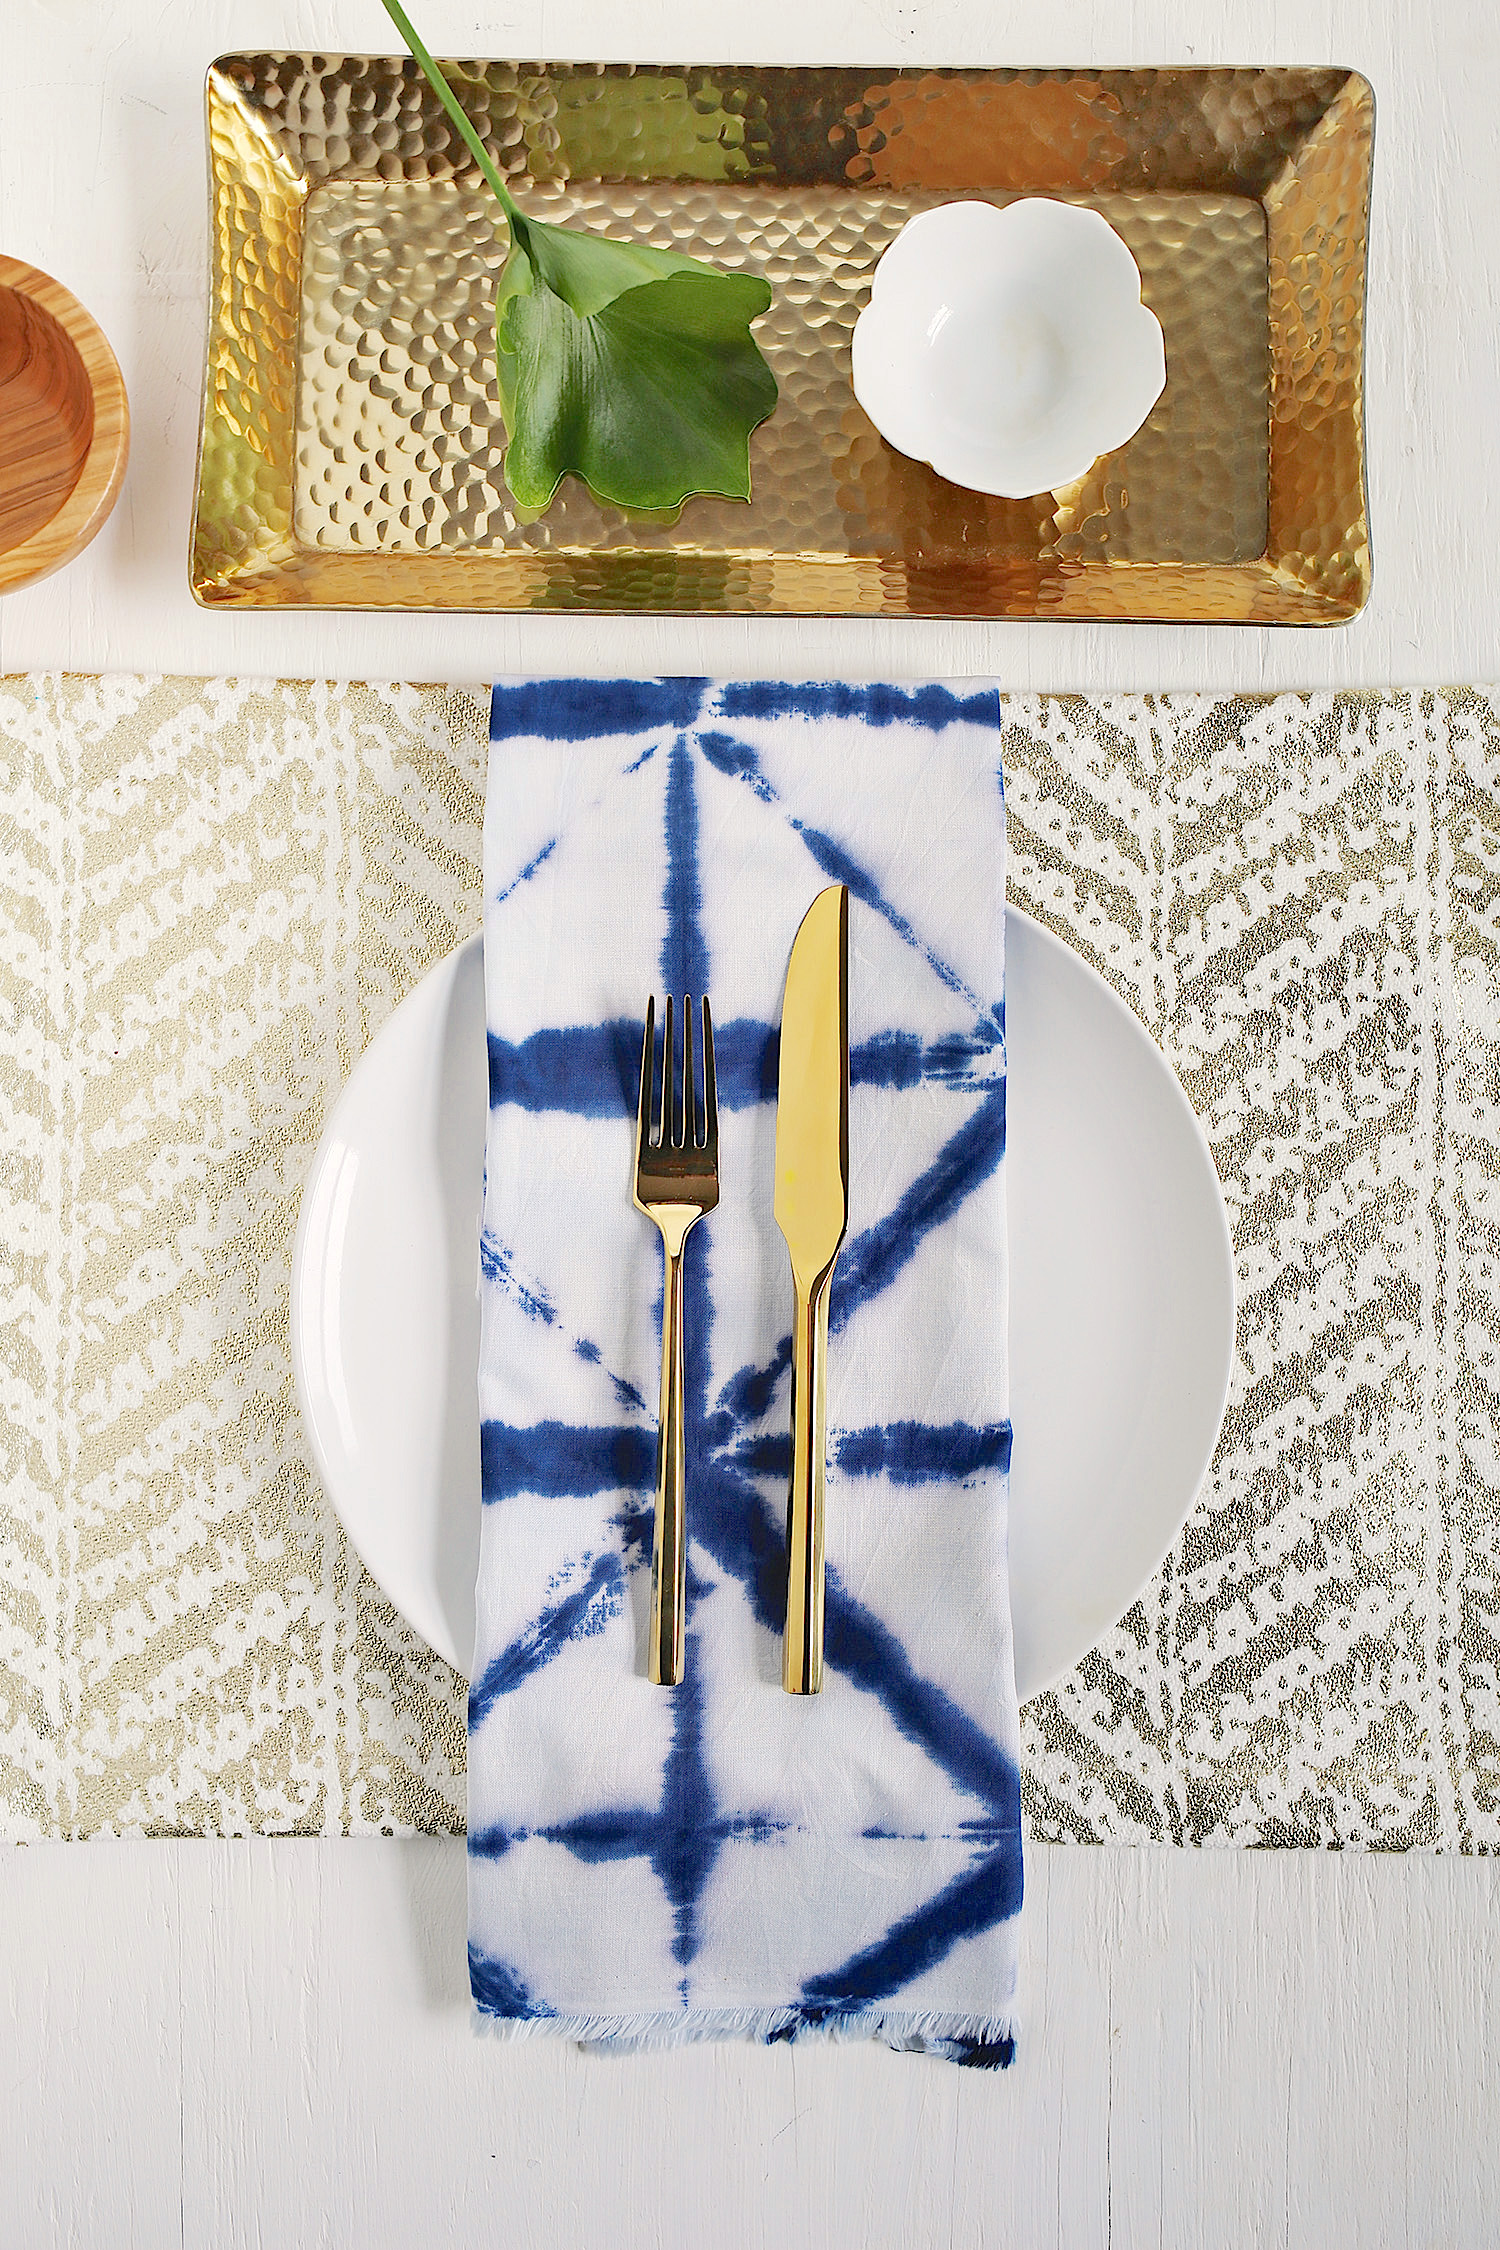
These DIY napkins, using the Shibori tie-dye method, made the perfect, unique addition to Rachel's dinner table.
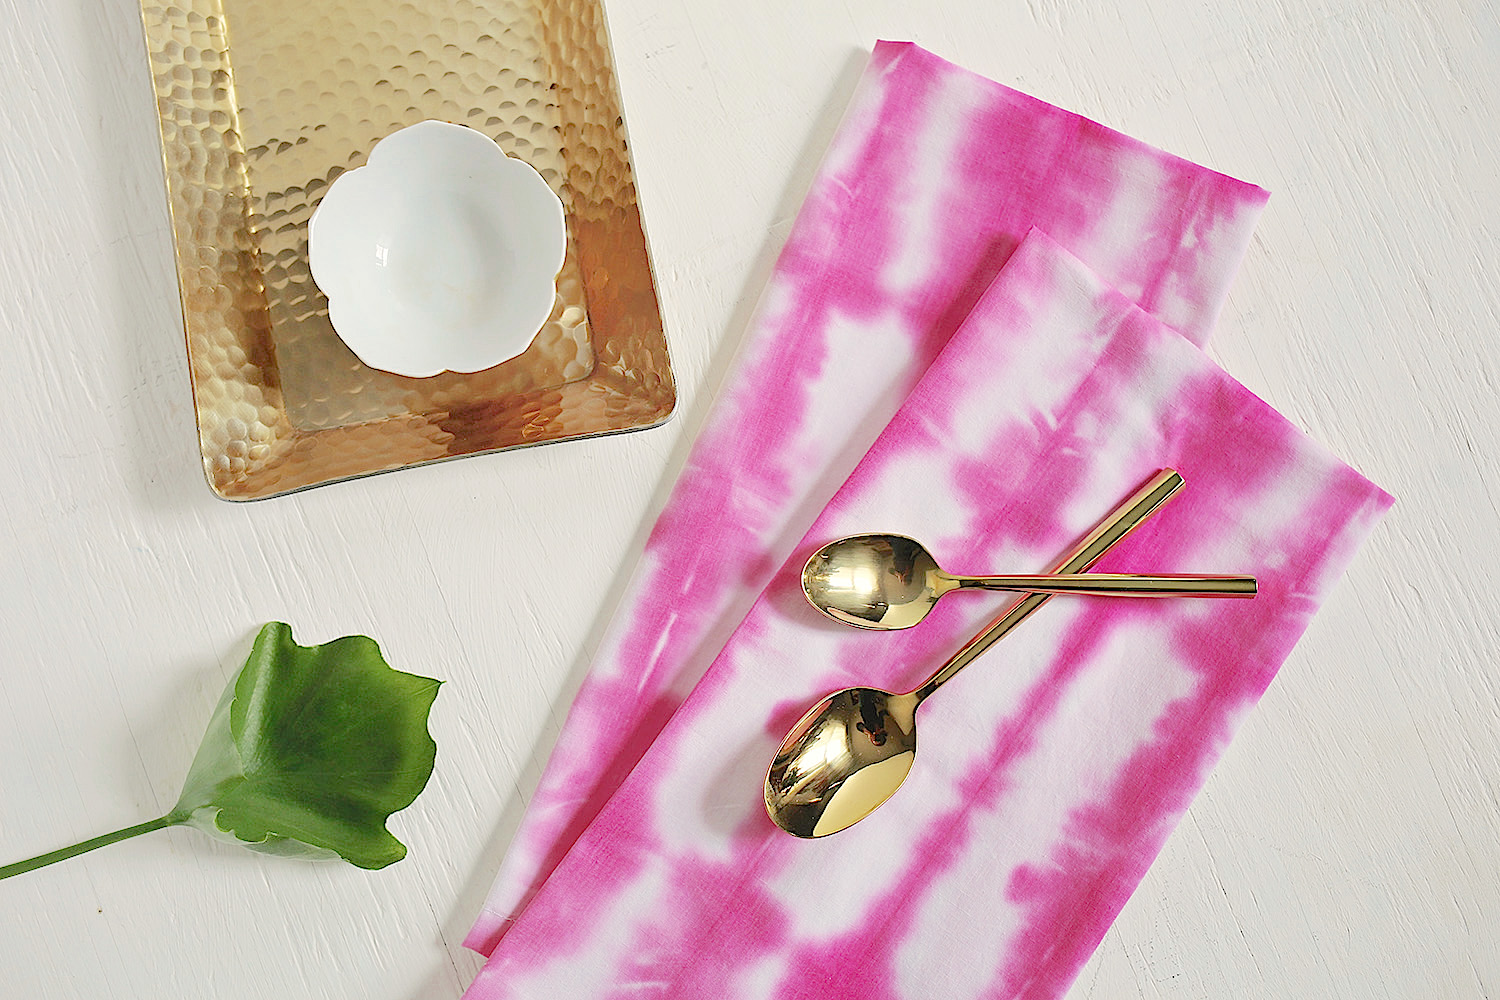
And by using a variety of dye colors, she was able to make sure that her latest DIY project really popped!
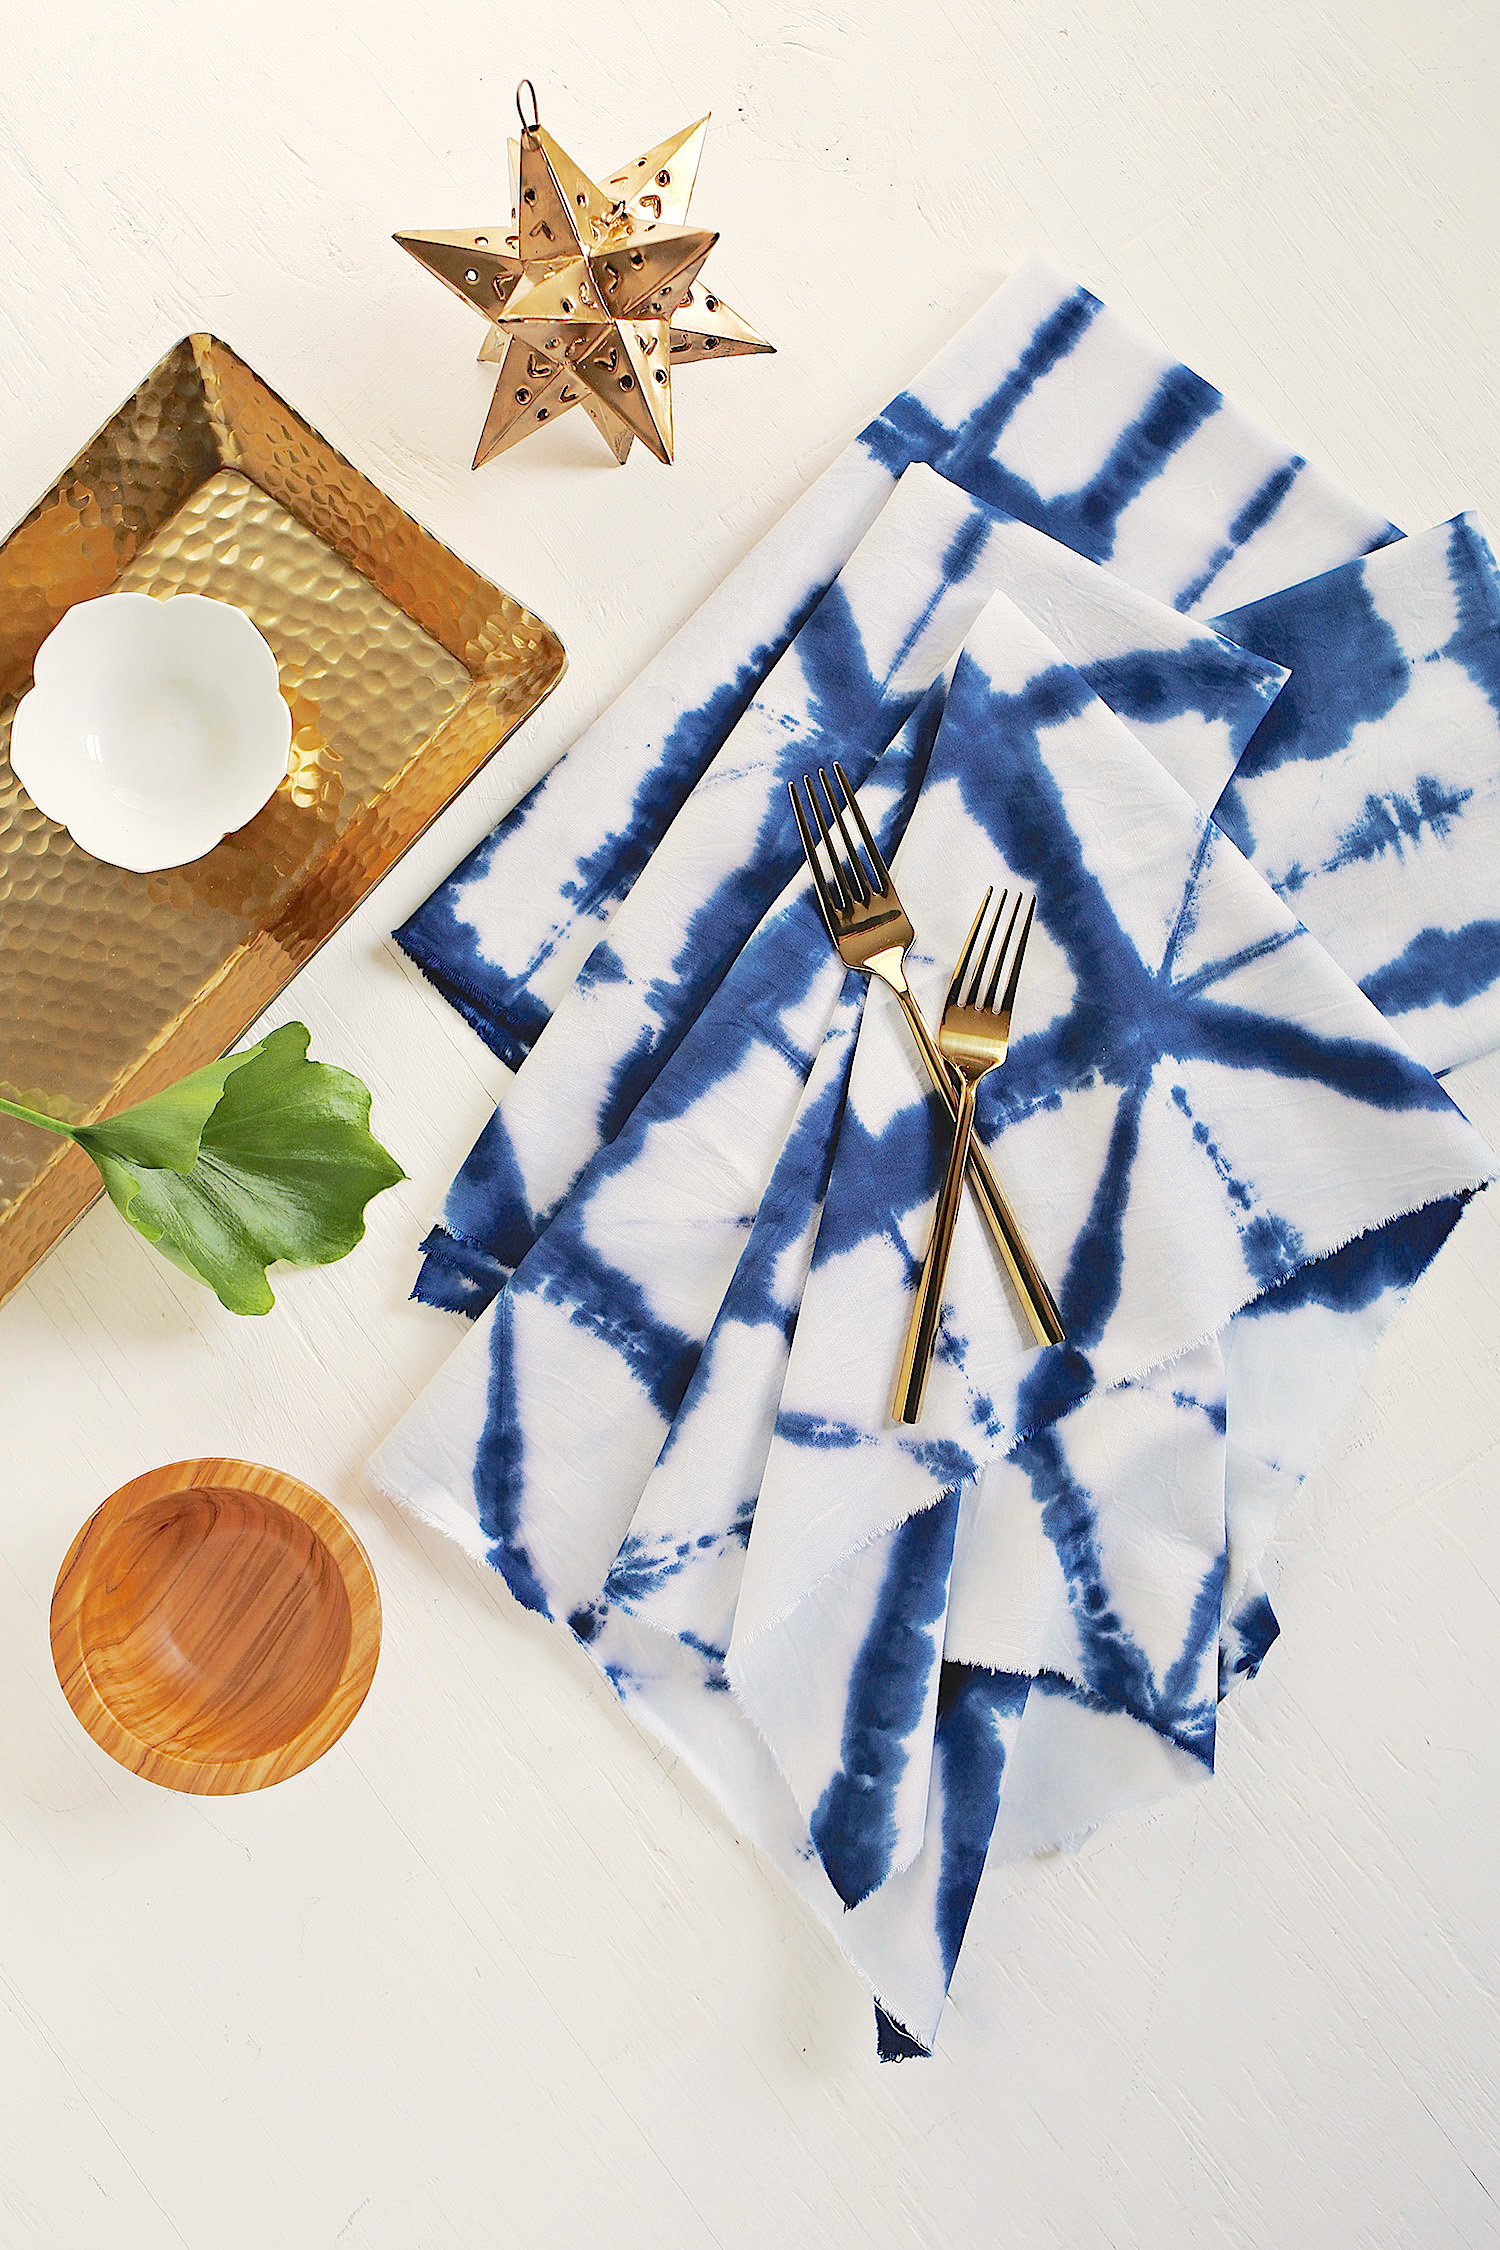
Rachel wrote, "Tie-dying your own cloth napkins is a really fun way to add more pattern and color to your table, and is sure to make your mealtime or next party a little more special!"
Will you be giving this tie-dye technique a try yourself? Let us know in the comments.
Please SHARE this easy and beautiful DIY project with friends and family!


