Whether you're into succulents, florals, or ferns, plants are the perfect green accessory to immediately add life to any room. And with the right planter, you can improve the ambience of the entire house — no matter the season.
The best part is that the perfect planter doesn't have to be expensive. You can actually make them at home using just a few items.
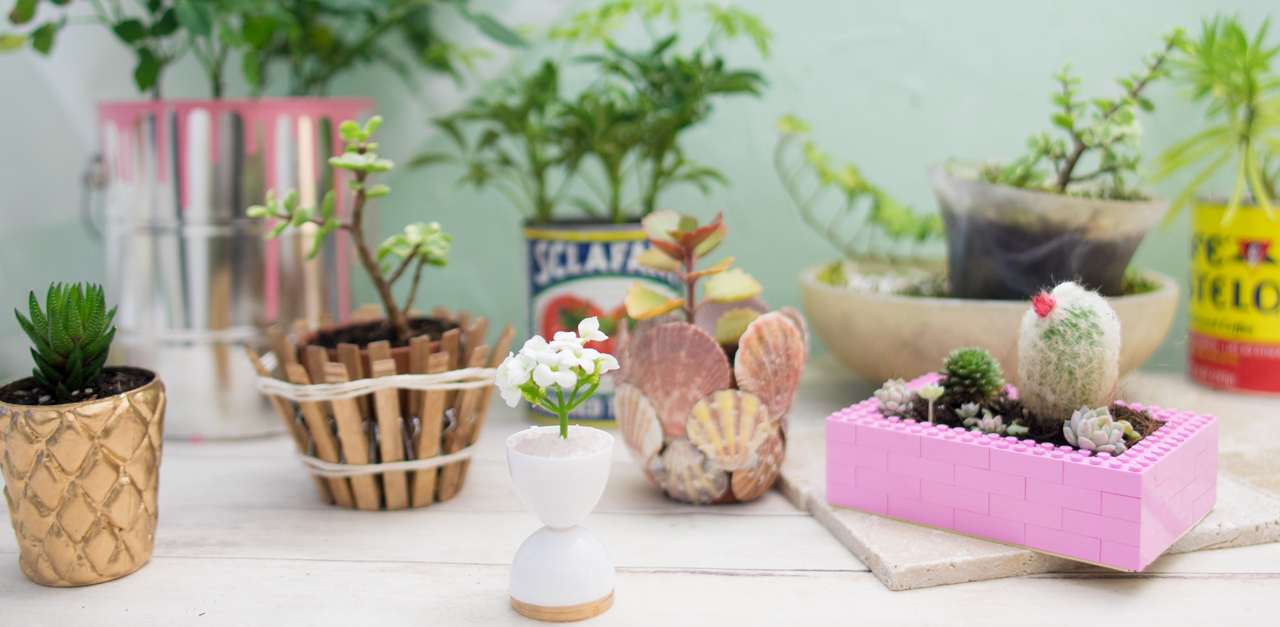
For example, if your home has a nautical theme, a shell-covered terra cotta pot will fit in perfectly with your decor. Or if you want a more modern look, you'll love the planter made entirely out of LEGO blocks!
These DIY planters are guaranteed to give you the inspiration you've been searching for, whether you're looking for something small to fit on your desk or a planter big enough to serve as a centerpiece on the dinner table.
Check out the instructions below to learn how to make the perfect planter for your space, and don't forget to SHARE these beautiful pieces with your friends and family.
Photos: Janine Ngai for LittleThings
1. Paint Can Planter

Materials:
- paint can
- paint tray
- paint
Instructions:
- Place an empty paint can in a small, disposable paint tray.
- Gently squeeze the paint (any color you like) around the rim of the can to create a dripping effect. Allow the paint to dry.
- When dry, fill the paint can with potting mix and plant your flowers or seeds.
2. Pineapple Planter

Materials:
- quilted planter
- gold paint
- paintbrush
Instructions:
- Paint the quilted planter gold.
- When it is dry, fill the quilted planter with potting mix and plant your succulent.
3. LEGO Planter

Materials:
Instructions:
- Using the building blocks, create a rectangle on top of the baseplate.
- Fill your rectangle with potting mix and plant your succulents (or the greenery of your choice.)
4. Seashell Planter

Materials:
- seashells
- hot-glue gun
- terra cotta pot
Instructions:
- Glue the seashells onto the terra cotta pot, creating an overlapping pattern. The shells on the bottom layer will face downward, and the top layer of seashells will lie above the edge of the pot.
- After the seashells are dry, fill the pot with potting mix and plant your succulent.
5. Rustic Clothespin Planter

Materials:
- terra cotta pot
- wood stain
- paintbrush
- clothespins
- string
- hot-glue gun
Instructions:
- Stain the clothespins with the wood stain using a paintbrush. Leave the clothespins to dry in a well-ventilated room.
- Once the clothespins are dry, glue them onto the terra cotta pot, making sure to cover the entire surface area.
- Tie two pieces of string around the top and bottom of the pot and glue them in place.
- Fill the pot with potting mix and your plant.
6. DIY Tin Can Planter

Materials:
- tin cans
Instructions:
- Clean your tin can out well.
- Decorate any way you desire or keep as is (like we did.)
- Fill the pot with potting mix and plant your greens.
7. Light Fixture Mini-Garden Planter

Materials:
- small light fixture
- large light fixture
- moss
- pebbles
Instructions:
- Fill the large light fixture with potting mix, and position the small light fixture inside it.
- Fill the small light fixture with potting mix to balance it out and keep it in place.
- Plant your desired plants inside the large light fixture and cover the dirt with moss and pebbles.
- Plant your desired plants inside the small light fixture and decorate the dirt with moss and pebbles as desired.
8. Easter Egg Planter

Materials:
- plastic Easter eggs
- hot-glue gun
- paint
- paintbrush
- pink crystal rocks
Instructions:
- Twist the plastic Easter egg in half, and glue it at its tips with the larger half serving as the base.
- Paint the bottom rim of the planter gold. (Feel free to get creative here with any color or design.)
- Fill the top of the planter three-quarters full with potting mix, and plant your tiny succulent.
- Fill the rest of the planter with pink rocks.
Do you know someone with a green thumb? Make sure to SHARE these fun and crafty ideas with them.


