Do you ever glance at some item in your household that you completely take for granted most of the time and ask yourself, “I wonder if I could make that?”
If you do, I totally get it. Let’s talk about how to make your own yogurt.
I use plain, unflavored yogurt on a regular basis. I put it into most of my smoothies, and I drown my oatmeal in it. I also, occasionally, shove it into my mouth when I’ve forgotten to eat for a few hours and suddenly become dangerously hangry.
Until recently, it never even occurred to me to make my own yogurt. Yogurt from the store is perfectly acceptable. It’s not that expensive, unless you buy the ~Very Fancy~ kind. Also, surely making your own yogurt is something best left to experts? People who maybe have a degree in probiotics and own some sort of special stove?
But no, my friends. Making your own yogurt is not the easiest task in the world, but it also doesn’t require any expertise or special equipment. Most importantly, it is definitely possible for even the laziest, most clueless cooks among us, as proven by the fact that I made my own the other day.
To make your own yogurt, all you need is — get this — some yogurt. And some milk. Yes, you can use yogurt to make more yogurt. I know, it’s a head-scratcher. Are you really “making” yogurt if you are using yogurt to do it? But trust me, it will all make sense soon.
In addition to the existing yogurt and milk, you need a heavy pot with a lid and some containers to store the yogurt in. That is it!
The entire process takes anywhere from a few hours to overnight. Much like cheese-making, it’s something that you’ll likely become better and better at with practice.
DIY Yogurt Ingredients

There are some perks to making your own yogurt, and one of them is that you can control exactly what goes into it.
Yogurt from the store is liable to have any number of filler ingredients, like sweeteners, artificial flavors, stabilizers, and other things that make the yogurt seem creamier and better than it really is.
That’s all well and good, but it’s nice to just eat some plain, natural, unaltered yogurt.

Another perk of homemade yogurt is the price. To my surprise, it’s actually far cheaper to make your own, because you can make a 1/2 gallon of yogurt for just slightly more than however much a 1/2 gallon of milk costs at your local store.
And on that note, let’s break down the only two ingredients that you need: milk and yogurt starter.
First, you need a 1/2 gallon of milk. Any type of milk will do, as long as it comes from an animal. (Nondairy yogurt is a different process, and I didn’t tackle it here. Maybe next time!) Whole milk will result in a creamier yogurt, but 2%, skim, or nonfat will also work.
Second, you need a small amount of yogurt starter. The starter simply consists of the live, active bacteria that converts regular milk into yogurt.
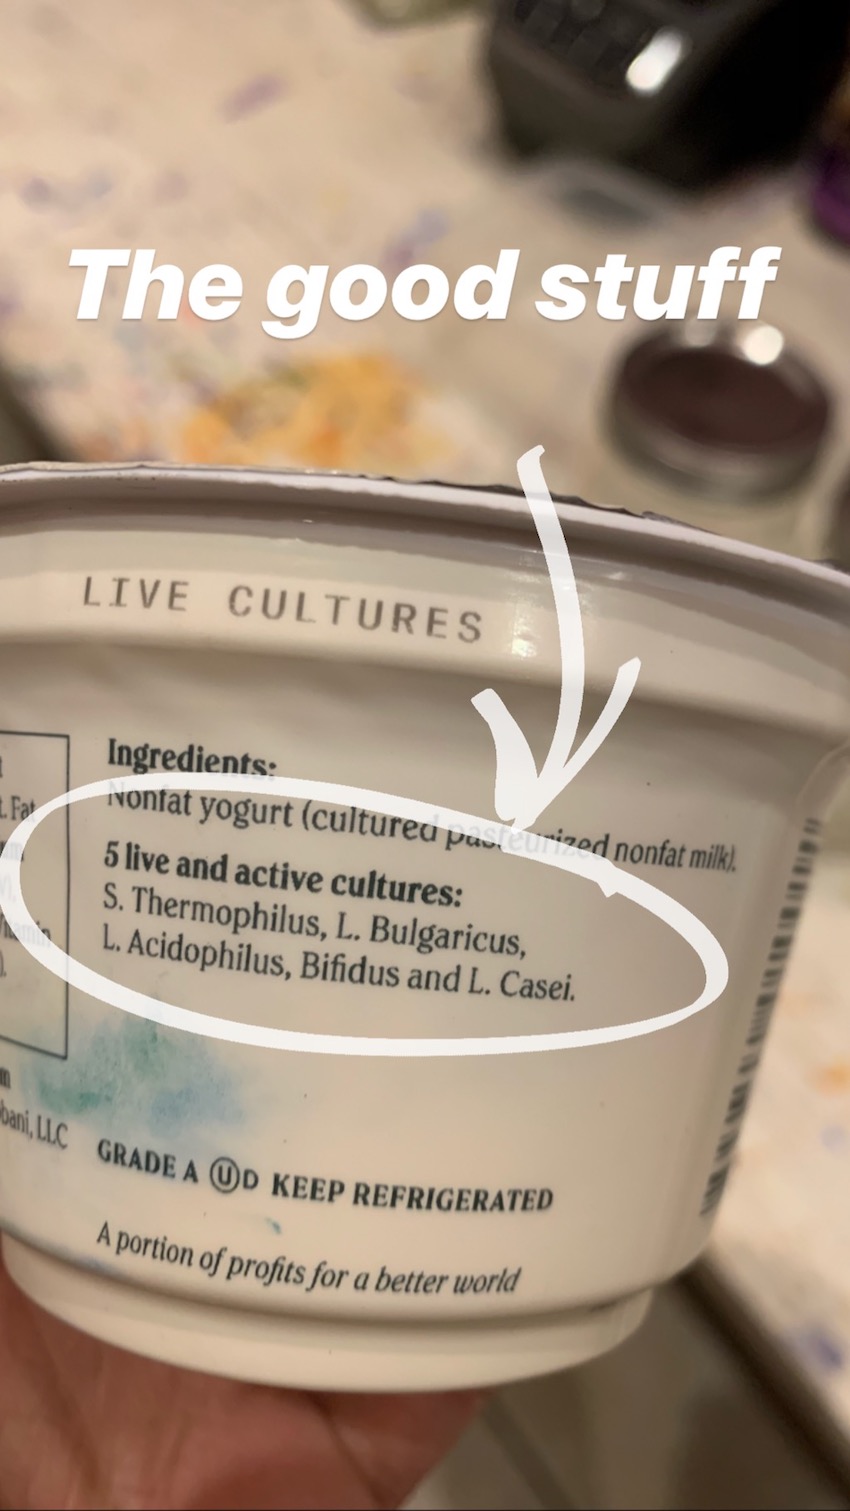
You can buy yogurt starter at some stores or online, but you can also use… YOGURT. Just use a plain, unflavored yogurt that contains live active cultures (look for it on the label). If not, it won’t have the live bacteria that you need to create more yogurt.

Once you’ve made your first batch of homemade yogurt, you can use that batch to make more yogurt (for free!).
You need about a 1/2 cup of yogurt for a 1/2 gallon of milk.
DIY Yogurt Equipment

As far as equipment goes, you really only need a pot with a lid and some containers to hold the yogurt (preferably glass). Everything else is optional. (You will end up with the same amount of yogurt as the amount of milk that you started with, so in this case a 1/2 gallon, or 2 quarts.)
If you look up homemade yogurt recipes, you’ll notice that there are seemingly infinite different ways to make yogurt. Everyone seems to have their own preferences, and they use different equipment, too. A food or candy thermometer, if you have one, can be helpful. If you want to thicken your yogurt, Greek-style, you’ll need a sieve or cheesecloth. Some people use blankets or towels to warm the pot. Some folks use a cooler. You get the idea. And while making yogurt doesn’t require special equipment, there do exist yogurt makers, and I hear they make things very simple.
As for me? All I used was a regular nonstick pot with a lid, two quart-size glass jars, and a food thermometer.
Here’s how I made my yogurt, step-by-step.
1. Heat the milk.

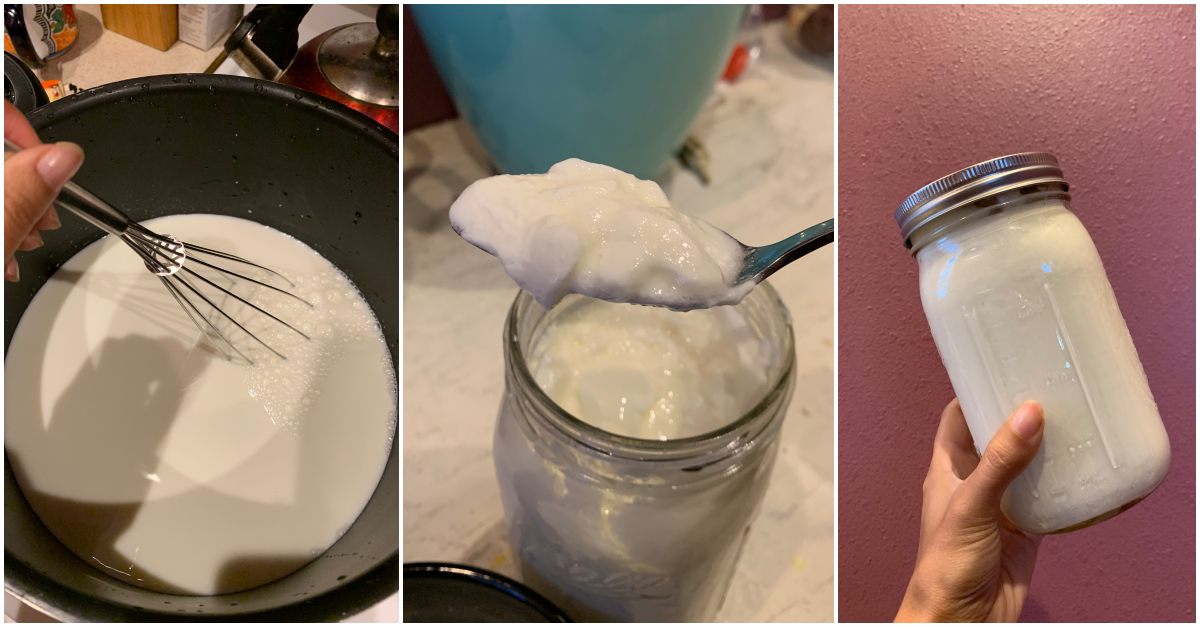
First, I poured the entire 1/2 gallon of milk into a pot and left it on medium-high for I don’t know how long. A while.
I was terrified of burning the milk or allowing it to boil over, so I stirred it often with a whisk. I even set up a stool right next to the pot so I could keep an eye on it.
The goal here is to bring the milk to a simmer. Bubbles should come to the surface, and it should maybe start to form a skin. The other goal is to get it to 180 degrees, which is where a thermometer comes in handy, but it isn’t necessary.
(Some people say the milk should boil for a while. Some say it should reach 200 degrees. I’m no expert. I’m just telling you all what I did!)

I kept watching my milk for seemingly ever, checking the temperature every few minutes until it reached 180 degrees. Then I turned it off.
If you’re not using a thermometer, just watch the milk until it comes to a full simmer.

After the milk was hot, I poured it straight into my glass jars. Each one holds a quart.

This part of the process was pretty nerve-wracking, honestly. Watching over a pot of milk like a hawk isn’t very lazy-cook-friendly. If I had more time, I’d probably use the slow cooker instead of a regular pot, because you don’t have to watch it so much, but it does take a few hours to heat up all the way.
2. Cool the milk.

I did all that work just let the milk cool back down! There is some science to this, I’m sure.
After pouring the milk into the jars, I rinsed the same pot and filled it with cool water, and put the jars into the water.
The goal here is to cool the milk to “pleasantly warm,” or about 115 degrees. It needs to be above room temperature for the bacteria in the yogurt starter to become active.
It’s not an exact science, so you can just use your pinkie to test the milk’s temperature if you don’t have a thermometer. Can you stick your pinkie in the milk for 10 seconds without yelping in pain? Then it’s ready for the next step.
If you have time, you can leave the milk on the counter for an hour or two until it cools rather than using the cold-water-bath method. I’m impatient, so I went with the latter, but it backfired.

My milk cooled off way too fast, and it got way too cold. I had to reheat it briefly on the stove to get it back up to 115 degrees. Another pain in the butt for a lazy cook like me! But it took only a few minutes.
Once the milk is at the right temperature, you can move on to the next step.
3. Add the yogurt starter.

It’s time to add the starter! You need about 3 tablespoons of yogurt for each quart of milk, or 6 tablespoons total in this case.
According to some sources, you should mix the starter with some of the warm milk in a separate bowl.

Then add the yogurt-milk mixture to the rest of the milk.

That’s what I did, and it worked out well.
4. Incubate the yogurt.

Now it’s time to incubate the yogurt-to-be. In other words, “let it sit.”
It needs to remain at a steady temperature for at least four hours, or six hours, or 12 hours, depending on whom you ask. I let mine sit for about five hours, although my house is pretty chilly, so I don’t know how long it actually stayed at the right temperature.

To keep your yogurt warm, you can use a few methods. I think the one I used is the easiest, though.
Just fill that same pot with hot water — as hot as it will get from the tap. Then put the glass jars in there. Make sure the water level entirely covers the yogurt in the jar. The hot water bath will keep the yogurt nice and incubated for a while, especially if your house is fairly warm, unlike mine. There’s no need to change out the water.
After some number of hours, you can test the yogurt to see if it’s setting properly. If the yogurt has set, it will have thickened up, and there may be a level of whey (yellow liquid) on top.
From there, it’s a matter of preference. You can continue to let the yogurt sit for up to 12 hours. The longer you let it incubate, the thicker and tangier it will be.
Once your yogurt has reached a consistency that you like, transfer it to the fridge for at least four more hours, where it will continue to thicken.

I moved mine to the fridge after five hours, and I left it to chill overnight.
The Final Result

In the end, I had a 1/2 gallon of yogurt! The fact that I ended up with yogurt at all felt like a miracle. Even if the yogurt had tasted disgusting, I would have felt like a champion.
But it didn't taste disgusting. My yogurt is smooth, creamy, and mild — it's not very tart, so it's easy to eat.
Now that I have a ton of really cheap yogurt in the fridge, I might experiment with variations, like Greek yogurt or flavored versions. But for now, this simple, yummy, plain yogurt is just perfect.


