Can we take a minute to appreciate soap, the most underrated ride-or-die MVP of the bathroom crew? Soap comes in delightfully fancy and $1 varieties. It gives you a little dose of aromatherapy every time you shower. And most importantly, it’s the one thing keeping the largest organ on your body clean.
Face it: Soap is doing more for you than your crappy best friend, your annoying ex, and your controlling boss combined.
As you can tell, I kinda love soap. I get really excited every time it’s time to buy a new bar, but then I get bored of the old one way before it’s over. I just want to be able to try a bunch of different kinds, depending on the mood I’m in, without spending a silly amount of money on fancy soaps I’ll never finish. (First world problems, I know.)
A magical solution dawned on me recently: I CAN MAKE MY OWN SOAP.
To make soap, you just mix oil, lye, and water together. Pretty simple, right? Humankind has been using roughly the same method for thousands of years. So why does the list of ingredients on the Dove soap bar read like a scientific research study from an alien planet? So many ingredients ending in “-ate”!
Most commercial soaps are full of synthetic ingredients, like sulfates. Let’s not delve into whether or not these ingredients are bad for you and the environment — some are, some aren’t, and most are up for debate. The point, for me, is that these complicated products are unnecessary. Why bother with products that consist of 16 alien-word ingredients when a much simpler version does the exact same thing — and you can make it at home?
Lye, oil, and water combine to make soap, but that doesn’t make a very interesting soap on its own. To turn this combo into the exciting soap of your wildest dreams, you have to add the special sauce. Everything from essential oils to milk to rose petals can potentially go into soap. The possibilities are endless! (*insert evil laughter*)
Picking the Special Sauce

My favorite part of this entire process was, naturally, picking which types of soap to make.
First, I decided to make a lavender-coconut soap, since I already had lavender essential oil and lavender flowers (handpicked in California!) at home. Lavender is anti-inflammatory and antiseptic in addition to its relaxing aromatherapeutic properties. I also wanted to add coconut oil, because it’s ultra-moisturizing, antibacterial, and antifungal.
From there, I had to restrain myself from adding Everything Else in My Kitchen and Pantry. My soap did not contain rose water, aloe vera, bentonite clay, cinnamon, salt, sugar, coffee, cocoa, or olive oil, BUT IT COULD HAVE (and my next one might).
OK, but I did make one other kind of soap. I realized that I needed to make my soap in two batches anyway, so for the second batch, I decided to switch it up and make an oatmeal-honey soap. Oatmeal is a gentle exfoliant that also soothes the skin, while honey is moisturizing, anti-inflammatory, and antibacterial.
Cold Process vs. Hot Process
There are two ways to make soap: cold process and hot process. Cold process involves lye, a chemical made from salt that’s extremely caustic. When mixed with oil and water, and then cured for a few days, it magically becomes soap. You can also substitute water for milk to make a creamier soap.
Pretty cool, except that you have to use a lot of precaution when you use lye. It burns on contact, so you have to wear gloves and eye protection, and it produces fumes, so you have to stand back while mixing it with water.
Like the scaredy-cat that I am, I chose not to use the cold process.
With hot process soap-making, also known as “melt and pour,” you don’t have to deal with lye directly at all. Instead, you buy premade blocks of lye, oil, and water (or milk) already cured — also known as, well, soap. You simply add the oils, essential oils, fragrances, and other ingredients of your choice to the soap base.
With melt-and-pour soaps, nobody is at risk of getting burned by lye or inhaling toxic fumes. Win-win!
Melt-and-pour soap bases come in all kinds — plain glycerin, shea butter, and goat’s milk included. I went with a goat’s milk soap base this time; it’s great for dry or sensitive skin.
The Supplies

First, I headed to my local Michaels to pick up soap-making supplies. I bought 2 pounds of goat’s milk soap base ($9.99), which is enough to make eight bars of soap. I also bought soap colorant ($2.99 for a set), coconut fragrance ($4.99), and a soap mold with adorable bees on it ($3.49). Save the bees, y’all.
From home, I grabbed my extra virgin coconut oil, lavender essential oil, and lavender flowers for the lavender-coconut goat’s milk soap.

I took everything down to the kitchen, where I also grabbed some rolled oats and honey for the oatmeal-honey goat’s milk soap.
My total for the supplies was only $21.46, or $2.68 per bar of soap. That number goes down, though, when you take into account the cost-per-use of these items. The soap mold will last me forever, and the colorant and fragrance will take ages to run out.
DIY Soap 1: Lavender-Coconut Goat's Milk Soap

Time to prep my ingredients. I removed a handful of lavender from the stems to prepare the flowers for the soap.

Then I cut the goat’s milk soap base in half, leaving me with 1 pound of soap base for this batch. I cut it into cubes for easy melting.
The directions say to microwave the cubes for 30 seconds, then continue microwaving in 10-second intervals until they’re fully melted. You can also use a double-boiler if that’s your style.

Once the base was fully melted, I added 1/4 cup coconut oil and stirred.
Then I added about 15 drops of lavender essential oil and a bunch of fresh lavender. I also added some coconut fragrance. I eyeballed it until the smell was noticeable but not overpowering. I hate heavily scented products!

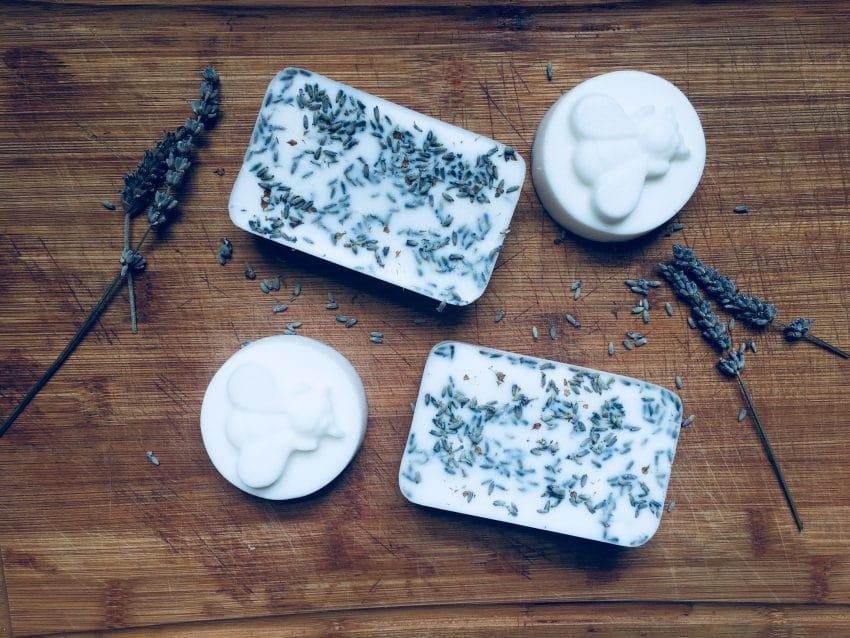
Once it smelled and looked pretty, I poured the mix into the soap molds. I added some more lavender flowers on top for decoration.

Then I tossed the molds into the freezer to set. In retrospect, I don't really think this was necessary. The soap solidifies pretty quickly at room temperature, too.

After a couple hours (I forgot about them in there), I took them out and gently popped each soap out of the mold.

The last (optional) step is simply to spray each soap with isopropyl alcohol to get rid of any bubbles.
All finished!
Um, somebody pass me my Mad Scientist badge, because I just made a CONCOCTION.
DIY Soap 2: Oatmeal-Honey Goat's Milk Soap

Time to move on to the next batch.
I cut up and melted the other pound of soap base. I wanted the soap to be yellow, to match the honey theme, and I’d bought soap dye at Michael’s. But I decided to use a natural dye instead. I thought it’d be nice if at least one of my soaps was free of any synthetic ingredients.
So I used 1/2 teaspoon of turmeric. It turned the goat’s milk base a nice golden yellow. I didn’t add any fragrance at all, so this soap has no scent.

Next, I ground up 3/4 cup of rolled oats in the blender.

I mixed the ground oats into the base and then poured the mixture into the molds.
Then I drizzled 2 tablespoons of honey into the molds and carefully stirred. I threw some whole oats on top for decoration.

Back into the freezer to set.
I waited an hour or so, then popped the soap out of the molds.

All done!
Each batch of soap took me under 10 minutes to assemble, and the cost came to under $3 per bar.
I tested each soap myself, and they're both great. They smell and/or look nice, and they clean my skin. They are, indeed, soap! And with four bars per pound of soap base, my friends and family are about to have a limitless supply.
Now that I know how ridiculously easy it is to make soap — at least, the hot process kind — I can make and use as many different kinds of soap as I like, forever and ever, with no guilt. Mwahahaha!


