I truly believe there's nothing more beautiful than a well-decorated home.
No matter the size of your home or how many people live in it, having it nicely decorated and organized can make a huge difference.
I love paying attention to the latest trends in home decoration, and given the number of television shows about houses, I'd say there are a lot of people out there just like me.
One of the most popular trends right now is pineapples.
People are using them as inspiration for paperweights, bookends, and even DIY lamps, like this one!
And honestly, what's not to love about pineapples?
They're tropical, adorable, and funky — perfect for anyone with an eclectic or elegant sense of style.
A lot of pineapple decor is expensive. Fortunately, here at LittleThings, we know that sometimes the best decorations are homemade!
Follow the instructions below to find out exactly how to make your own pineapple string art!
Supplies
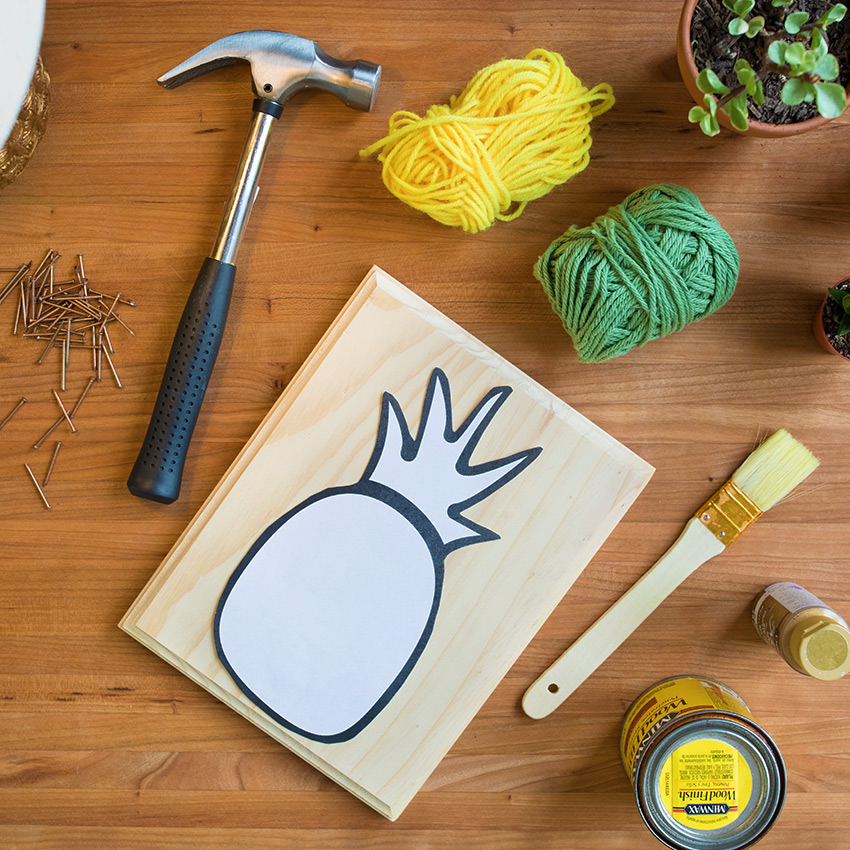
- Wooden board
- Wood stain (dark color)
- Hammer
- Nails
- Thin yellow yarn
- Thin green yarn
- Scotch tape
- Gold paint
- Paintbrushes
- Pineapple printout
Instructions Step #1: Stain The Wood
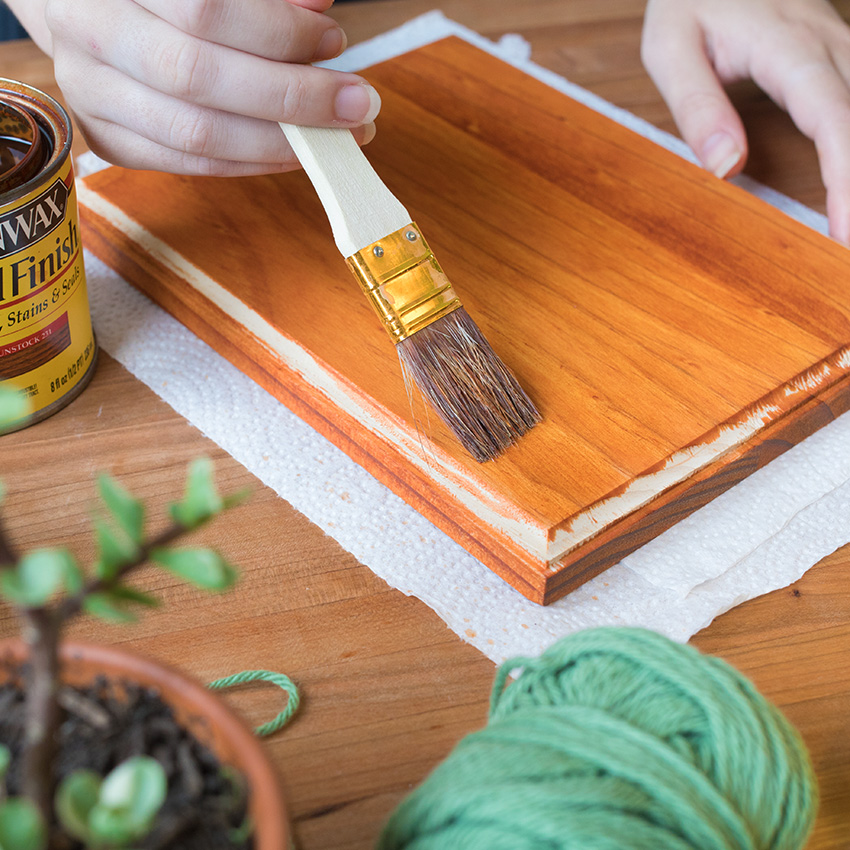
The very first thing you'll need to do to make this pineapple artwork is stain the wooden board.
You can use any color of stain you want, but a darker stain will make the yarn stand out more.
Make sure to use paper towels or newspaper under your wooden board so you don't accidentally stain anything else.
Step #2: Paint Edges Of Wood With Gold Paint
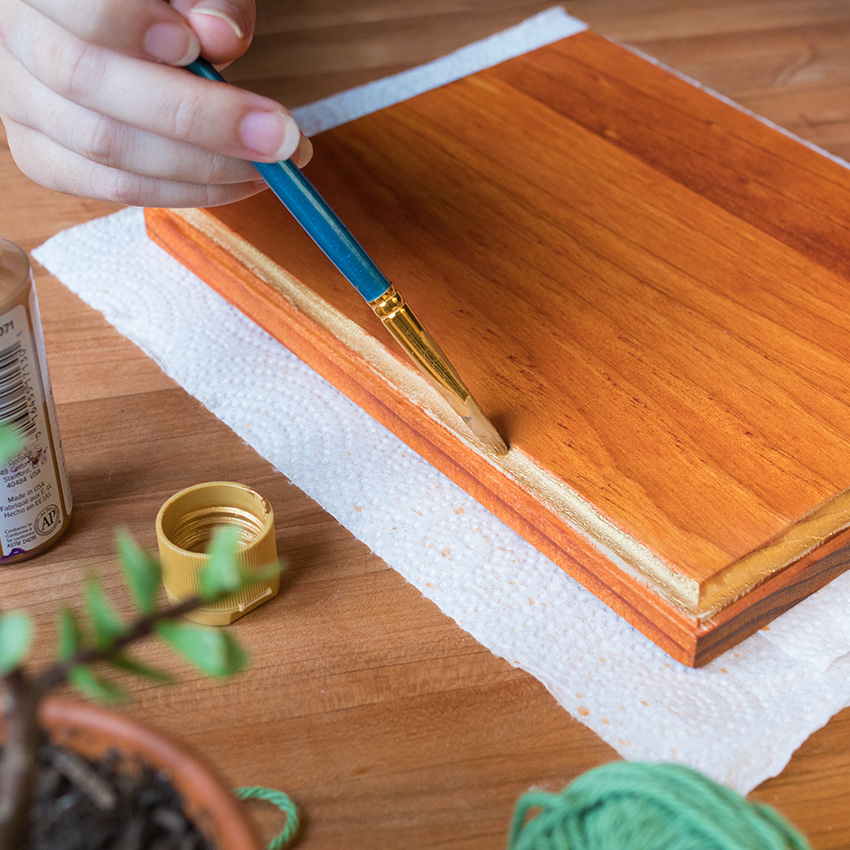
Once the wooden board has dried completely, use a thin paintbrush to apply gold paint to the edges of the wooden board.
You can do the entire edge, or just part — whichever suits your style more!
Step #3: Tape Pineapple Printout To Wood
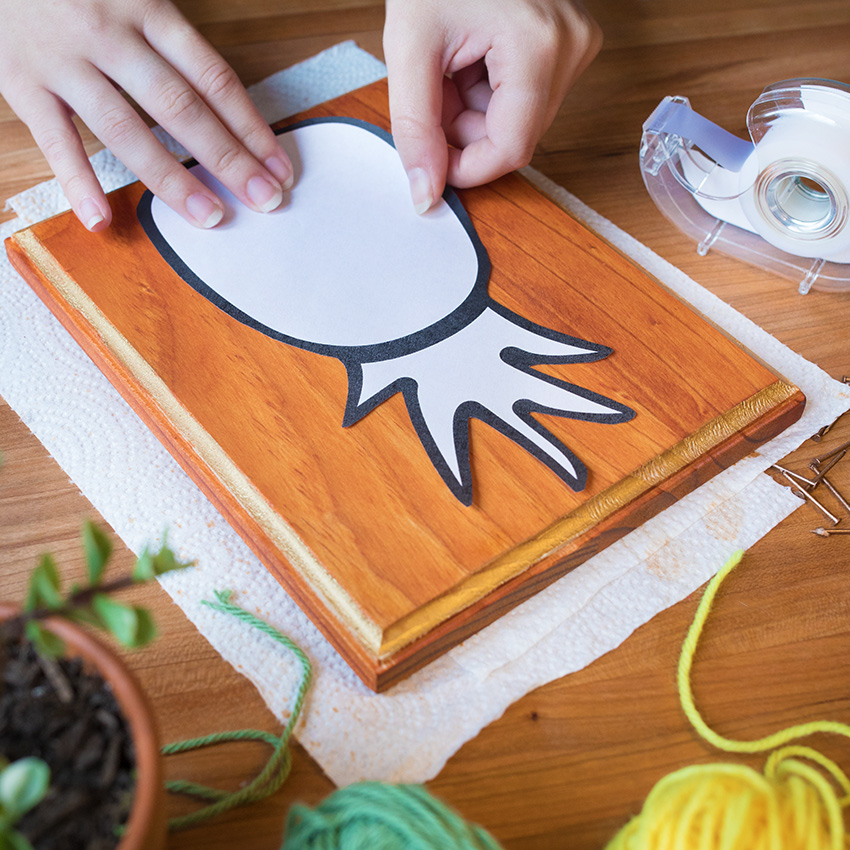
After the gold paint is dry, get your pineapple printout. Apply a single piece of rolled tape to the back of the printout, then stick it down on the middle of the board.
Make sure the pineapple is exactly where you want it to be, since the next step is more permanent.
Step #4: Hammer Nails Into Pineapple Shape
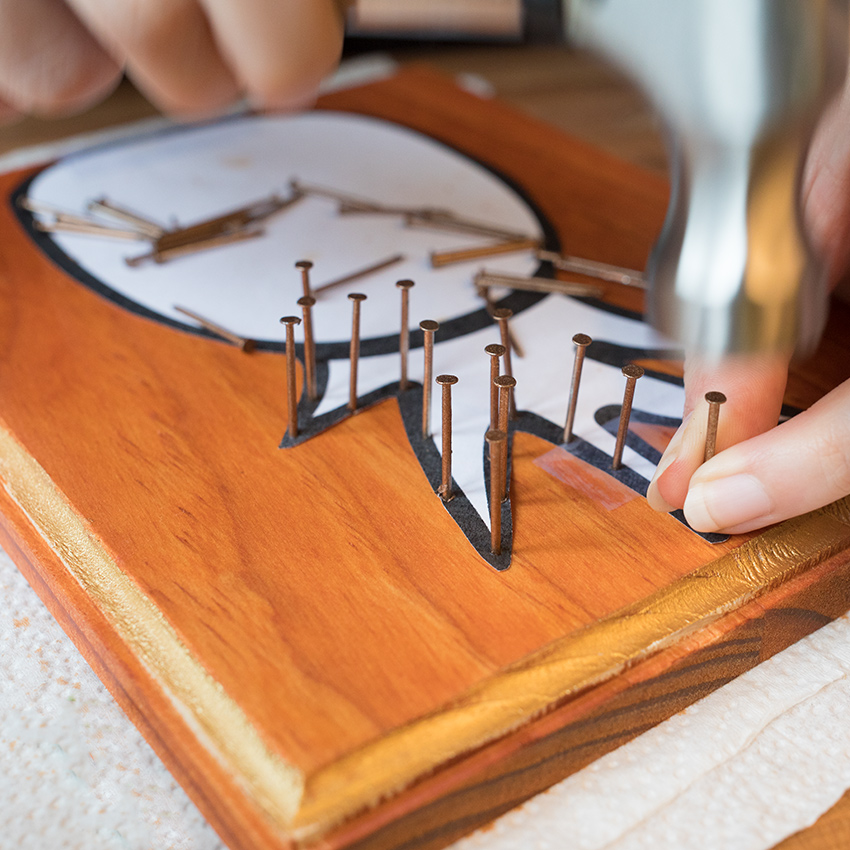
Next, hammer nails into the wooden board around the outside of the pineapple printout.
Try to place the nails close to the edge of the paper without nailing the paper to the board.
While you're hammering, try to get all the nails to about the same height — this will make wrapping the yarn easier (and make the final product look more professional).
Step #5: Wrap Yellow Yarn Around Nails
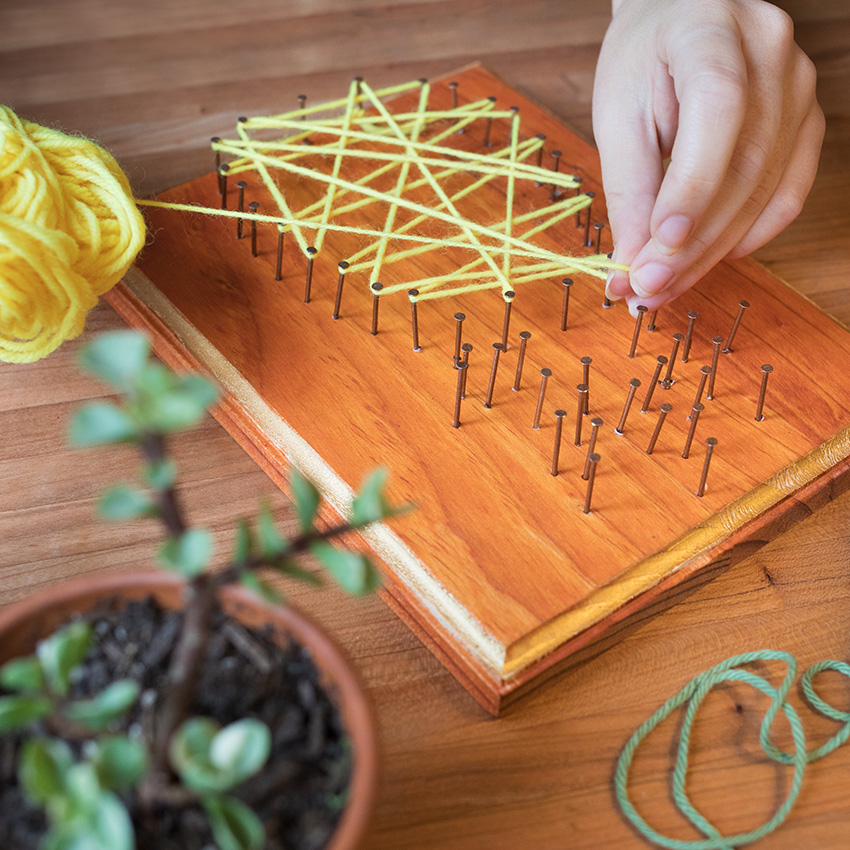
Using your yellow yarn, wrap up the base of the pineapple.
You can do this in any pattern you want — and your pineapple can be sparse or filled in, it's totally up to you!
Make sure not to wrap any yellow yarn around the leaves of the pineapple, since that's where the green yarn needs to go.
Step #6: Wrap Green Yarn Around Nails
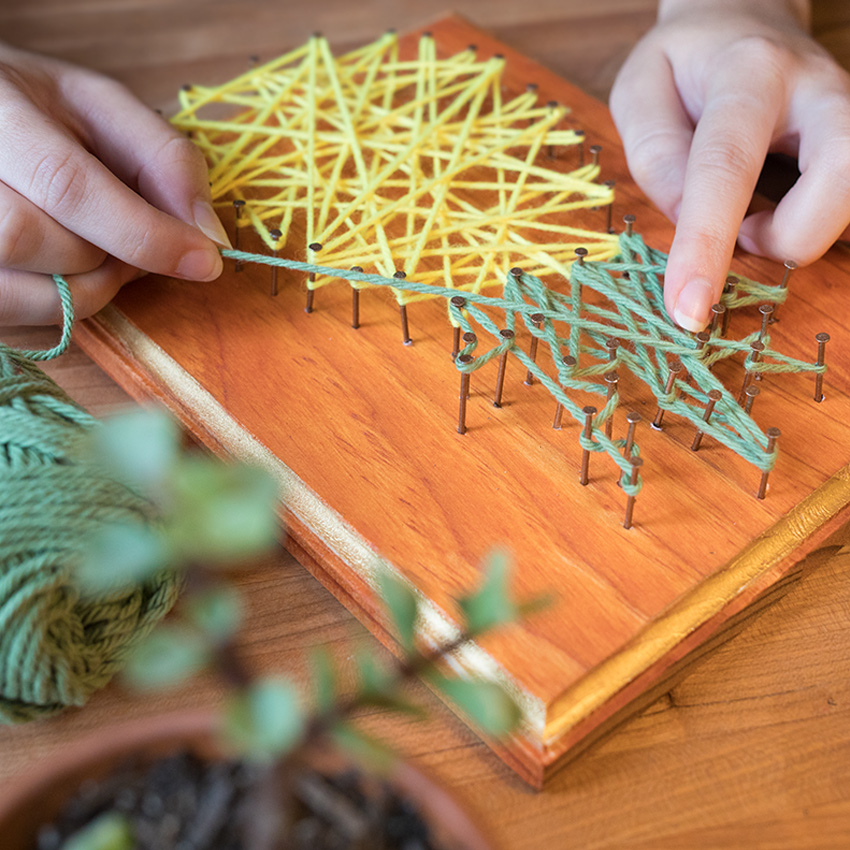
Once you're satisfied with the yellow yarn placement, switch to using the green yarn for the leaves of the pineapple.
During this stage, make sure not to accidentally connect the leaves to one another in one big blob — try to create the same spiky effect as a real pineapple.
Step #7: Hang And Enjoy!
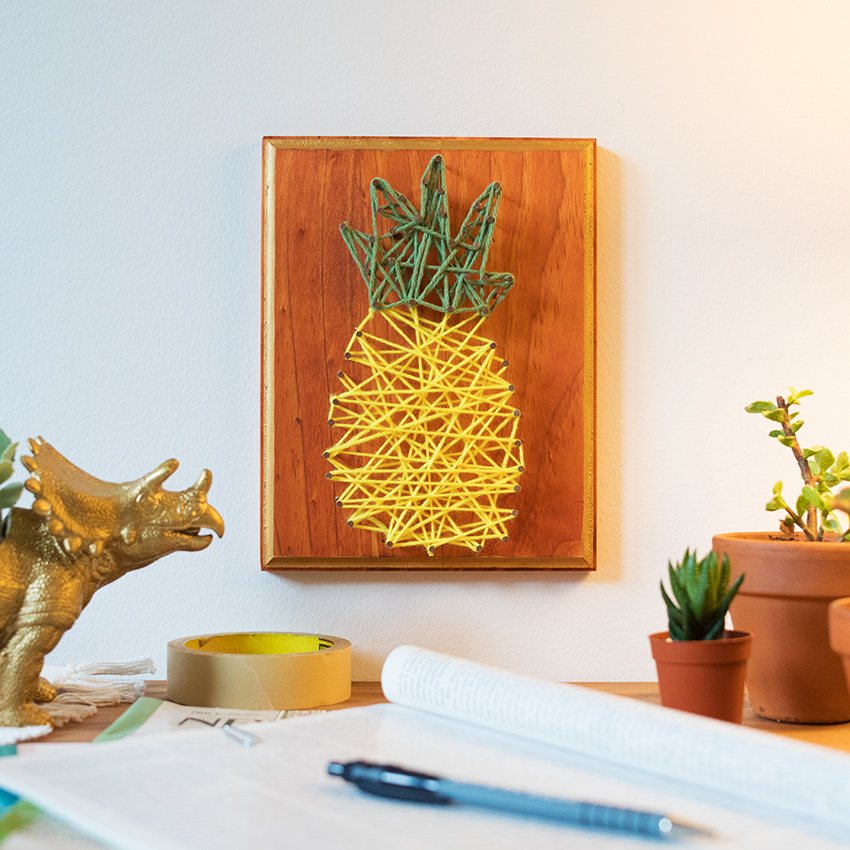
Finally, hang your DIY pineapple string art on the wall for everyone to enjoy!
I promise your friends will ask where you got this adorable piece of art — and they'll be blown away when you say you made it yourself.
Please SHARE this article with anyone who loves the pineapple decor trend!


