Preserving food is an age-old tradition that not only is incredibly practical but also can be wonderfully fun (and hilariously messy if you’re an enthusiastic yet somewhat out-of-practice chef like I am). And while canning might seem like a food-related practice that is more suited to those who lived back in the pioneer days, it can also be a handy hobby for those who grow their own produce, live off the grid, or just like to keep fruits and vegetables around all year long. Since this is the second summer I’ve enjoyed picking strawberries from my own little backyard patch, it seemed like the perfect time to try canning and preserving my own food.
There are plenty of options when it comes to preservation methods, including traditional techniques like curing, freezing, boiling, sugaring, pickling, jellying, burying, and fermentation. There are also more modern methods like pasteurization, vacuum packing, artificial additives, and even sci-fi-sounding processes like irradiation, pulsed electric field electroporation, modified atmosphere, nonthermal plasma, biopreservation, and hurdle technology.
There are even more options when it comes to the kinds of food you can preserve. You can opt for peppers, corn, carrots, beans, peas, tomatoes, cucumbers, apples, peaches, berries, cherries, plums, pineapple, lemons… the list goes on and on.
Because this was completely new to me, and I was sure there was a good chance I would screw up at least one aspect of this process, I thought I would play it safe and try preserving three different kinds of food using three different methods. I opted for strawberries, peaches, and peppers due to the fact that the preserving processes seemed like ones I could actually manage (i.e., not terribly time-consuming, not wildly complicated, and not requiring any pricey kitchen equipment that I don’t have). I also thought these three choices might be ones my family would actually enjoy — no sense in preserving something that no one wants to eat anyway.
After deciding which types of tasty treats I was going to preserve, I was on my way!
Preparation

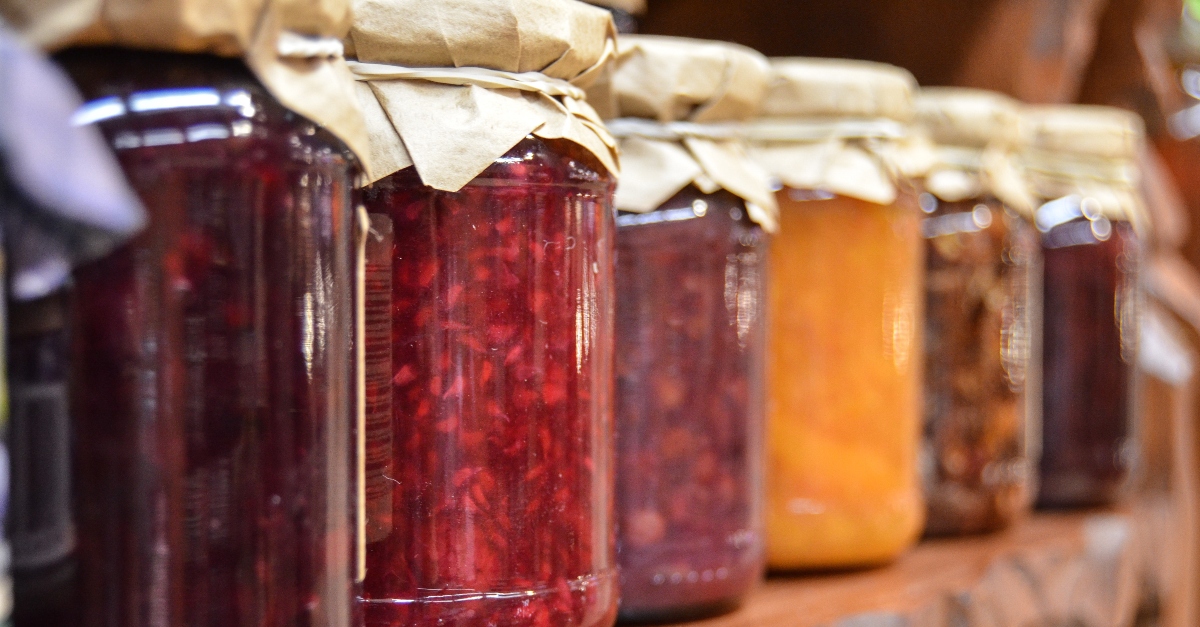
The first step was to pick up a variety of jars, and although I chose ones I thought would be the best size for peaches, peppers, and strawberry jam, I was also somewhat swayed by the adorable decorative lids.
When I got home, I popped the jars into a sink of soapy, scorching hot water to clean and sterilize them.
Strawberry Jam: Ingredients

- 2 lemons
- 4 cups sugar
- 3 pints strawberries (it turns out my kids had eaten most of the ones from the garden, so I picked up additional strawberries from the grocery store)
Strawberry Jam: Process

Ina Garten’s Fresh Strawberry Jam recipe from the Food Network website seemed like the perfect option for my first attempt at making this sweet classic, thanks to the fact that it was super straightforward.
You start by washing and coring your strawberries as well as washing and zesting the lemons. Next, in a saucepan or pot, add the sugar, lemon zest, and the juice from the lemons. Cook over low heat until the sugar is dissolved.
At that point, pop in the strawberries and cook them for about 20 minutes, which is when they’ll start to soften and release their juice. I felt like the strawberries weren’t breaking down enough, so I threw them in my blender for a few quick pulses before tossing the mixture into my older, reliable pot to cook further.
When the jam starts to thicken, you can test to see if it’s ready by smearing a small amount on a cold plate and swiping the blob in half. If the two sides stay separated, then your jam is ready. If it’s still so liquidy that it runs back together, then you need to keep your jam on the heat for a little longer.
Once the jam is ready, dip your jars into hot water to warm them up (just get the outside wet, not the inside of the jars like I accidentally did at first). Then pour the hot jam into the jars. Do not add hot jam to cold or warm jars, or the glass might break.
Pop on the lid and refrigerate your jam before enjoying the deliciousness.
Strawberry Jam: Finished Product

I was thrilled to have just enough jam to fill the six jars that I had put aside, managing to spill only a tiny bit (although that tiny bit resulted in a pretty sticky situation). The jam solidified pretty quickly and already smelled amazing. I was incredibly eager to try it out once it had cooled down.
Strawberry Jam: Verdict

Me: I don’t have much of a sweet tooth, so I only like jam when I’m really in the mood for it. However, I loved this jam. It was pure strawberry deliciousness that wasn’t too sweet and had a slightly unique kick thanks to the lemon zest. Frankly, the jam is so nice, I’m going to give my mom and sister a few jars as a gift for the holidays.
Husband: “It has a nice tang and zip from the lemon zest, but it’s not overly sweet. This would be perfect for my morning toast. I can’t wait to try it in my next PB&J.”
Kid No. 1: Didn’t want to try it because he’s not a fan of jam and had a cold so probably wouldn’t have been able to truly taste it anyway.
Kid No. 2: “That's so good. That’s REALLY good!”
Peaches: Ingredients

- 20 peaches
- 3 cups sugar
- 6 cups water
- 1 lemon (I didn’t realize I’d need a lemon, so didn’t include one in the photo)
Peaches: Process

I turned to Fabulessly Frugal for guidance on how to preserve peaches, and although the process was a little slimy, it was also easy and fun.
First, wash off your peaches and place them in a pot of boiling water for 30 to 60 seconds. Have a bowl of ice water ready, and quickly pop the peaches into the cold water right after putting them in the boiling water. Once the peaches have cooled off, take them out of the cold water. The skin will easily peel off. It’s super cool, though this is where things get a little slimy.
To keep the peaches from turning brown, you can then squeeze some lemon juice on top.
Next, cut your peaches into halves or quarters (I did both) while getting rid of any brown spots.
For the syrup, you’ll need to decide if you prefer it light (2 cups sugar), medium (3 cups sugar), or heavy (4 cups sugar). Add the desired amounts of sugar and 6 cups water to a pot and bring the mixture to a simmer.
Finally, carefully pour the syrup into the jars, making sure that the peaches are completely covered while also leaving a ½ inch of space at the top. Slide a butter knife or chopstick down each side of the jars to remove any air bubbles. Pop on the lids, and you’re done.
Peaches: Finished Product

The original four jars I had set aside for peaches filled up quickly, but thankfully I had some empty spaghetti sauce jars to preserve every last bit. I was really hoping these peaches would taste good; otherwise, I had just wasted a lot of fruit.
Peaches: Verdict

Me: I tried them 24 hours later, and yum! The outsides of the peach slices were slightly softened from the syrup, and the insides were still perfectly fresh and looked like I had just cut them open. The peaches reminded me of the peaches in the canned fruit cocktail I used to have as a kid, but because I had used the medium amount of sugar, the syrup wasn’t overly sweet.
Husband: “The peaches still tasted ripe. The syrup was nice and light — it wasn’t too heavy at all.”
Kid No. 1: “It tastes like a peach.” When asked about the texture, he said, “It was squishy.”
Kid No. 2: “It’s so good! It just tastes like a normal peach.”
Peppers: Ingredients

- 2 red bell peppers
- 2 yellow bell peppers
- 2 orange bell peppers
- 4 jalapeño peppers
- 1 bulb of garlic
- Olive oil or vegetable oil
- Optional: chili powder, rosemary, basil, cumin, or any herbs and spices that you fancy
Peppers: Process

Chili Pepper Madness seemed like the perfect place to get tips on how to preserve peppers, and while this method apparently won’t keep peppers as long as other techniques (unless you freeze them), it was incredibly simple and very customizable, so it felt like a great place for a novice.
The first step was to roast the peppers, which I didn’t realize until after it had gotten dark outside. Although I could have roasted them in my kitchen, my husband was willing to fire up the barbecue to give them a quick char.
The next step is to remove the skin and either slice your peppers into halves or leave them whole and make a slice in the side so that the oil can penetrate. If you don’t like hot peppers, then you might want to remove the seeds. But if you prefer a kick, leave ‘em in!
Next, simply put the peppers in the jar and add the garlic cloves (as well as any additional herbs that you wish) as well as the oil. Pop the lid on the jars, and refrigerate immediately.
Peppers: Finished Product

I probably could have fit all of the bell peppers into one jar, but I was reluctant to squish them, so I played it safe with two jars.
As for the jalapeños, four didn’t even come close to filling the jar, so if I try this again, I’ll probably preserve eight to 10 peppers in one jar.
Peppers: Verdict

Me: I have to confess that I hate peppers. And apparently I hate preserved ones just as much as fresh ones. If you like peppers, these are probably great, and I’m thrilled with how they turned out… but I still think they taste nasty.
Husband: “First off, you get the smell of garlic and peppery spiciness.” After frying them up quickly in the oil that they’re preserved in and adding a few to his burger, he added, “They’re nice and soft with a garlicky kick.” He liked them so much, he ended up putting a few more on his burger before finishing it.
Kids Nos. 1 and 2: Neither kid was eager to try the peppers, which was a surprise to me but fine with my husband. He’ll happily eat them all.
Final Thoughts

I really enjoyed these simple preserving techniques and felt like they were each a success. I was so pleased with the outcome that I definitely want to try these methods again (perhaps with a little twist here and there) and possibly attempt other foods. I might even have to set up a shelf for my preserves in my cellar before I run out of room in my fridge!