Watching your kids grow is a delight, but there's also a bittersweetness to it as you realize how time is passing. Jessika Reed knew the feeling all too well.
The graphic designer, photographer, blogger, and mother of two felt the pang when she realized that both of her children had outgrown the changing table.
It might seem like a strange thing to focus on, but for Reed, the table held memories of her children as little babies.
But being a creative sort, Reed realized that she could both hang onto the beloved changing table while still getting rid of an unneeded piece of furniture. How?
With some clever DIY of course. It's the perfect way to turn something old into something new, like how an old door can become a quirky coffee table.
When she was done, she'd turned her old changing table into something functional, stylish, and new. In fact, you would never guess it had been a changing table at all!
Check it our below, and you might get inspired to turn one of your old somethings into a new something!
[H/T: Hip & Simple]
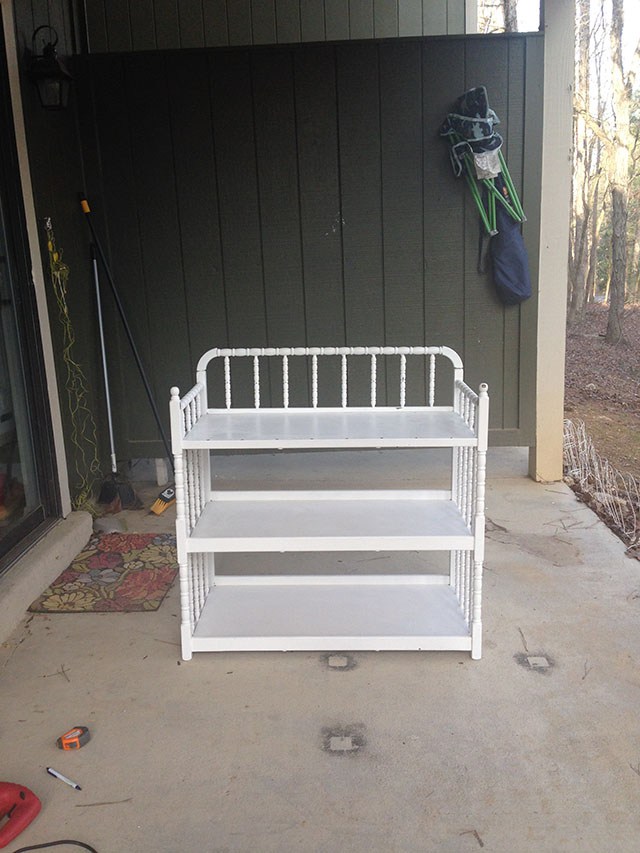
Jessika Reed knew there was no more use for her changing table now that her two children had outgrown it, but it had become a sentimental piece for her, and she didn’t want to part with it.
So the only solution? To turn it into something useful she could continue to treasure!
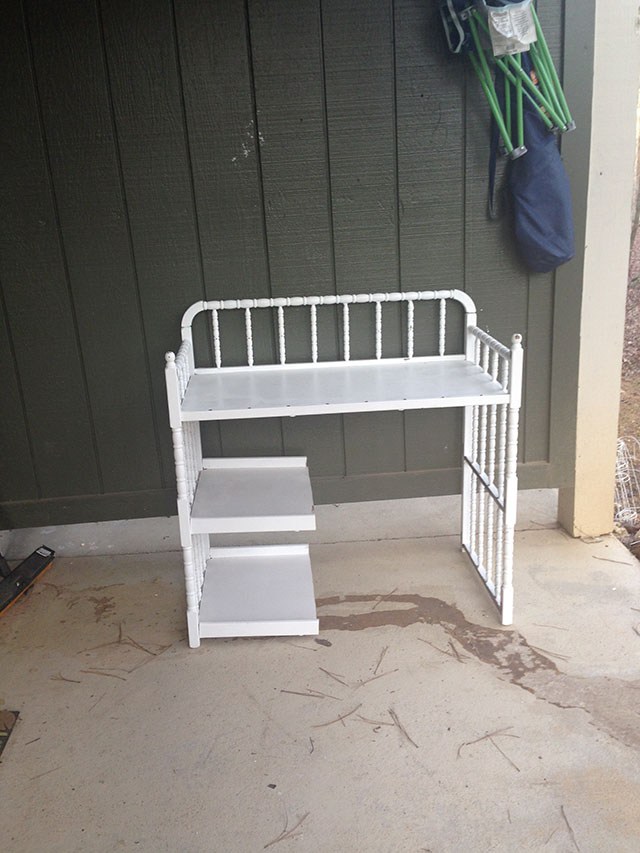
First, she sawed the bottom two shelves in half. She planned on turning the changing table into a desk, and so creating a space underneath would allow her to sit at it comfortably.
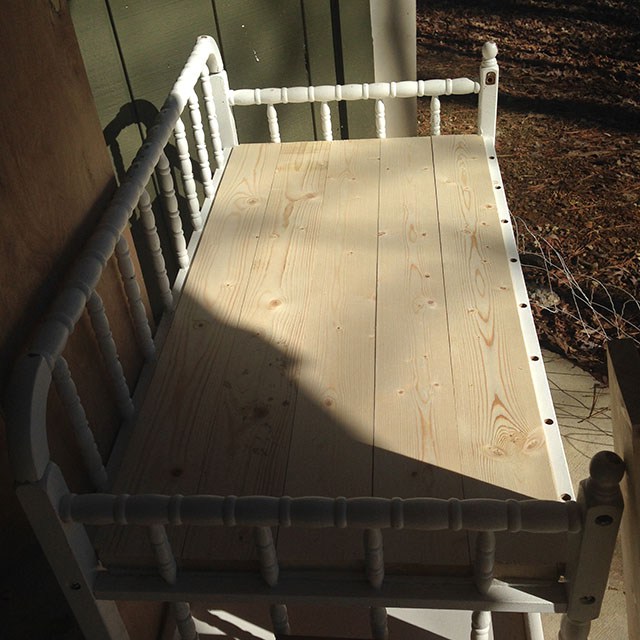
Reed planned to put a printer on the desk, and they’re heavy! That means that the relatively thin shelves had to be reinforced.
She layered some planks on top, and also attached wooden lips and a backing support to the two half-shelves below to make them sturdier. And then everything got a thorough sanding.
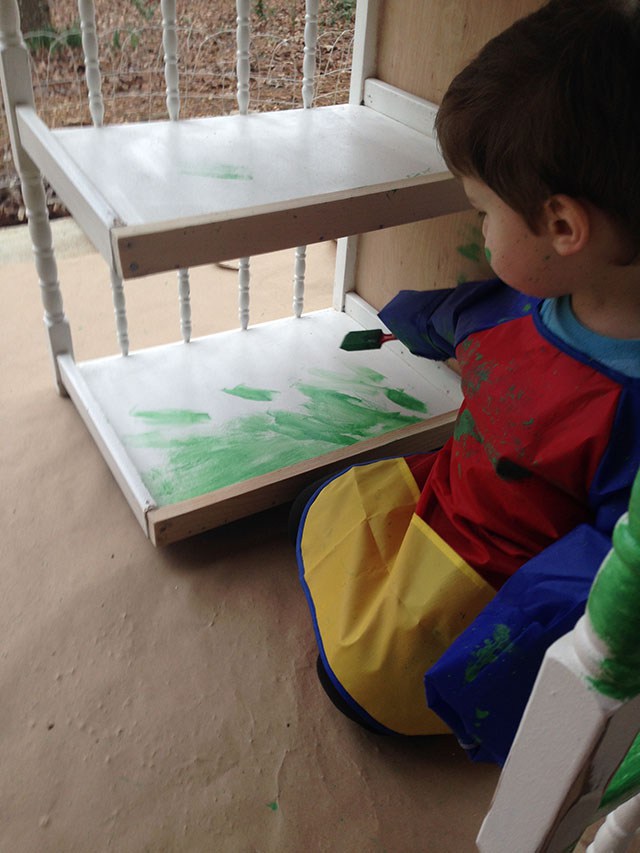
Next came the paint job. The choice of bright green even surprised Reed!
“I kept envisioning green," she says. "Which is very odd for me. I like to keep things neutral and mix up the fun with pops of color in pillows or blankets and decors, but I couldn’t shake the green feeling. So I went with it.”
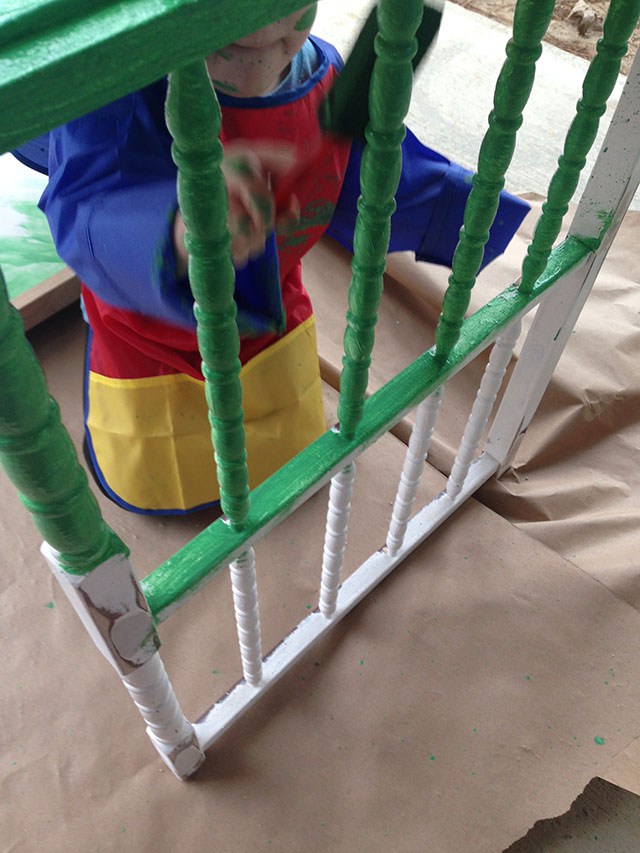
She also recruited a helper, but was still a little uncertain about the color, even taking a week off from the project to think about it. But in the end, she stuck with it.
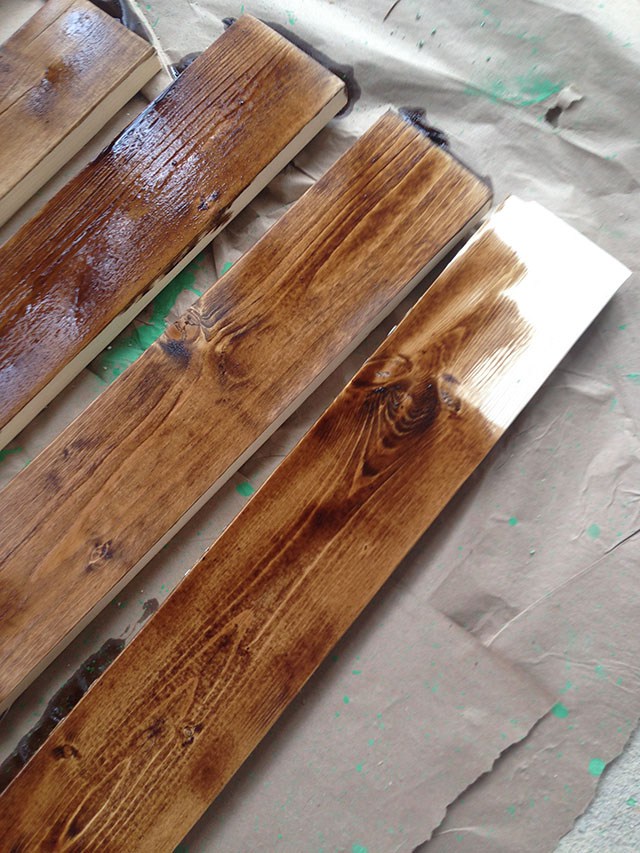
Things started coming together when she opted for a dark stain for the top.
With this dark wood color and some distressing of the green, it went from “primary and kiddish” to sophisticated.
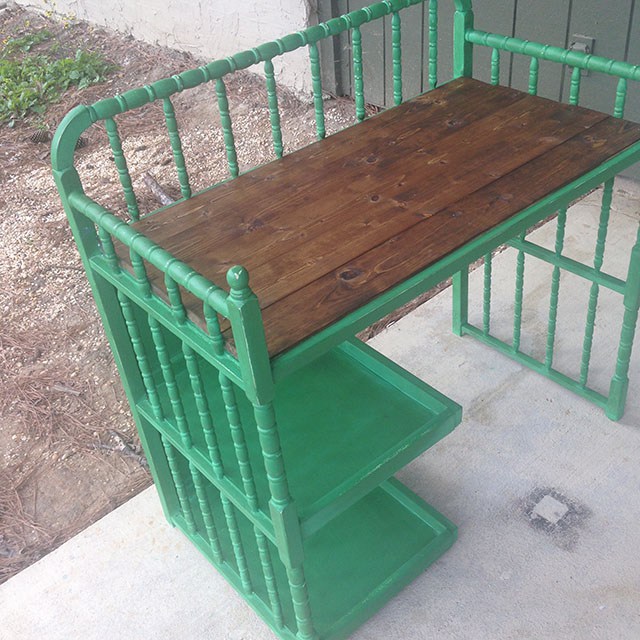
And it was all coming together. Because the desk is relatively small, the bright green doesn't seem so overpowering, especially when combined with the dark wood.
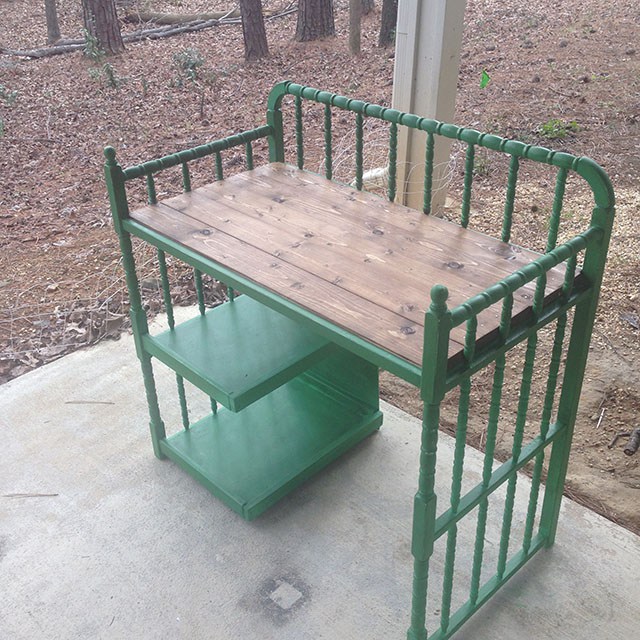
Large, exposed nail heads were used to attach the stained boards to the top shelf to keep with the rustic, shabby-chic look.
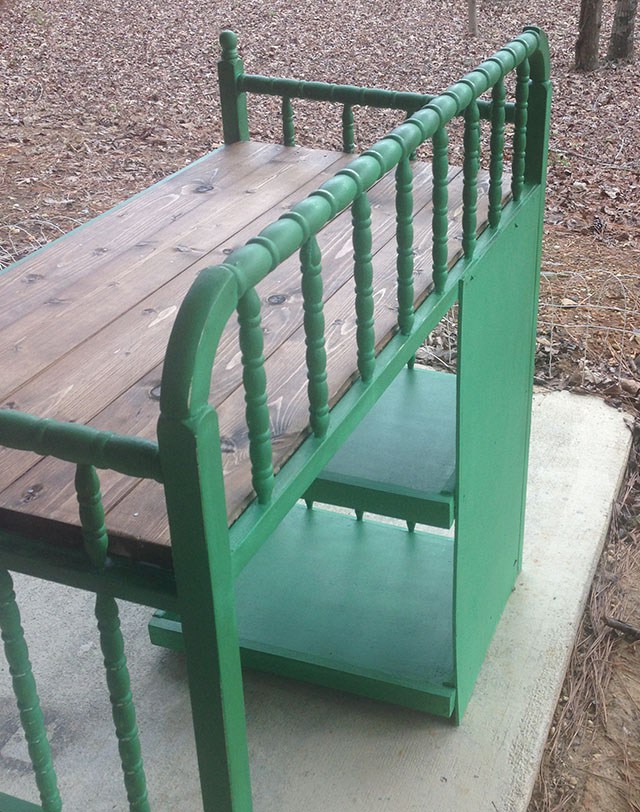
With just a few steps and some materials Reed already had at her house, she got a family heirloom to grow up, right alongside her kids!
Here, you can also see the piece of wood she attached to the back to support the lower shelves.
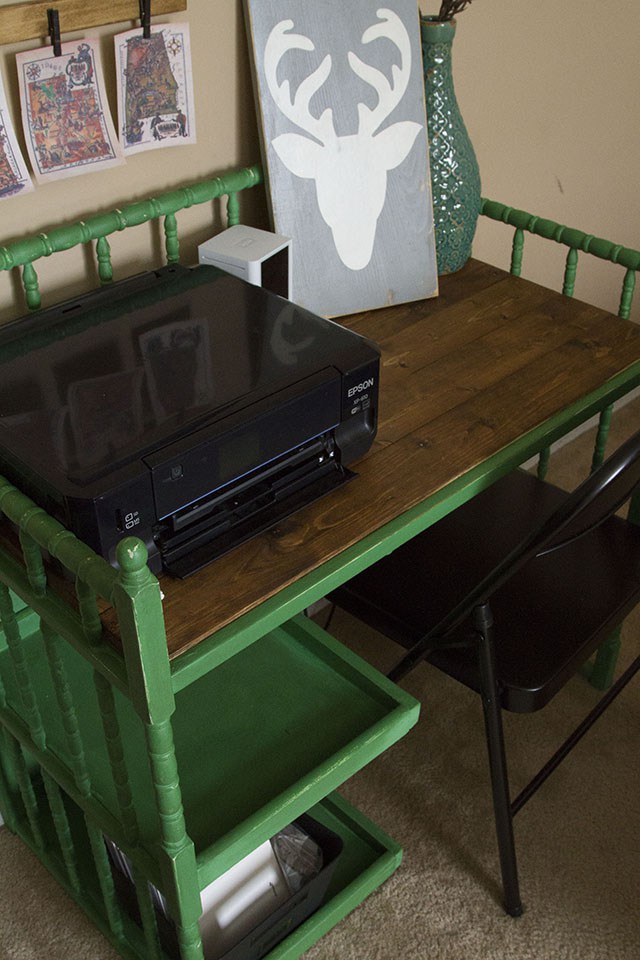
And of course, no DIY furniture project is complete without some accessories. Combined with a black chair, even the black printer looks at home.
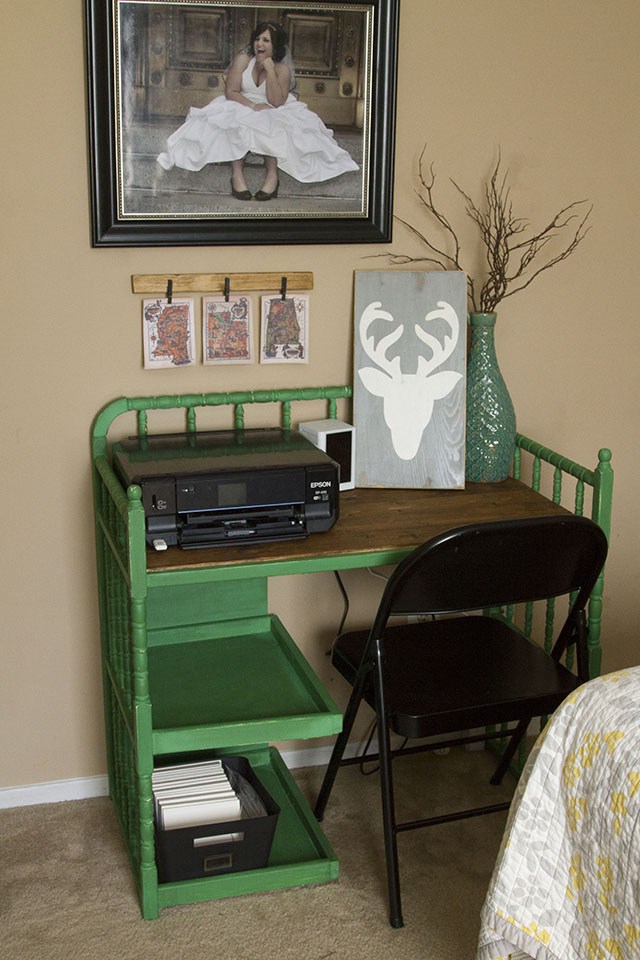
In the end, Reed was happy with it — even the green. She now has a dedicated space for her laptop and printer, as well as some extra space below, and she got to hold onto the beloved changing table.
This project is a great way to extend the life of a piece of furniture by turning it into something else. Check out the rest of Reed's blog for more DIY ideas!
Please SHARE if you love preserving sentimental items in creative ways!


