Groundhog Day is in the rearview mirror and we’re gearing up for spring with some of the hottest trends for spring nails. Pantone recently announced their picks for spring colors of the year, and it’s looking like spring color trends are a refreshing mix of verdant greens, vibrant pinks, and nautical blues. We couldn’t be more excited to incorporate some of their amazing picks into our nail designs for spring. So far, most of the major spring nail trends are a continuation of designs we saw in 2016. Flowers are going to continue to be super popular, but we’ll see an emergence of unique spring nail designs like negative space and color blocking. Below, we’ll take a look at some of the must-have manis and cute spring nail designs that you’ll want to show off as the weather turns warmer. If you also want to include 2017's spring nail colors in your nail art, here's some Pantone-inspired nail polish colors you can try with the designs:
- OPI “Green-wich Village”
- China Glaze “Sunshine Pop”
- Azature “Lapis”
- Essie “Seen on the Scene”
- Zoya “Hunter”
- China Glaze “Sun Worshiper”
Thumbnail Photo: karanailedit / frecklepusnails / motivation_nails
Negative Space Spring Nail Designs
Stay on trend this spring by incorporating some eye-catching negative space into your spring nail designs. In art, negative space is the area around the subject, rather than the subject itself.
To get the look for your nail art, simply leave part of your nail au naturel by applying a small sticker or nail tape before you begin painting. Check out these three examples that highlight the many options for negative space, one of the hottest spring nail designs.
1. Grownup My Little Pony
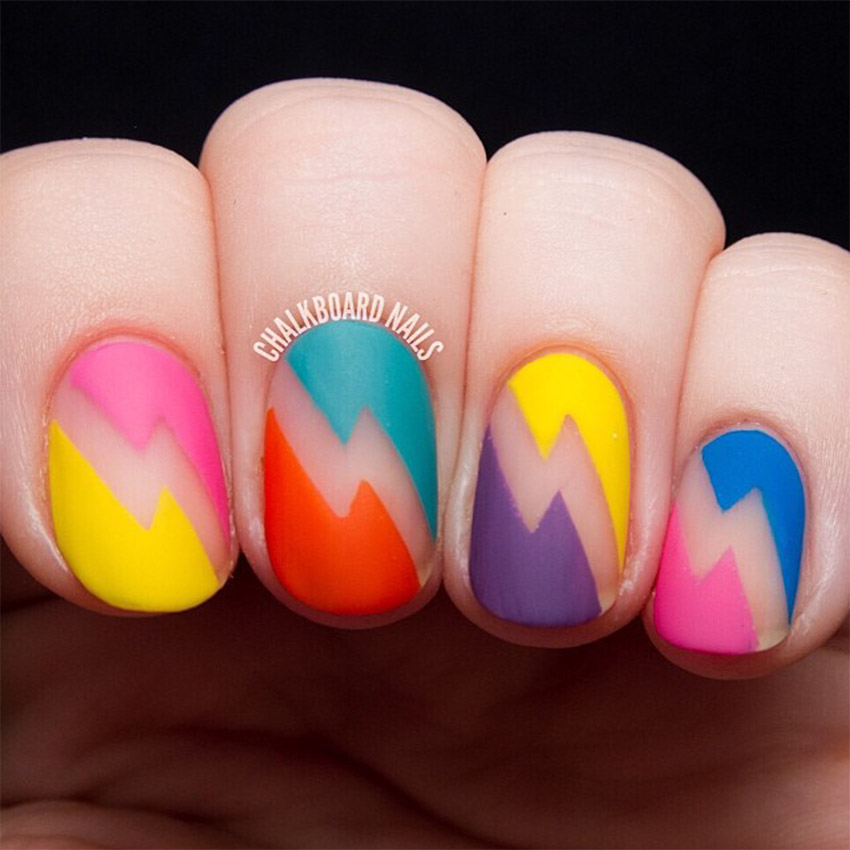
Nail artist Sarah Waite channels our inner little girl with this throwback nail design in classic 1980s colors with negative space lightning bolts.
How to copy this spring nail art:
- Apply nail tape in the shape of lightning bolts to clean, unpainted nails.
- Paint different colors on either side of tape and let dry completely.
- Remove tape.
- Finish with a matte top coat.
2. Hearts
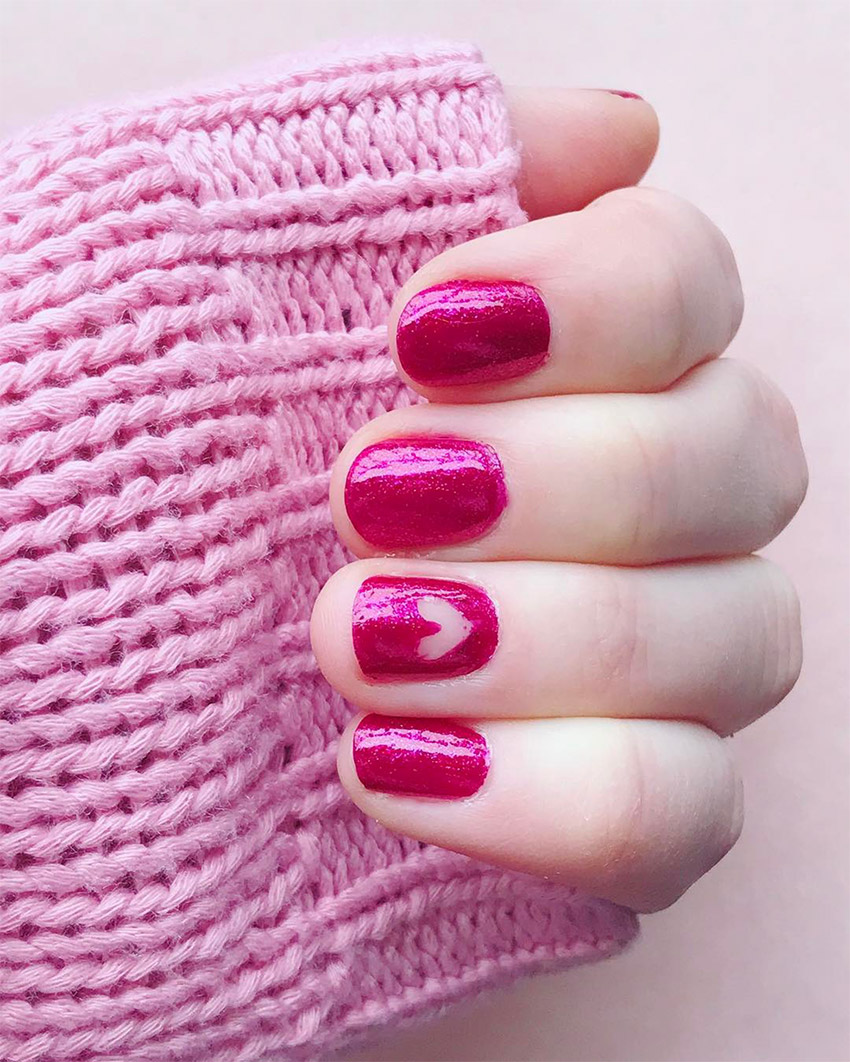
Using OPI’s trendy color Let Me Entertain You, Kara opted for monochromatic nails with one simple, unpainted heart on her ring finger —hint, hint!
How to copy this spring nail art:
- Apply a heart-shaped nail sticker to one unpainted nail of your choice.
- Paint your nails with the color of your choice and let dry completely.
- Remove sticker.
- Finish with a top coat.
3. Chevron Stripes
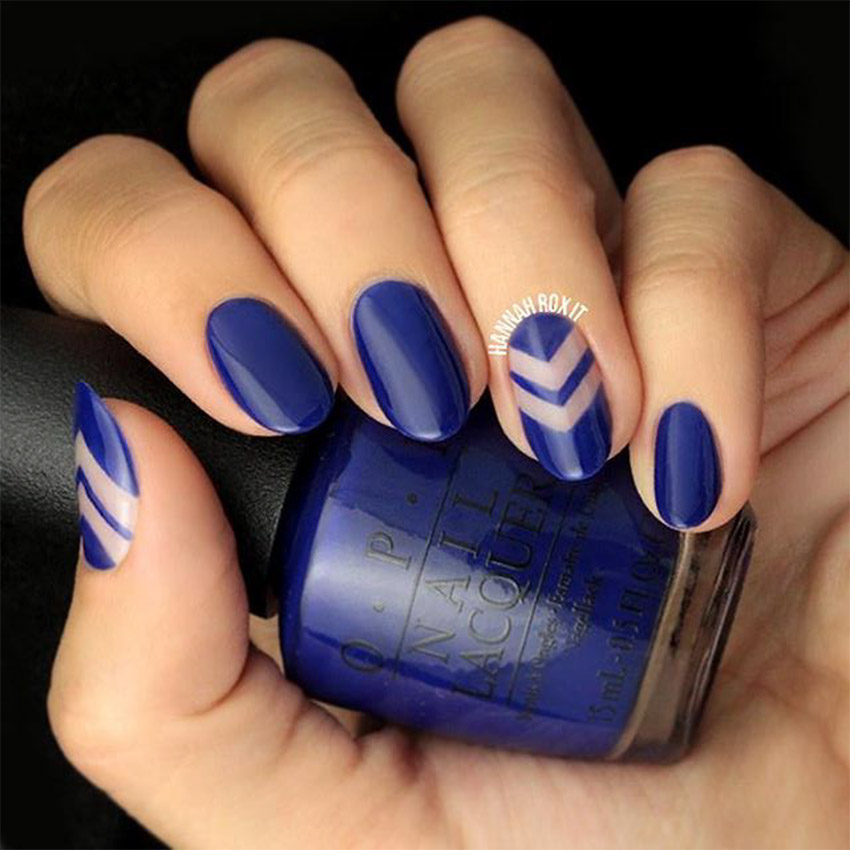
Want to glam up that negative space mani? Try this elegant chevron stripe manicure, brought to you by the Mani Monday blog. Instead of navy, opt for a brighter blue spring nail color, like Pantone’s lapis, or keep it simple for work with a light pink or beige tone.
How to copy this spring nail art:
- Apply nail tape in the shape of chevron stripes to two clean, unpainted nails.
- Paint your nails the color of your choice and let dry completely.
- Remove tape.
- Finish with a top coat.
Flower Spring Nail Designs
Nothing says spring better than flowers, and we’re definitely seeing a continuation of the flower theme in this season’s on-trend spring nails. Most flower designs are much easier to pull off than they look; you’ll need a good dotting tool and either a toothpick or second, smaller dotting tool. Check out this tutorial to learn how to create a basic flower shape. Let’s take a look at three of our favorite nail ideas for spring.
1. Simple Flowers
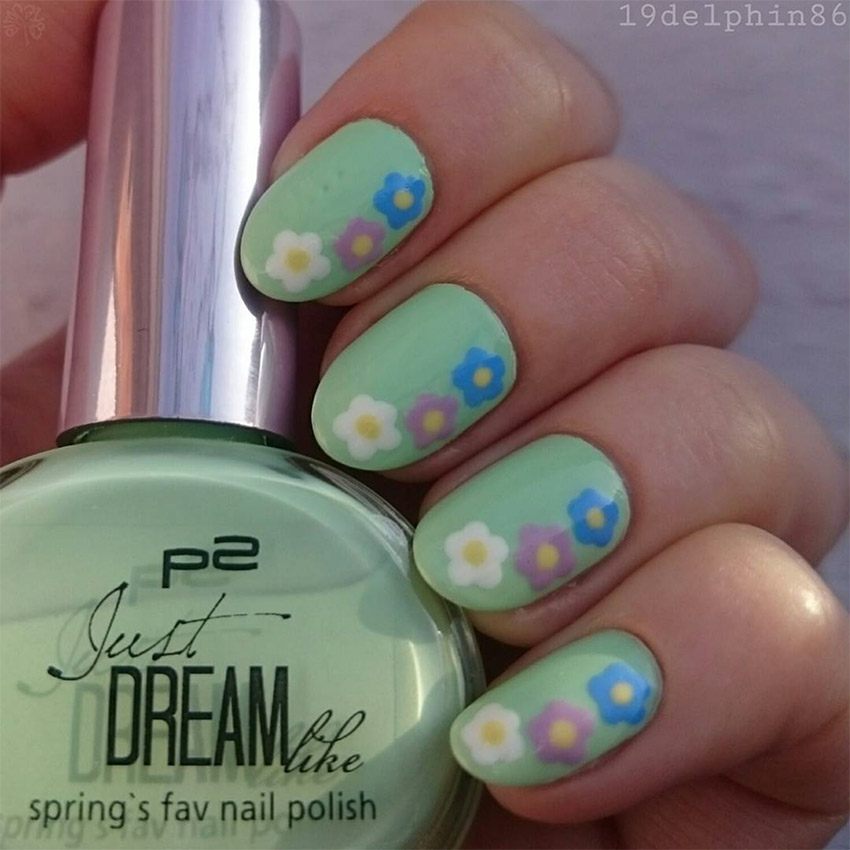
Three basic flowers pop against a soft green background on these cute spring nails by Instagram user 19delphin86.
How to copy this spring nail art:
- Paint your nails using any green color and let dry completely.
- Use the tutorial above to create three flowers along the side of your nail. You can opt to use three different colors or paint them the same color for a more classic look.
- Finish with a top coat.
2. Pastels And Lace
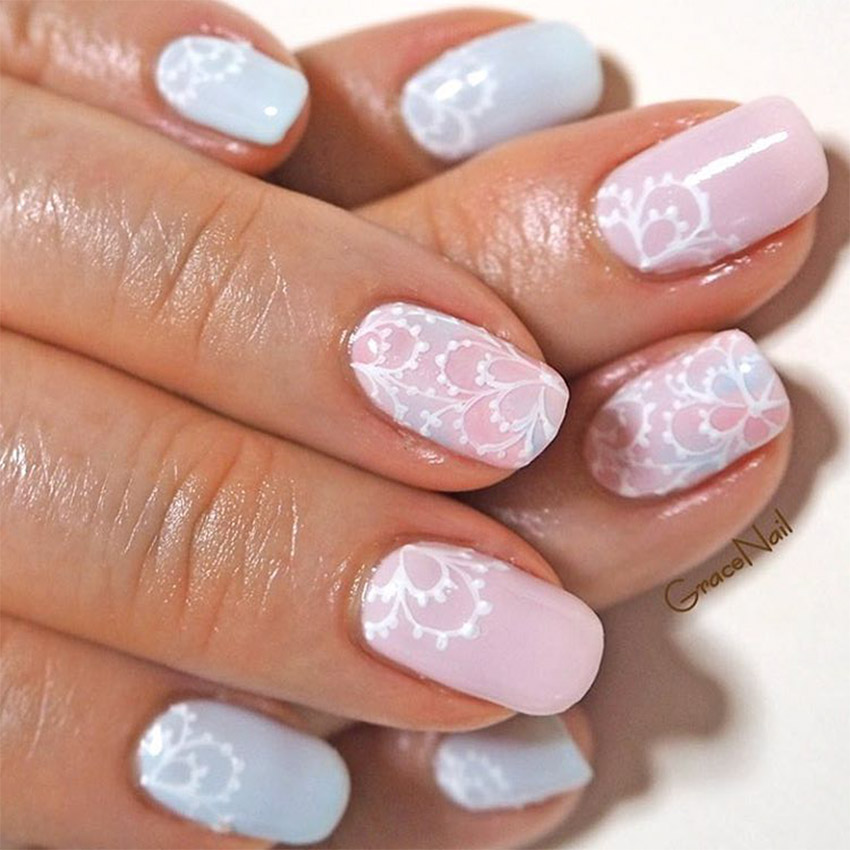
These delicate, lace-like white flowers are set against a soft pastel background by Instagram user gracenail. For a cheerier look that displays one of spring’s hottest colors, opt for a bright-yellow background instead of pink and blue pastels.
How to copy this spring nail art:
- Paint your base color and let it dry completely.
- Using a dotting tool, make the center of the flower with white polish.
- Using a thin nail art brush or toothpick, paint the flowers, working out from the center dot.
- Use a small dotting tool to dot along the petals of the flowers if you choose.
- Finish with a top coat.
3. Blue Flowers
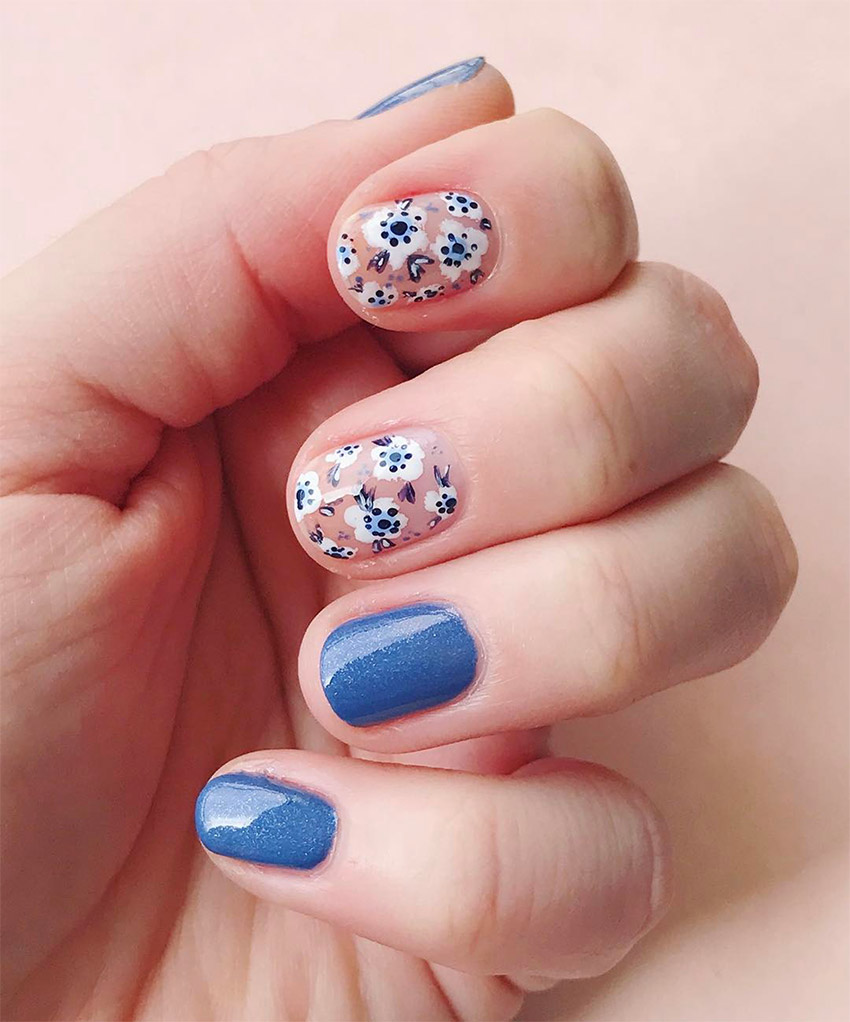
In her blog, nail artist Kara Summers gives a step-by-step video tutorial to help you snag this super-fun transitional look. We love how she incorporated a beautiful medium-blue, one of this season’s up-and-coming spring nail colors, with flirty, whimsical flowers.
Check out Kara’s easy-to-follow video tutorial to copy this spring nail art.
Cuticle Spring Nail Designs
Glitzed up cuticles are the name of the game this spring, and we’re starting to see this unique concept everywhere, including the runway at New York Fashion Week. Cuticle designs are a great option if you’re looking to try one of the easy nail designs for spring — you can paint just the cuticle, or incorporate cuticle design into your manicure. Either way, this is one of the spring nail trends we can’t get enough of!
1. Glitter Cuticles
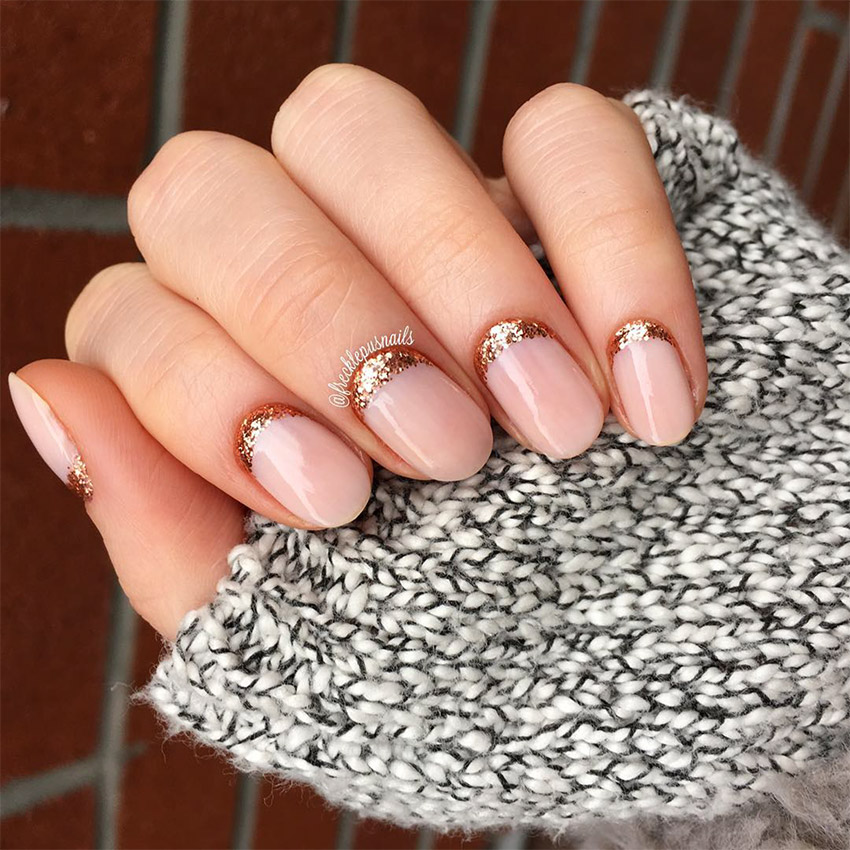
Simplicity and sparkle are in perfect harmony on this beautiful manicure. Using a sheer nude as a base, this blogger added a gold stripe along the cuticle to really make her nails pop. This is a perfectly sophisticated way to copy one of the hottest spring nail designs.
How to copy this spring nail art:
- Paint your base color and let dry completely.
- Gently apply a piece of half-moon nail tape about 1/4 of the way up your nail.
- Using the glitter color, apply the paint below the nail tape, extending down to the cuticle.
- Finish with a top coat.
2. Outlined Cuticles
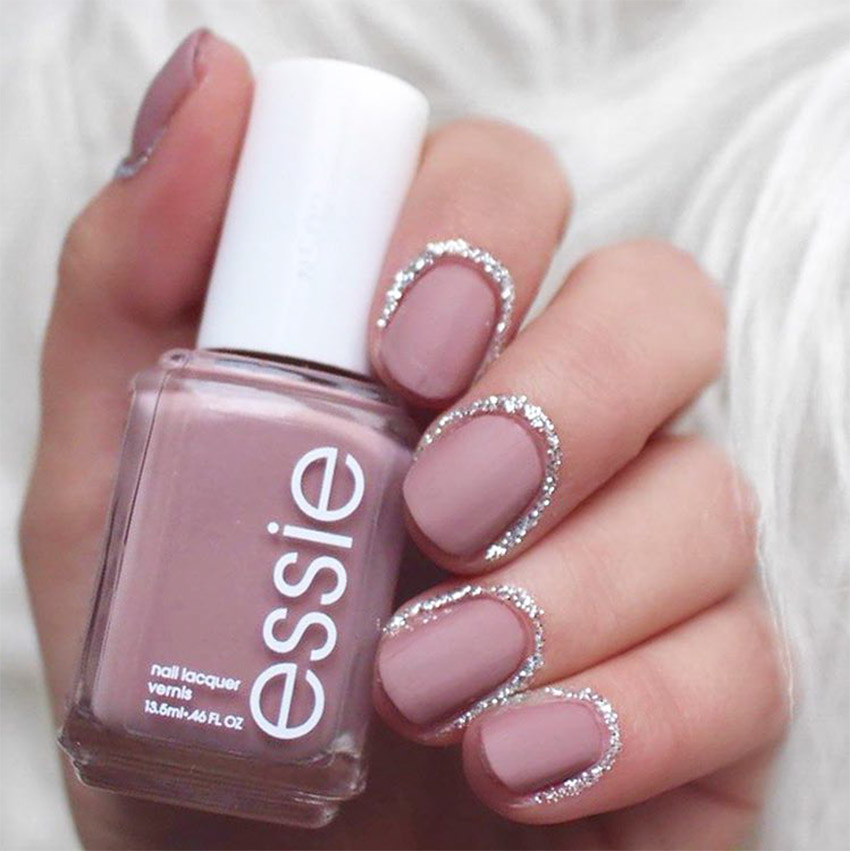
Think outside — well, the cuticle with this unexpected twist on glitter cuticles by nail blogger Harli G. Here. Here, a thin strip of glitter lines the skin around the nail instead of the cuticle. Change up the matte pink for one of the cute nail colors for spring, and voilà — the perfect manicure that’s fresh and fun for spring!
How to copy this spring nail art:
- For this unique mani, you will need loose glitter and a liquid bandage product, which is a paint-on solution for small cuts on skin. Liquid bandage can be purchased at any drugstore.
- Paint your base color and let dry completely.
- Paint a thin strip of liquid bandage around your cuticle.
- Immediately dust on the loose glitter and shake or tap it off. The result will be a thin strip of glitter around your nail.
Pastel Spring Nail Designs
Pastels are all the rage when it comes to cute nail colors for spring, and the good news is you don’t have to choose just one! You could opt for several different shades of the same color, or you could paint a pastel rainbow with a different color on each nail. Either way, you can’t go wrong with these cute spring nails!
1. Pastel Rainbow
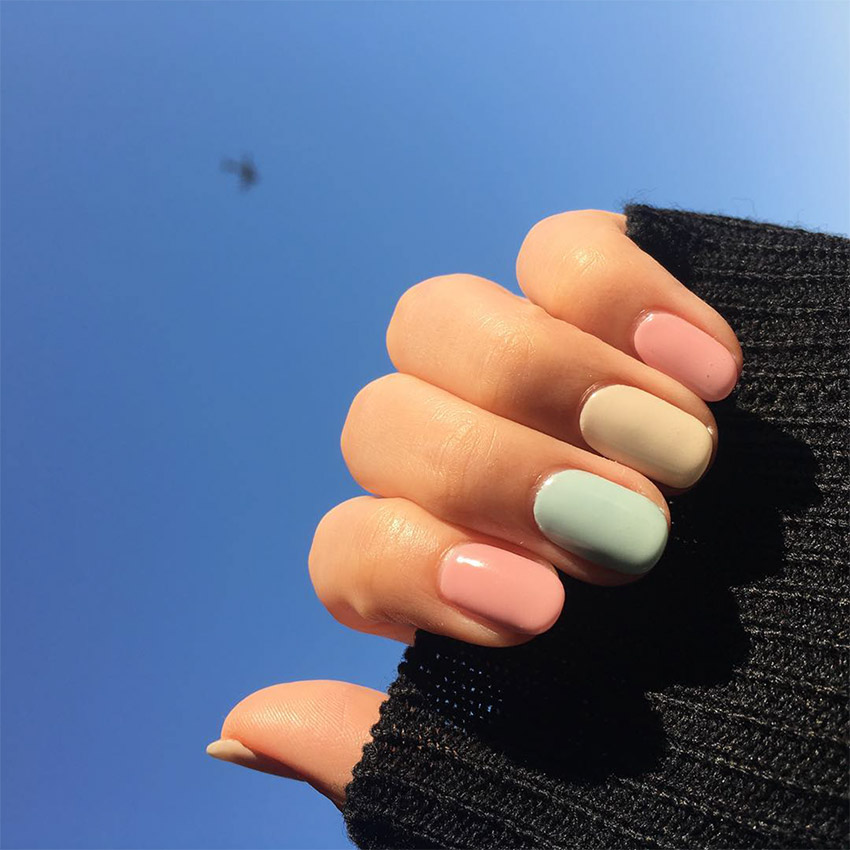
Instagram user asa._.yoko inspires us with this beautiful spring mani that simply uses a different pastel color for each nail. Nothing complicated here, but the effect is light and springy.
To try this easy nail design for spring, simply choose five of your favorite pastels and paint each nail a different color. You could paint them randomly, or you could follow ROYGBIV for a rainbow effect.
2. Ombré Pastels
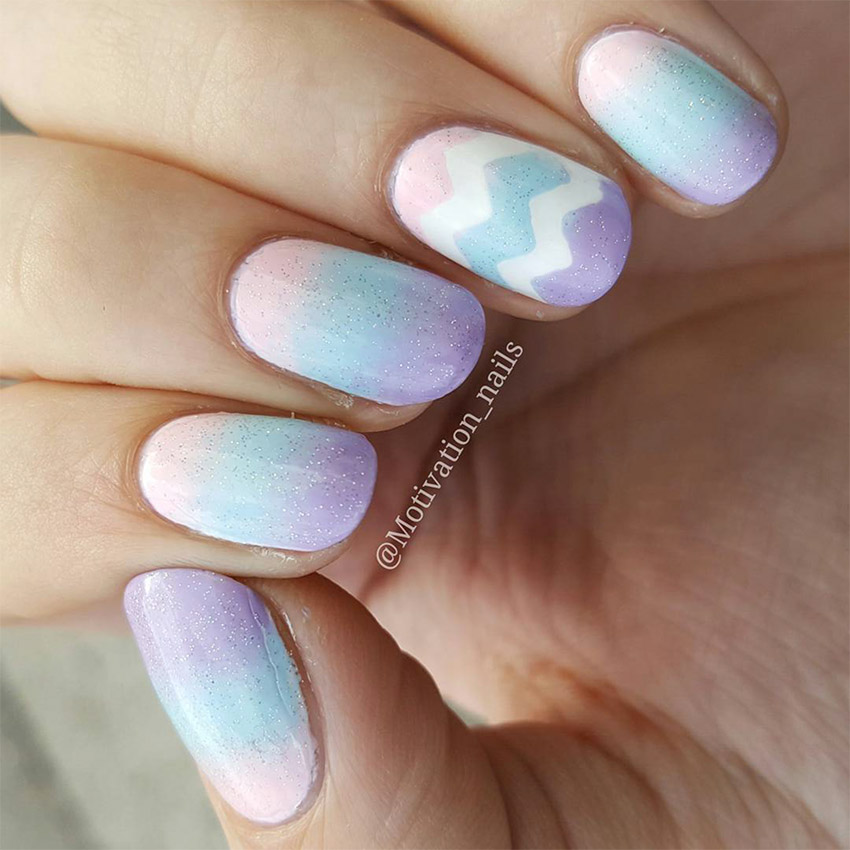
We love how motivation_nails gave her pastels an upgrade by putting them all on one nail for a pretty ombré effect and covering them with glitter. She painted one nail on each hand/foot with gold glitter polish, but you could opt for silver, too. Either way, we love these cute spring nails!
How to copy this spring nail art:
- Paint your nails white or the lightest nail polish color from your ombré palette and let dry completely.
- Paint the two other colors in a row onto a makeup sponge and dab onto the end of each nail.
3. Easter Pastels
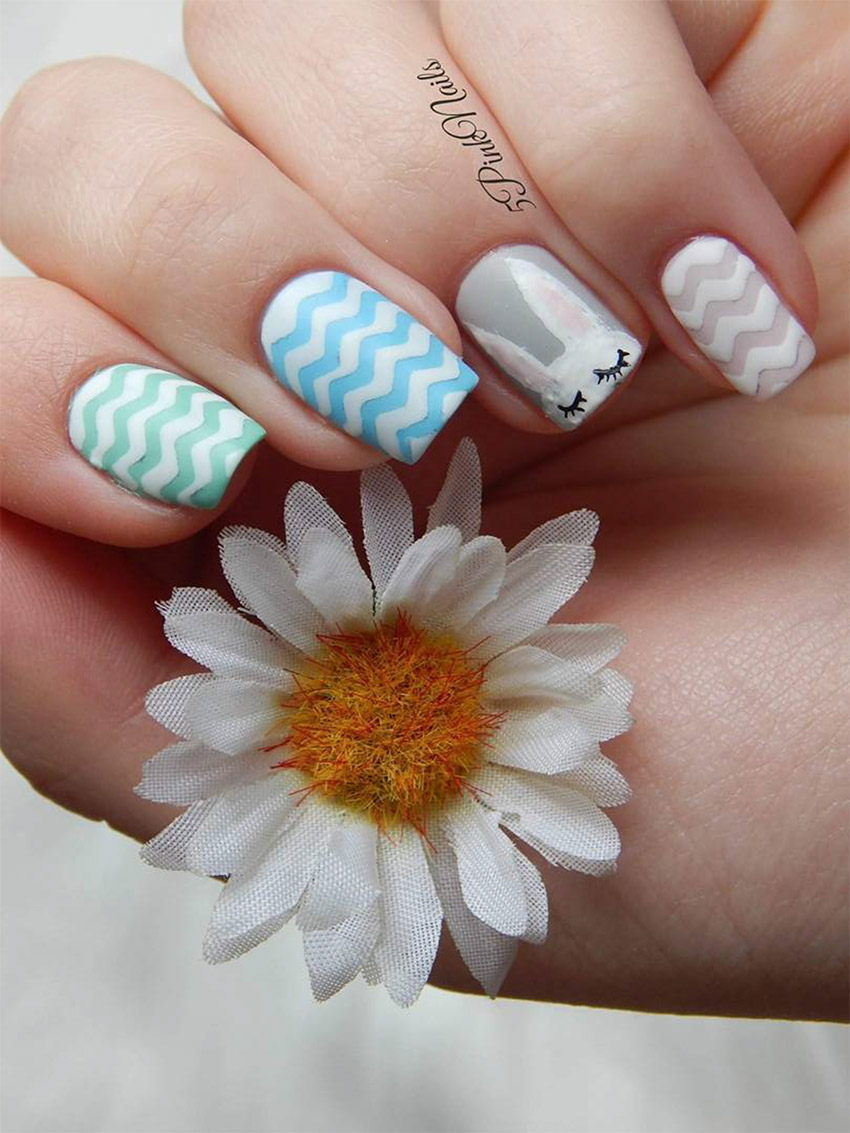
Instagram user 5pink_nails incorporated multicolored pastels and white chevron stripes as one of her spring nail designs and came up with an “egg-stra” special manicure.
How to copy this spring nail art:
- Paint your nails with pastel colors of your choice and let dry completely.
- Use a small nail polish brush or a toothpick to make white chevron strips.
- Let dry completely.
- Finish with a top coat.
Color Block Spring Nails
One of our favorite nail designs for spring is color block nails, simply because they’re fun, trendy, and limitless in their possibilities. Color blocking takes a bit more skill and patience than some other spring nail designs (check out this tutorial for the 411), but the results are totally worth it!
1. Pink On Pink
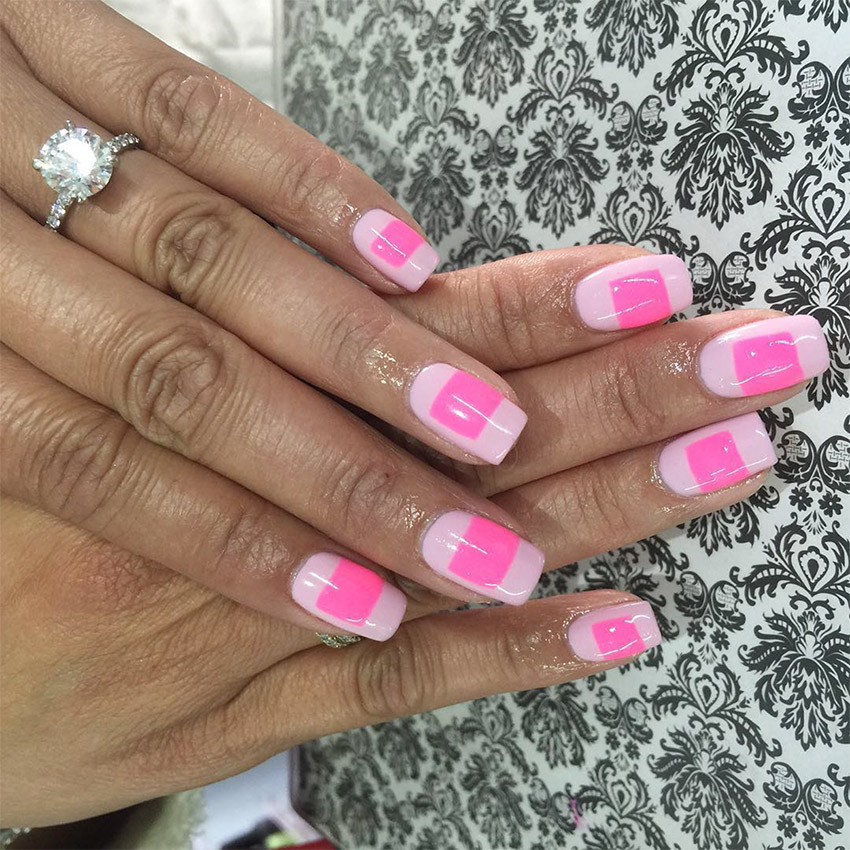
Using two cute nail colors for spring, Instagram user tootsietoessf created this pink-on-pink color block manicure. We love this fun, flirty combination!
How to copy this spring nail art:
- Paint your nails with a light pink color and let dry completely.
- Using nail tape as a guide or free-hand with a thin nail art brush, make a small, off-center box using a darker pink color.
- Finish with a top coat.
2. Random Color Block
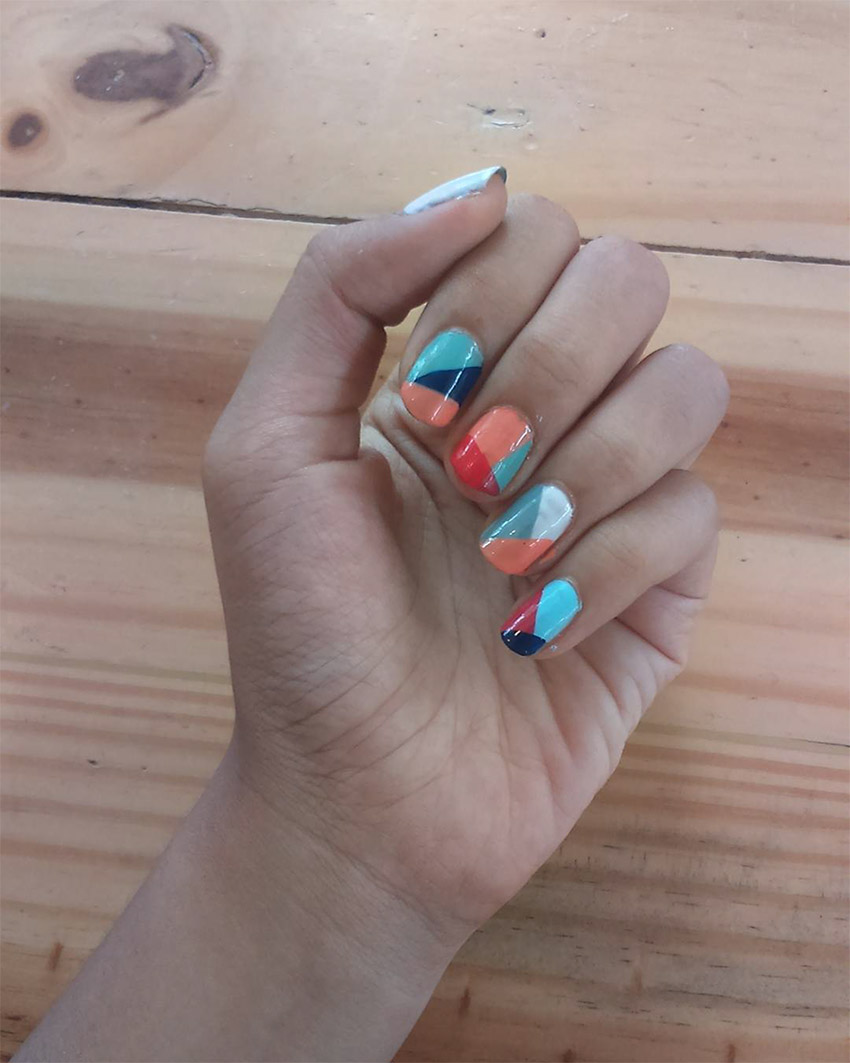
We can’t get enough of this professional-quality manicure using several of the most popular spring nail polish colors by Instagram user nailartyuk. You’ll need patience to pull this one off, since each nail is at least three different colors that will need to dry completely between layers. Another solution? Take this one to your professional manicurist!
How to copy this spring nail art:
- For each nail, think about the design you will use, and paint the lightest color first.
- Let dry completely.
- Use thin nail tape to block off a section of your nail, and fill it in with the second lightest color.
- Let dry completely.
- Use nail tape to block off another section of your nail and fill it in with the darkest color.
- Let dry completely.
- Finish with a top coat.
If you’ve found your perfect spring manicure here, be sure to SHARE this article!


