Every winter, adults and children alike await the eve of December 24, when Santa flies over rooftops and delivers presents to all of the good children. After all, what's more exciting than presents, cookies, and time off to spend with friends and family?
Just the thought of Christmas is enough to lift anyone's spirits. And at the center of all that good cheer is the North Pole, where Father Christmas lives and elves work around the clock, making presents.
We may not know where to find Santa's elusive North Pole, but luckily, we can bring a bit of that magic into our homes with a handmade North Pole street sign.
Just as Rudolph's red nose guided Santa one foggy Christmas Eve, your solar-powered street sign will automatically light up whenever it gets dark.
With this DIY North Pole sign in your home, it will feel like Christmas all through December. This easy-to-make sign is just what you need to tie all your holiday decorations together and create a touch of winter wonderland in your home.
Check out the materials and instructions below to learn how to make a North Pole street sign, and make sure to SHARE this craft with Christmas lovers on Facebook!
Supplies
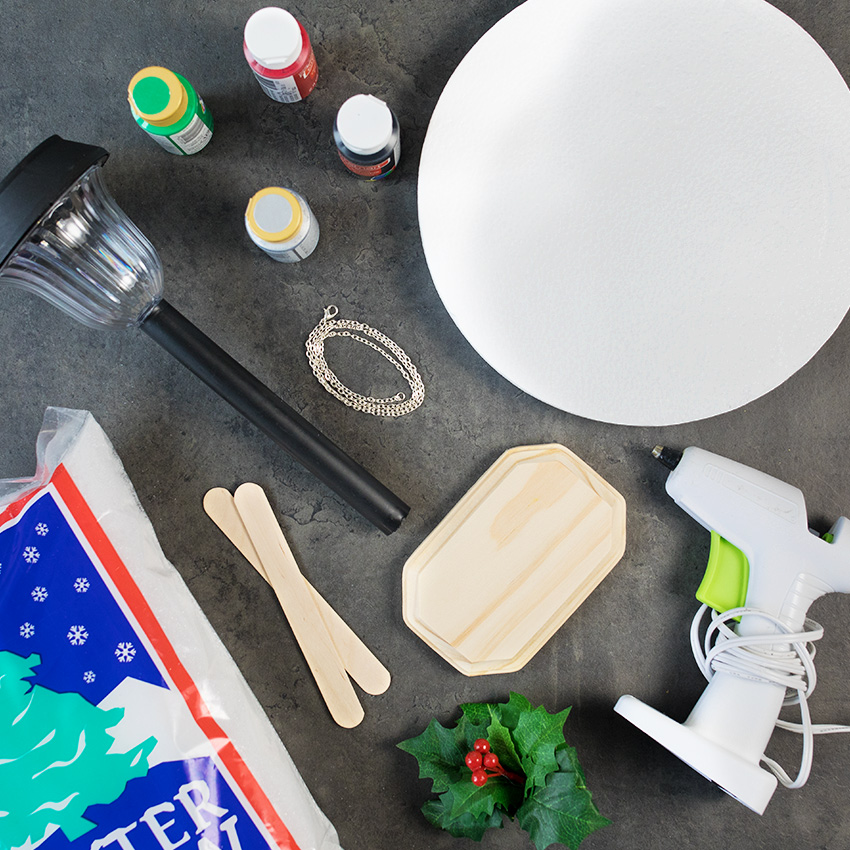
Instructions
Step #1: Paint Path Light
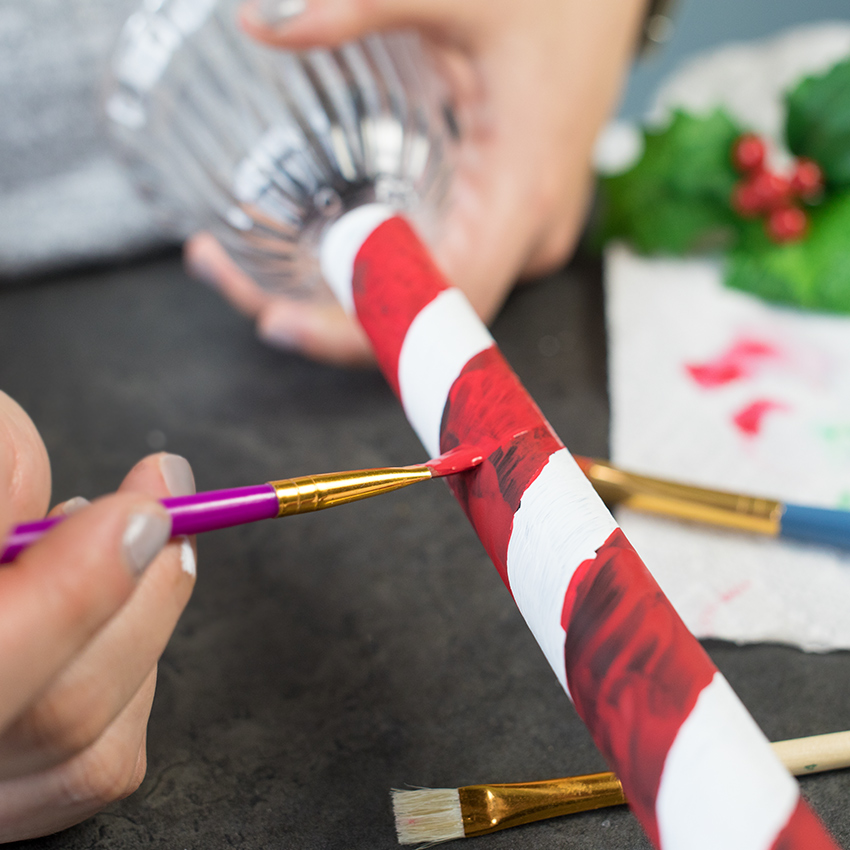
In a candy cane pattern, paint the pole of the light red and white, then leave to dry for a few minutes.
While the pole is drying, paint the cover of the light red, making sure not to paint over the solar panel.
Once the paint has started to dry, apply another layer of paint over everything. Let dry.
Step #2: Make North Pole Sign
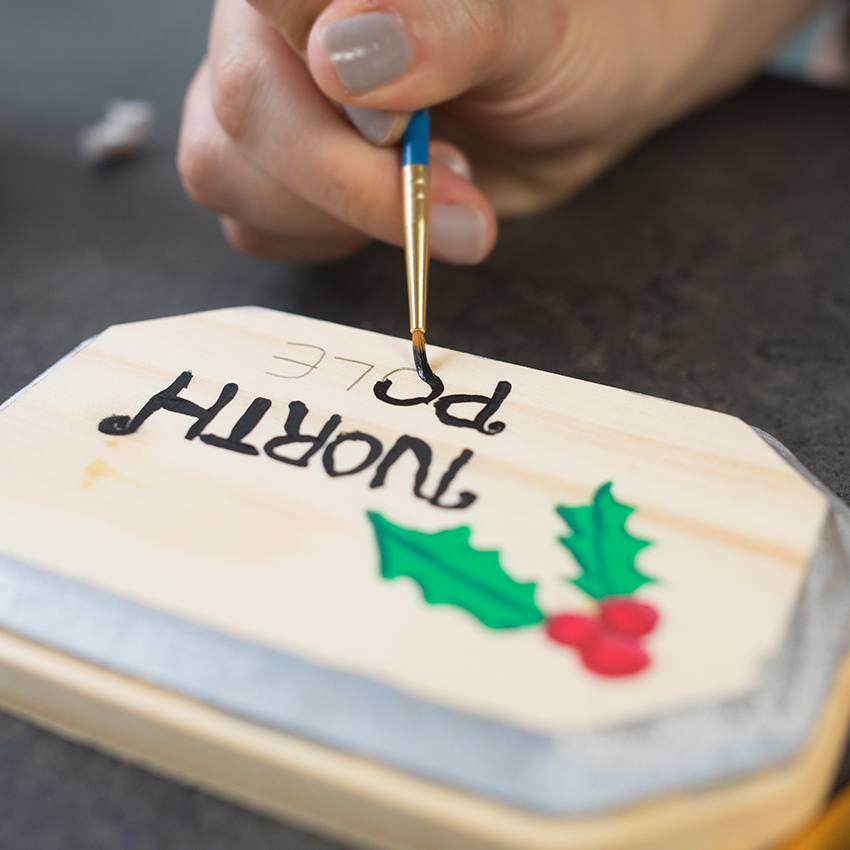
Now, it's time to make the star of the show: the North Pole sign.
For this part of the craft, you will need your wooden plaque, paint, and paintbrushes.
For our sign, we wrote everything out with a pencil before we painted it, and we recommend doing this to avoid any permanent mistakes. Feel free to get as creative as you want with your sign, or you can use ours as a guide.
Step #3: Add Chain

Cut a small piece of chain, and eyeball it so that you are glueing an equal length of chain to each side.
With your glue gun, glue the chain to the wooden plaque. Cut the chain straight down the middle to make two equal strands.
Step #4: Stick Light Into Base

Use a scissor to create a small hole in the Styrofoam base, then gently twist the light into the base until it is nice and sturdy.
If you accidentally push too far and break the Styrofoam, just cover the bottom up with a piece of duct tape!
Step #5: Hang Sign
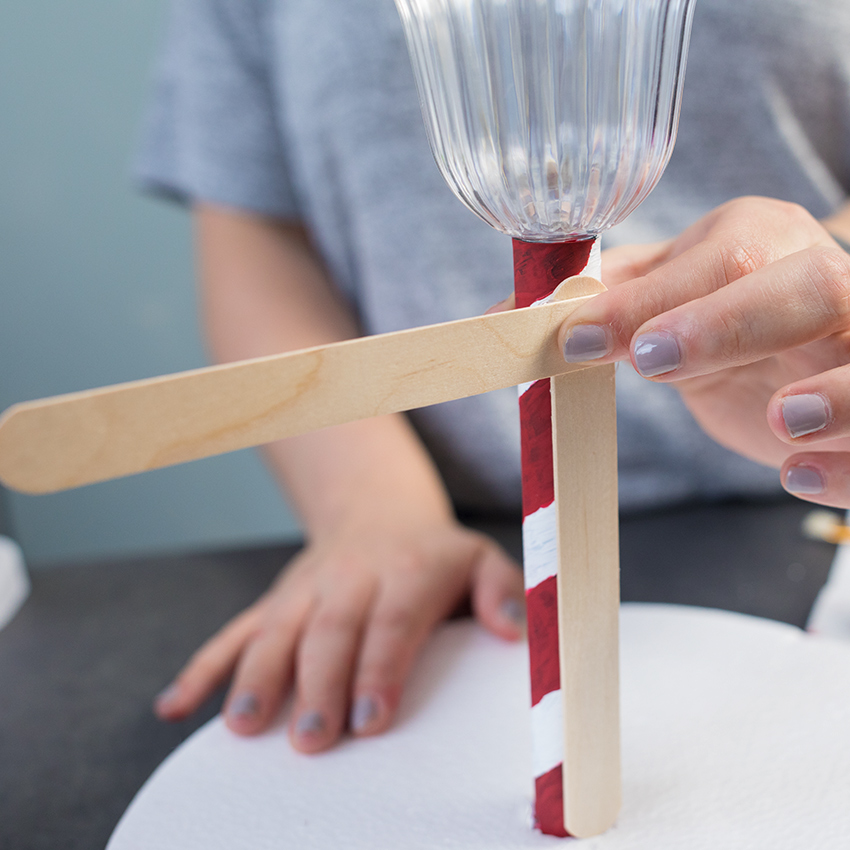
Hot-glue two Popsicle sticks perpendicularly onto the pole of the light.
Wrap the chains around the popsicle sticking out, and glue the loose ends of the chain onto the plaque, creating two loops. Let the plaque hang on the Popsicle stick.
Step #6: Make It Snow!

Last but not least, it's time to make it snow.
Apply a layer of Elmer's glue to the Styrofoam base with a spongy paintbrush. Make sure not to use hot glue here, as the hot glue will melt the Styrofoam.
Once you've applied the glue, sprinkle the fake snow onto the base. If you want to make it look like it just snowed on your lamp, you can even apply a little bit of glue to the top of your lamp and wooden sign, and add some snow there, too!
For even more festive fun, glue a piece of holly onto the cover with hot glue, if desired.
Step #7: Put Your Sign Out And Enjoy!
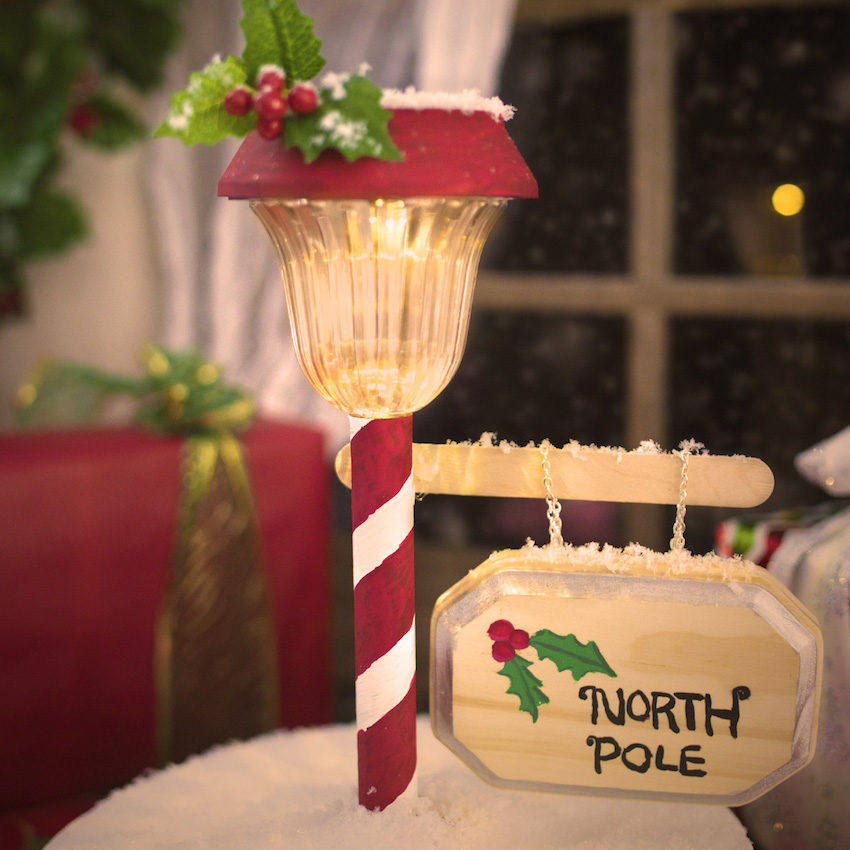
Finally, put your sign wherever you want it to be, and watch as it magically lights up whenever it gets dark!
If you're excited to make this magical sign this winter, make sure to SHARE this article with family and friends on Facebook.


