When one man discovered how to feed a whole family for a month by just using a simple Mason jar I was floored!
Everyone loves a good "Do It Yourself" project. Whether it be an amazing clawfoot bathtub sofa or something a bit more on the simple side, there's just something so neat about seeing someone come up with ingenious solutions using simple household products.
While this DIY project comes with a few steps, it's definitely worth looking at, and it inspired me to do my own version to feed and play with our favorite feathered friends. I didn't know where this project was going at first, but the end result was beautiful, simple, and most important of all: It was cheap! This project was so creative and unique that it actually won the guys at Rustic Wood a nationwide contest!
Let us know if you'd make something similar to this! It really shows how creative some people can really be! What a great weekend project!
Here's what you'll need…
Tools:
- Saw: If you don’t have a bandsaw, you can use a regular hand saw or a chainsaw.
- Drill press or electric drill: For drilling rope holes and seed cups.
- Drill bit (large): The bit should be a little larger than whatever rope you use so that the roof can slide up easily.
- Drill bit (small) or punch: For drilling holes in metal ring. You could also use a punch.
- Forstner or spade bit: To be used to drill the little cups that the seed falls into. The bigger the better. We used a 1-1/4″ forstner bit.
- Hot glue gun: For securing the knots and hook.
- Wire cutter: For cutting the wire
- Pliers: For shaping the wire
Supplies:
- Log: We used a 9″ diameter black ash log. You can go larger, but I wouldn’t go smaller in diameter.
- Wide-mouth one-quart Mason jar with metal ring.
- Screws: You will need four (4) small brass screws to secure the jar ring to base.
- Sanding pad and/or sandpaper (optional): To sand off base and roof slightly.
- Spar varnish: To be applied to roof only. You can either spray or paint it onto the roof. Spar varnish has UV protection and is perfect for wood that will be outside. Apply several coats.
- Mineral oil: This will be applied to the base and must be bird-friendly. Food grade works best.
- Rope: I used jute because of its rustic appearance. You can also use clothesline, poly cord, or chain.
- Wire or coat hanger: Heavy gauge wire to make the hook or loop on top. You can also use a coat hanger.
- Paper: One sheet of paper to make template for rope holes in the top and bottom.
- Pencil: To mark on the wood for drilling. You can also use a magic marker like I did, but it is harder to sand off.
Scroll down and take a look at this wonderful creation, and please SHARE this idea with your friends!
Step One: Confirm you have all the supplies you need
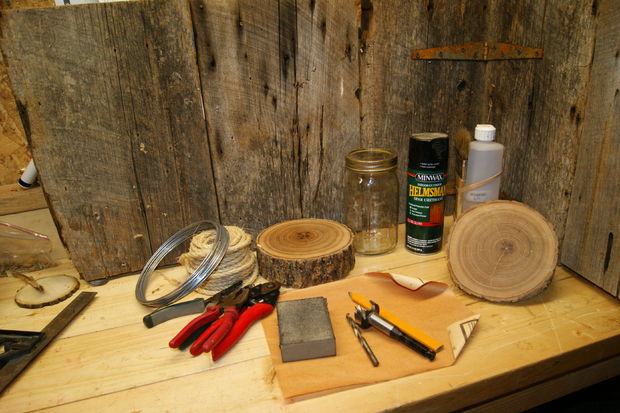
Once you've double checked the list of tools, you're ready to start!
Step Two: Cut the log
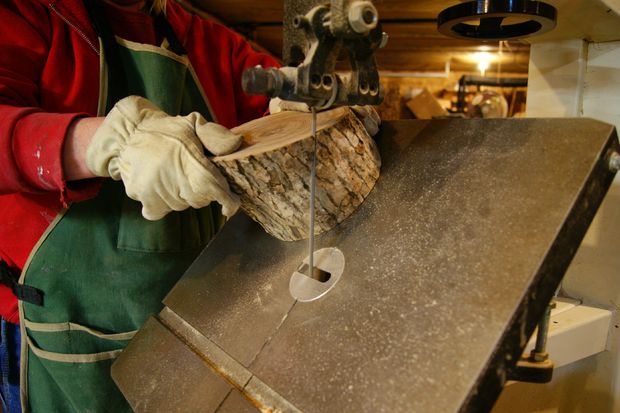
Use a 9" diameter log. For the base log of your project, a simple flat cut of about 2" will work. For the roof, cut a 4" thick piece. You can make the roof a 45-degree angle or you can go with a flat cut.
Step Three: Cut out your template for your rope holes
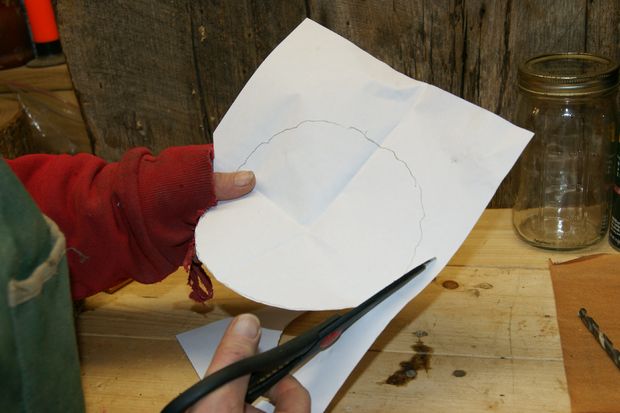
With a piece of paper, trace around the base of the log, cut it out when finished.
Step Four: Fold the paper into quarters
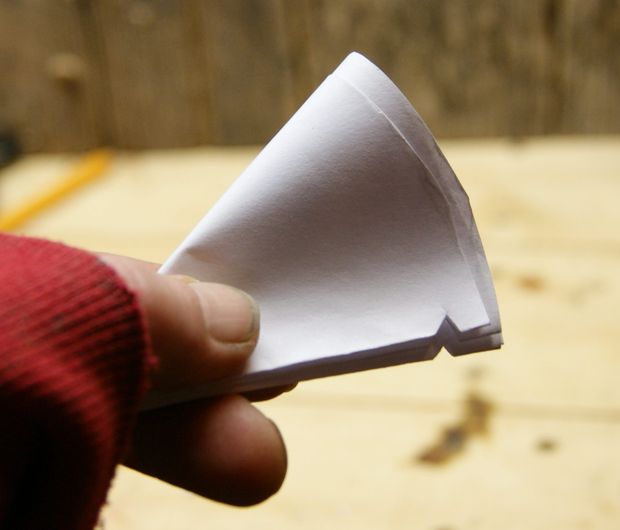
Then make a small hole at the bottom of your folded up paper.
Step Five: Mark your notches
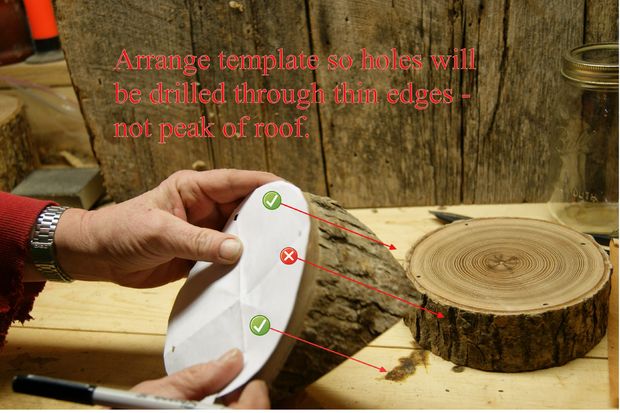
Put the paper back over your log and make marks for drilling the holes for the rope to go through. Make sure the mason jar will fit between your marks!
Go to the NEXT page for more steps to this amazing project!
Step Six: Find your center
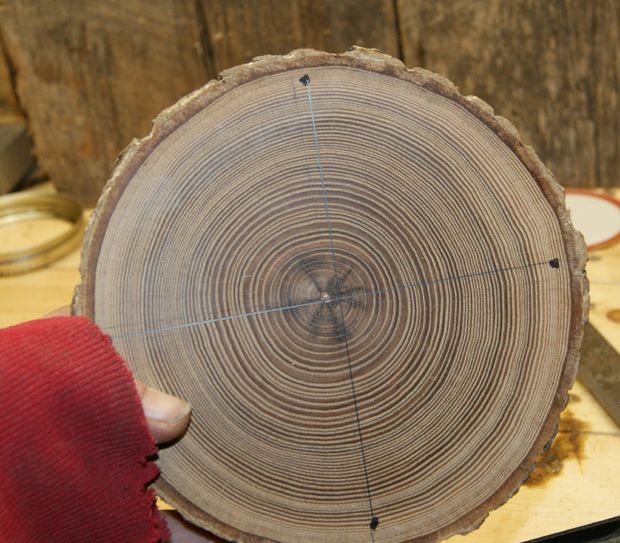
By using the four notches you made earlier, measure out and find the center of your log.
Step Seven: Draw an outline of your Mason jar ring top
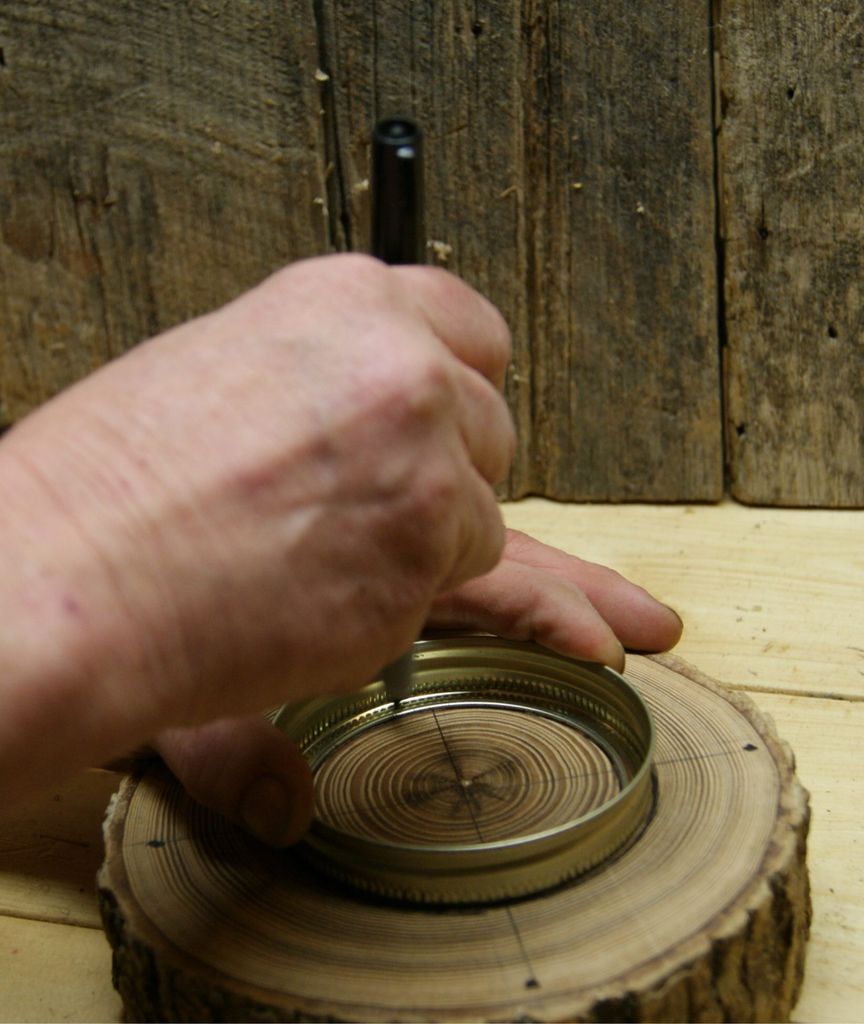
Place your Mason jar ring in the center and draw an outline all around.
Step Eight: Make your feeding stations
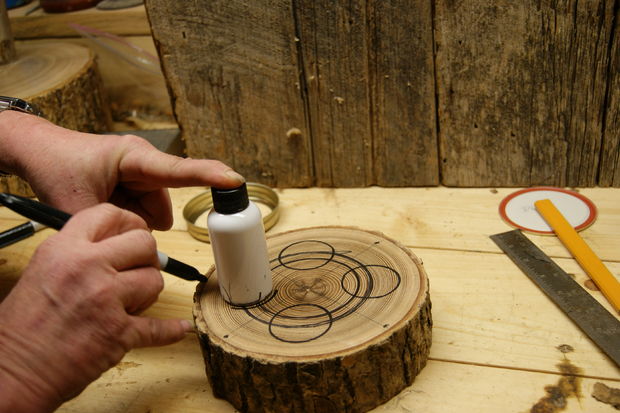
Then draw four smaller sized holes with half of each hole being within the center circle, and half of each hole being outside.
Step Nine: Drill your holes!
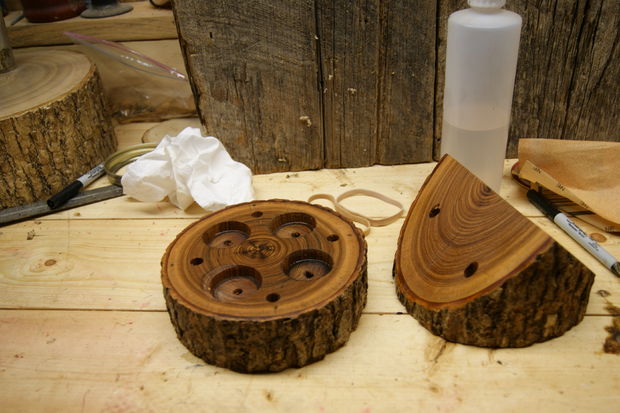
For the smaller rope holes that you used your paper outline for, just use a drill bit that's slightly bigger than the rope you're using. For your bigger feeding cup holes, drill around 1" deep. Make sure to be careful and keep the wood stationary!
Click NEXT to see how to feed a whole family!
Step Ten: Protect the wood
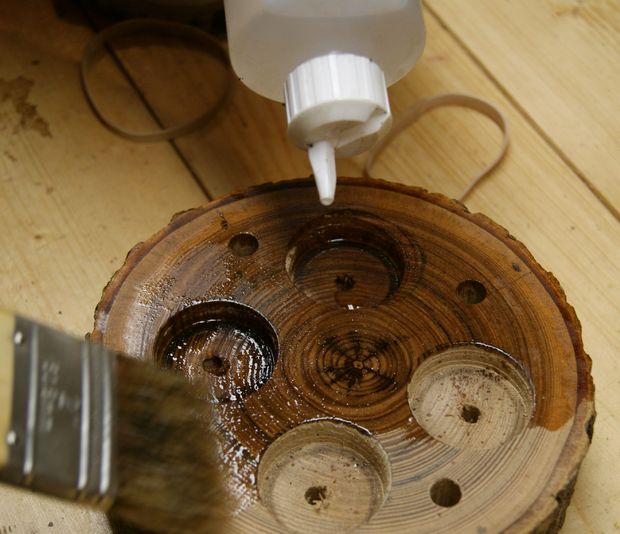
For the base, make sure to only use food grade mineral oil. We don't want anyone to get sick! For the roof you can use some simple spar varnish.
Step Eleven: Attach the Mason jar ring top
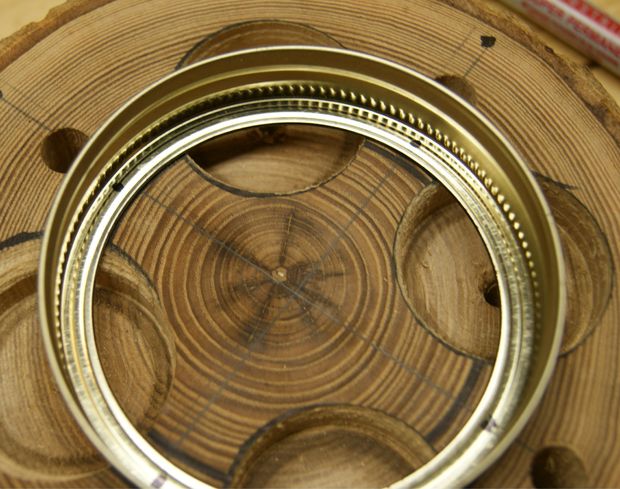
Center the ring back onto your base. Drill or punch four small holes in ring.
Step Twelve: Screw it in
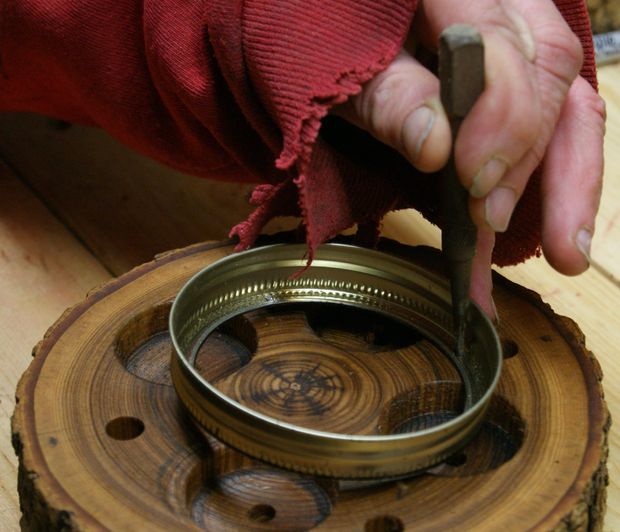
Make sure to use four small brass screws (brass won't rust, unlike steel screws).
Step Thirteen: Get your rope
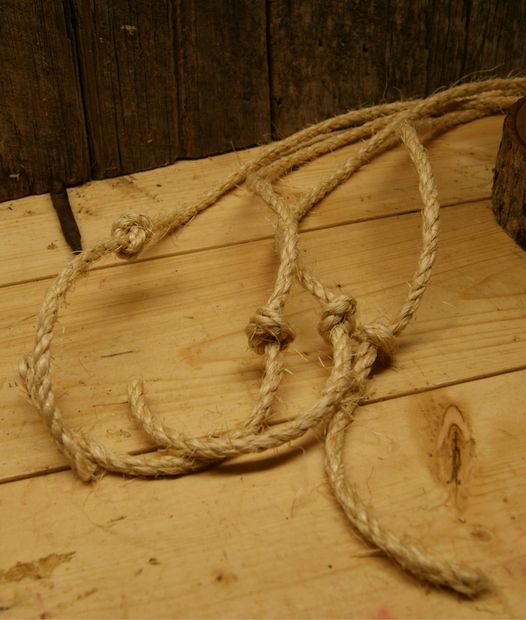
Just as long as it's slightly smaller than the four rope holes you drilled in. Get four strands of around three feet each.
Check out the final steps on the NEXT page!
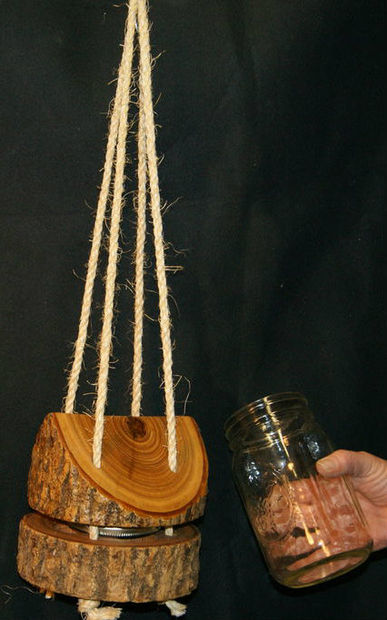
Step Fourteen: Stuff it through
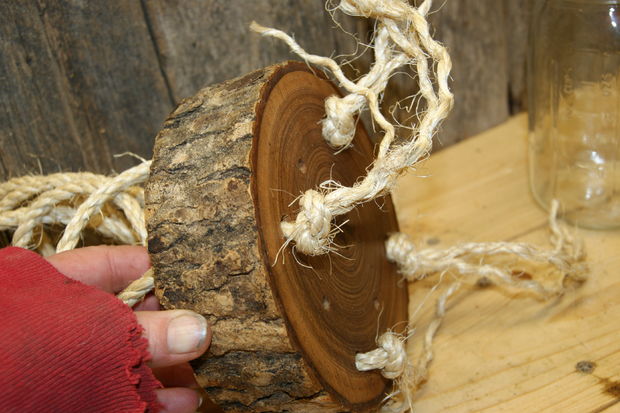
Stuff your rope through the holes and tie a knot so it doesn't slip out.
Step Fifteen: Bunch your rope together
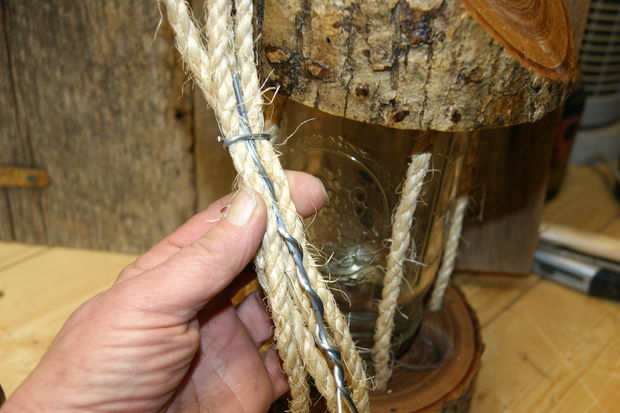
Once you've stuffed the rope through the roof and the bottom logs, bring the very end of the rope to the same point and bunch it together.
Step Sixteen: Wrap your wire
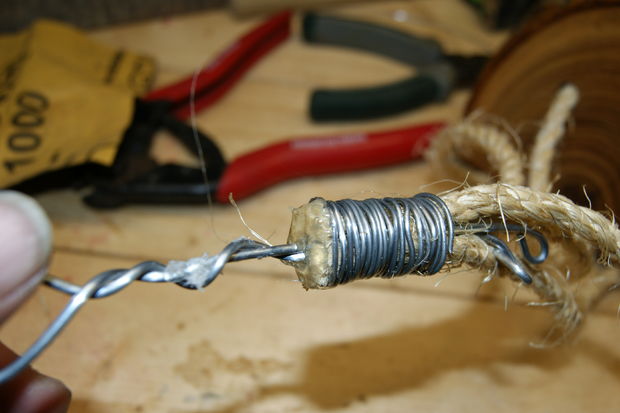
Wrap the wire around the end of your rope so the four strands come to a single hanging point.
Step Seventeen: You're almost there!
Click NEXT to see how it looks in the wild!
Step Eighteen: Fill it up with some seeds!
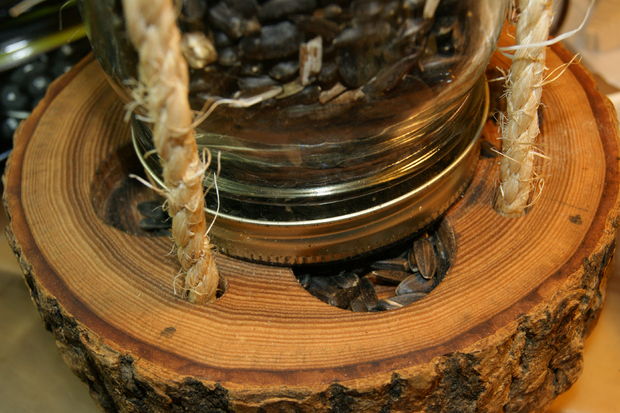
This bird feeder is meant for the smaller birds, so use sunflower seeds or regular bird seed.
Step Nineteen: Hang it up outside and wait
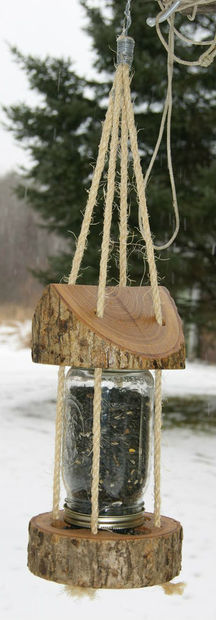
Not bad for a Mason jar, some rope, and a log!
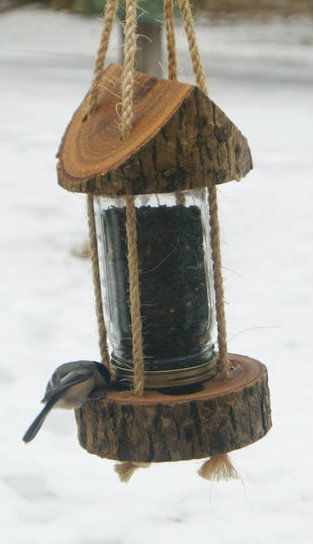
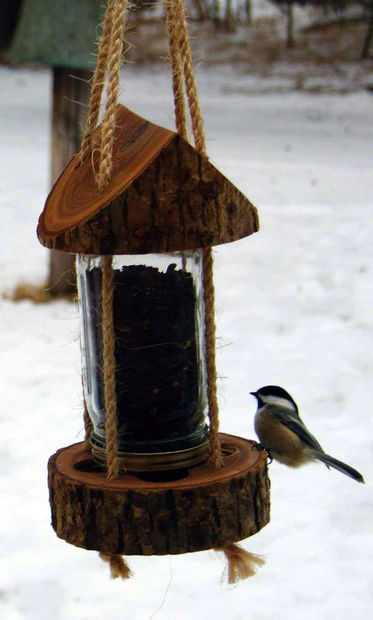
Be kind to your feathered friends and please SHARE this incredibly fun do it yourself project!


