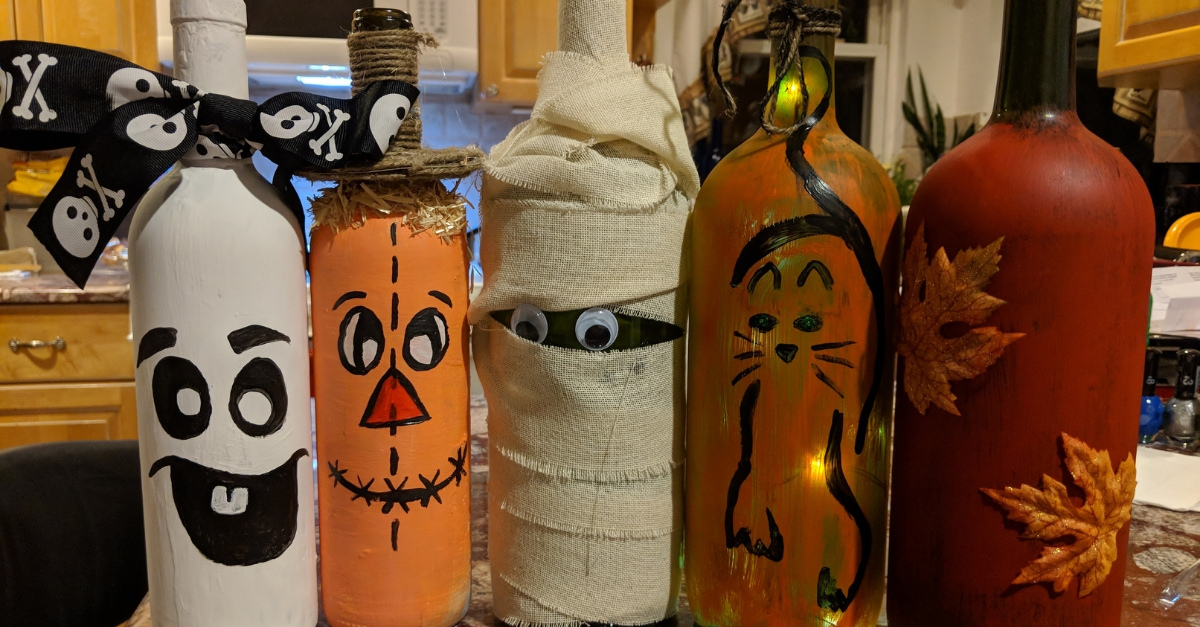
Fall is officially here. The air is crisp, the days are getting shorter, and staying in seems more appealing each and every day. There's nothing like kicking back in your warm, cozy house with a bottle of wine and enjoying a beautiful fall evening.
With staying indoors comes indoor activities, and crafting is an excellent one. Creating crafts is a wonderful way to decompress, and it leaves you feeling rewarded for the fruits of your labor. You can keep these crafts to keep the fall vibes strong in your house or give them away to family and friends to get them into the spirit of the season.
First things first, you'll need to empty some wine bottles. I suppose they don't necessarily have to be wine bottles (liquor is lovely too, after all). I won't tell you how to empty them, although I will suggest getting your favorite and taking long sips, maybe even a gulp or two. Once your bottle(s) are empty, you're ready to upcycle them into lovely decorations for your home.
Before you start any of the below crafts, soak your wine bottle in warm, soapy water so that you can easily peel off the label. If you have an impatient streak like me, use a steamer and a razor blade to scrape the label off.
If you're painting a bottle and feel like the paint isn't sticking, your bottle could be too sleek. You can use a primer like the gesso I used in some of the below crafts or try roughening up the surface with sandpaper so that the paint has something to stick to. Remember, it's OK if it isn't perfect. These crafts are supposed to be fun and relaxing, not art museum exhibits!
With all of these things in mind, it's time to get crafting. Grab your messy clothes, tie your hair back, and let's get started!
1. Black Cat Light Bottle
There's nothing unlucky about this adorable black cat bottle! I was inspired to try out this creation by BoyMomSCreations on Etsy. You'll need:
- Acrylic paint (I used orange and black, but feel free to mix it up.)
- Small sequins (You’ll use these for the cat eyes, so yellow or green can work.)
- Bottle string lights (I picked these up from my local Michaels.)
- Hot-glue gun
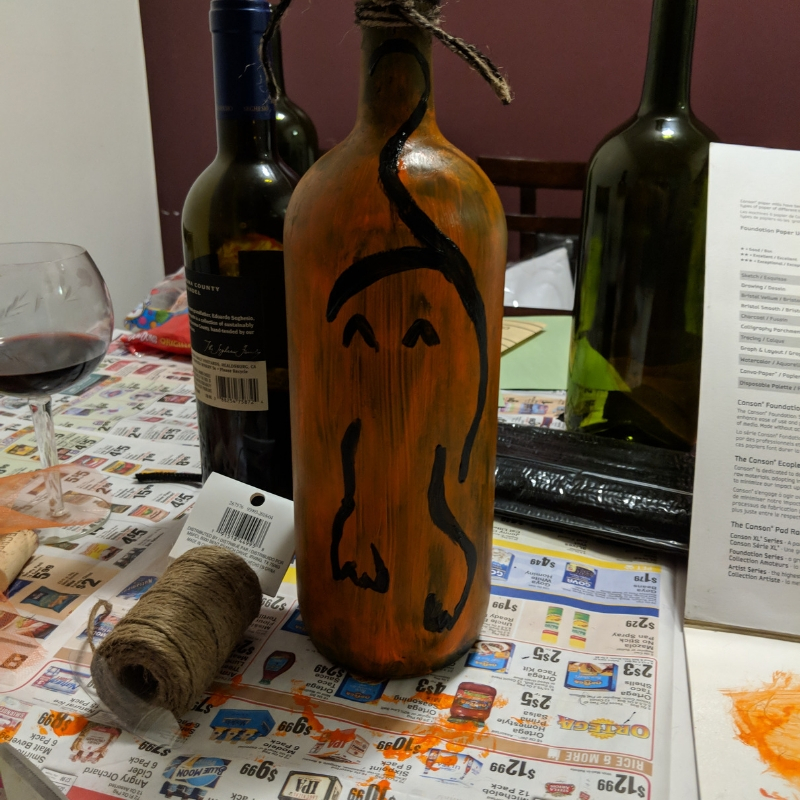
You'll first want to coat the bottle in two to three coats of orange paint. Remember that you still want to see the lights through the bottle, so don't paint it on too thick. Let the bottles dry 30 minutes to an hour before painting on your black cat.
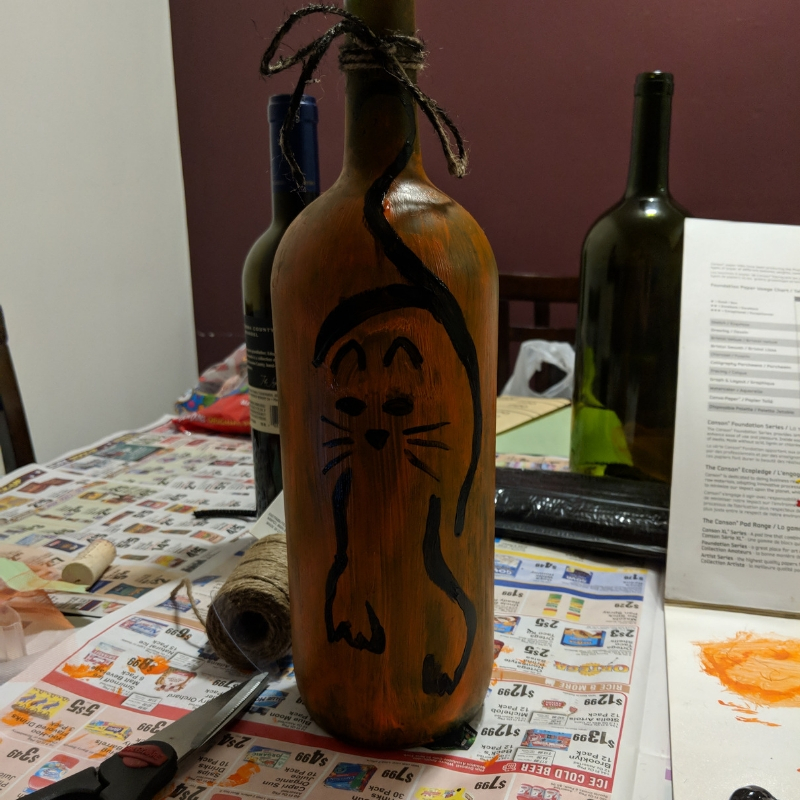
I loved this design because it's pretty simple to execute but still presents really nicely. But feel free to paint any other fall things that tickle your fancy.
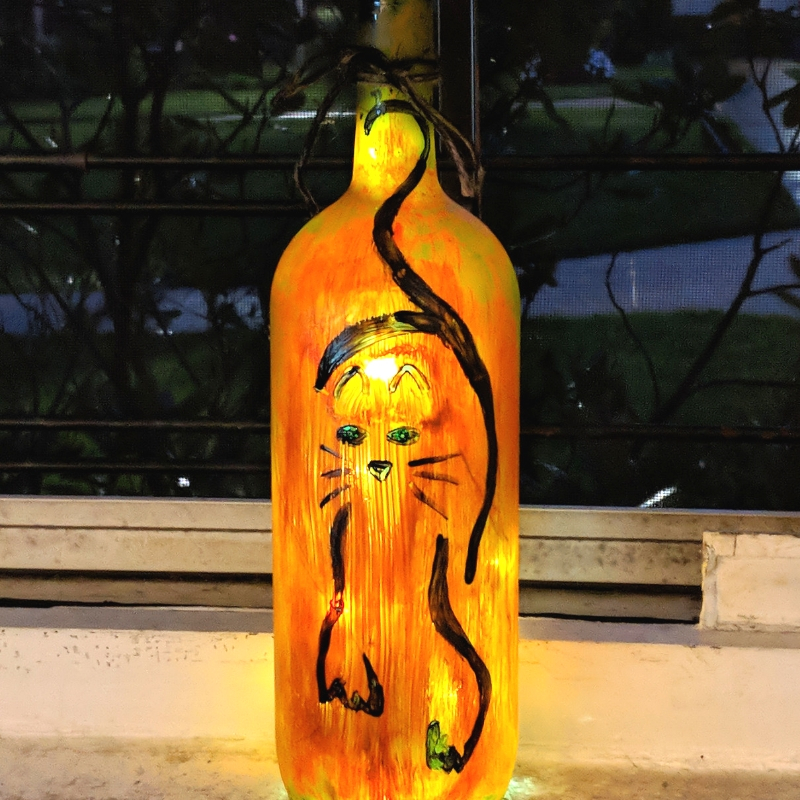
Glue some sequins in place as the cat's eyes. Finally, wait until the bottle is totally dry before inserting the string lights.
2. Mummy Wine Bottle
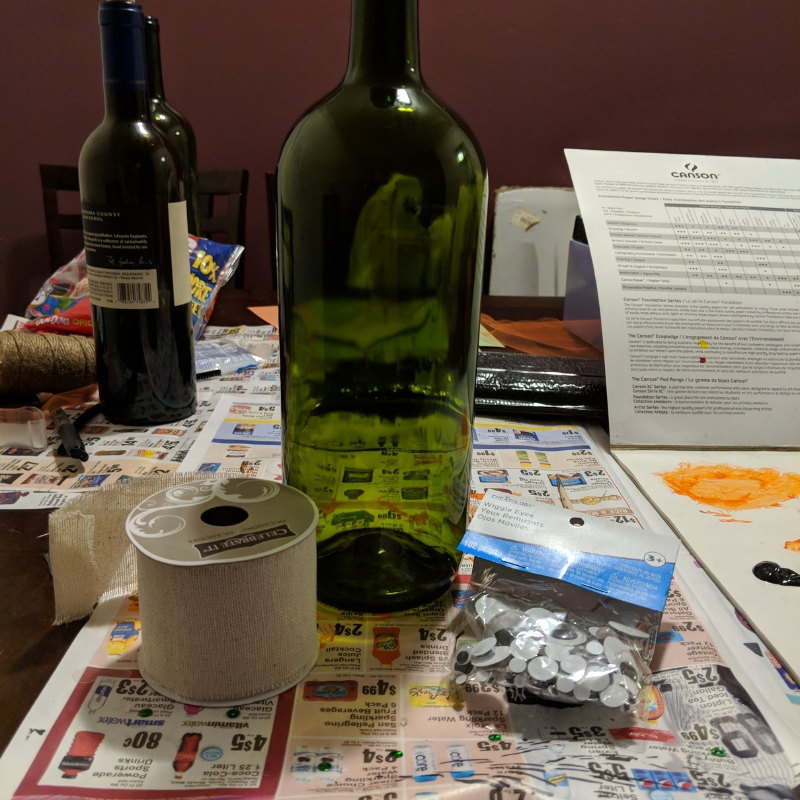
These mummy wine bottles have come back from the dead to charm you!
You'll need:
- Wide ribbon, cheesecloth, or a wrap bandage
- Googly eyes
- Hot-glue gun
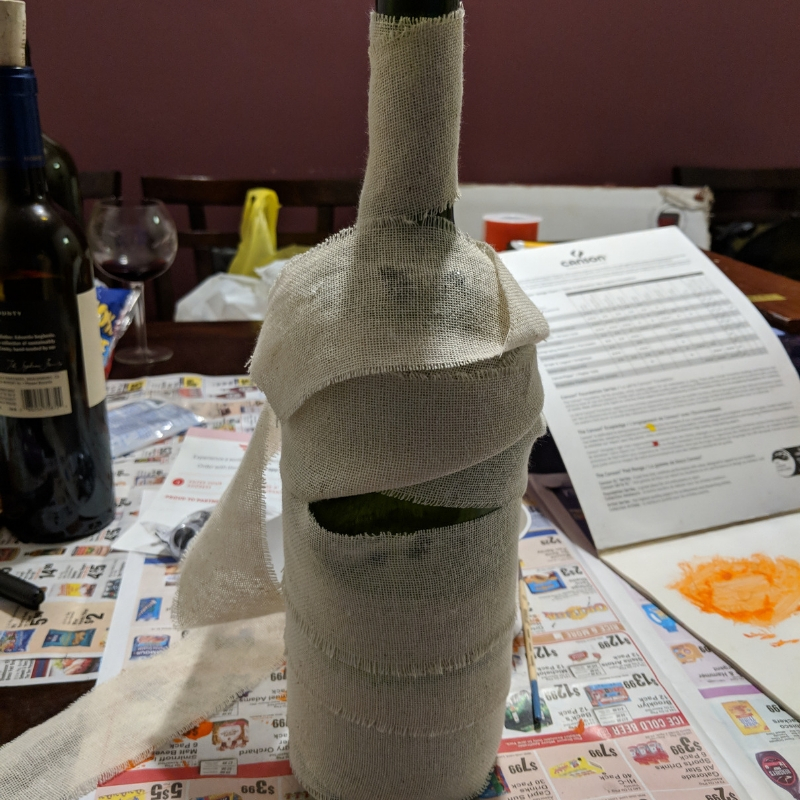
Using a hot-glue gun, carefully make a nickel- to quarter-size dot of hot glue on the bottle. Attach the beginning of the wrap there and carefully spin the bottle, stopping every so often to glue down another piece in place.
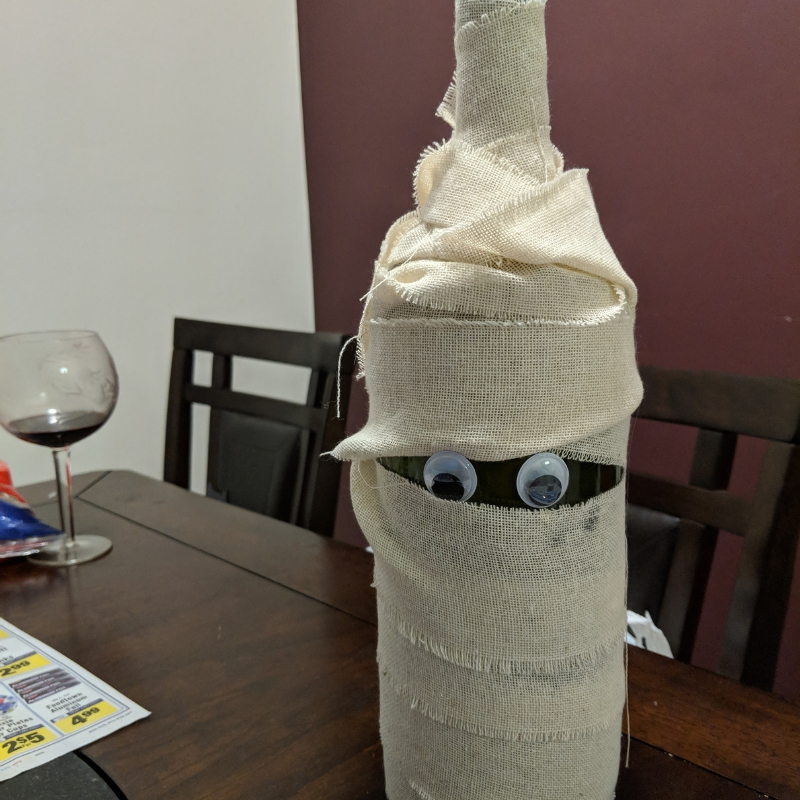
Leave a space between the wrappings about a quarter of the way to the top. That's where you'll glue down the googly eyes. Then secure the rest of the bandage. It's OK if it's a little messy — a few hundred years of bedhead will do that to you!
3. Falling Leaves Bottle
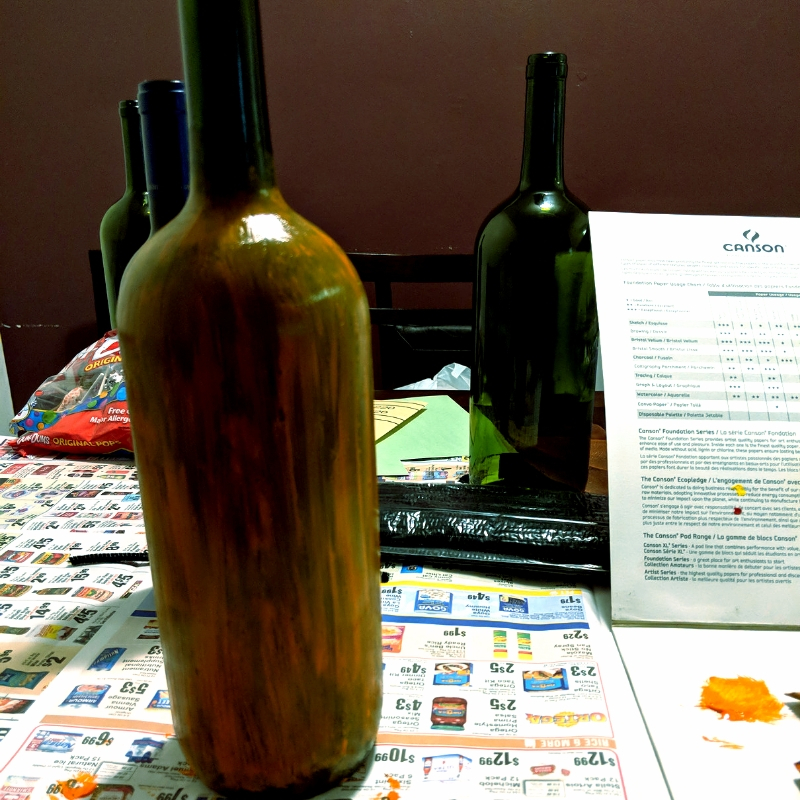
Fall leaves aren't just for piling up and jumping in! This pretty bottle, inspired by this candle holder by Kids Kubby, will add a nice touch of fall to the indoors.
You'll need:
- Acrylic paint
- Hot-glue gun
- Fake leaves (If there are real leaves in your area, feel free to use those instead!)
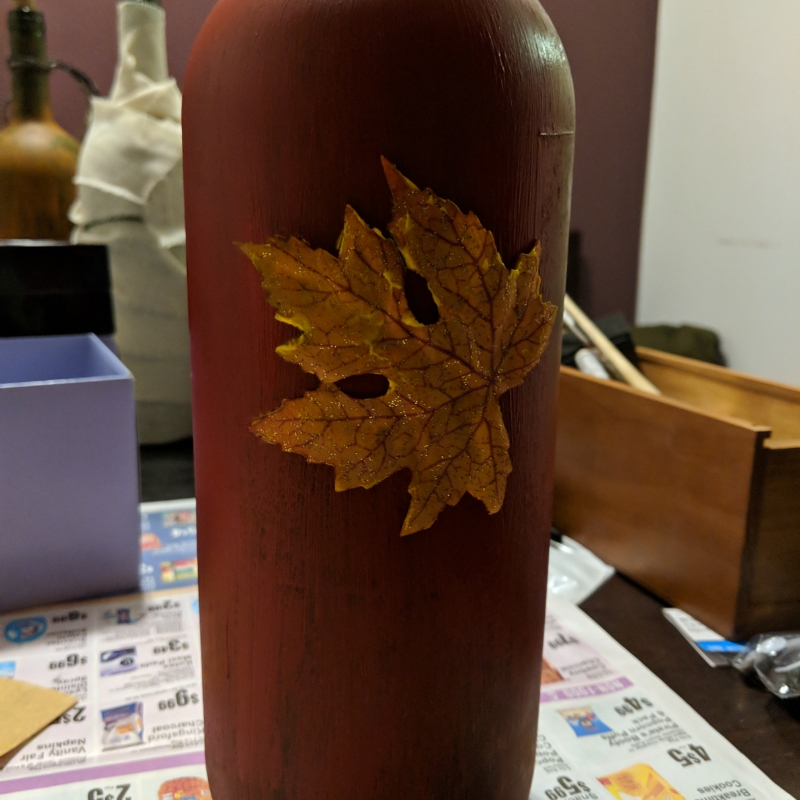
Paint the bottle just like in the first craft! Do as many coats as you'd like. Just remember that if you want to add twinkly lights inside the bottle, you might want fewer coats.
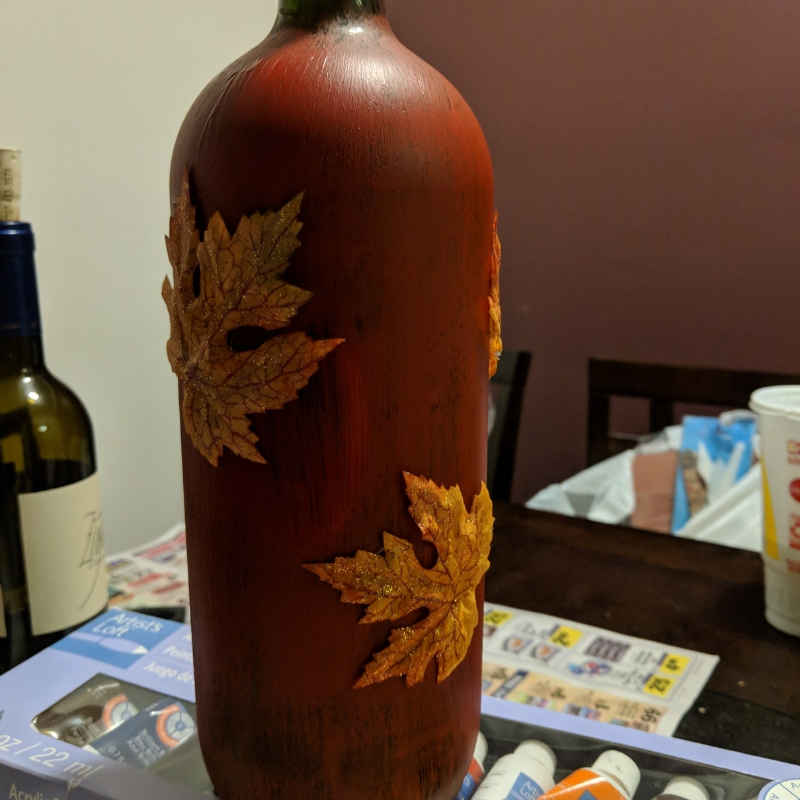
Carefully glue the leaves in whatever pattern you'd like. I loved the look this spacing provides. It makes it seem like the leaves just fell onto the bottle!
If you have real leaves and want to avoid hot glue, try dipping them in the paint and carefully pressing them to the bottle. You might have a tough time keeping them in one piece depending on how dry the leaf is, but it'll create a lovely pattern.
4. Ghost Bottle
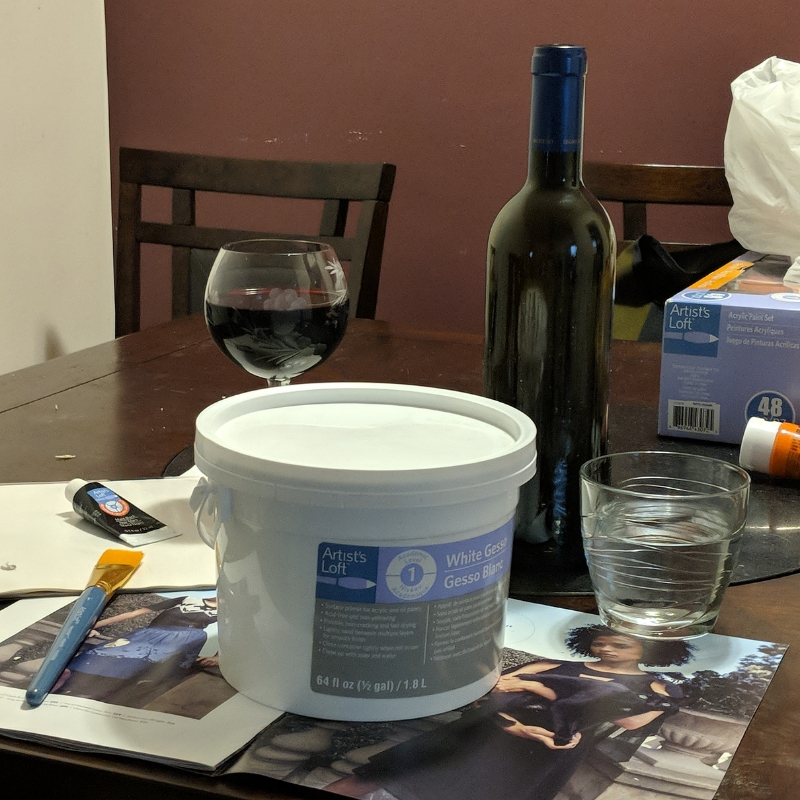
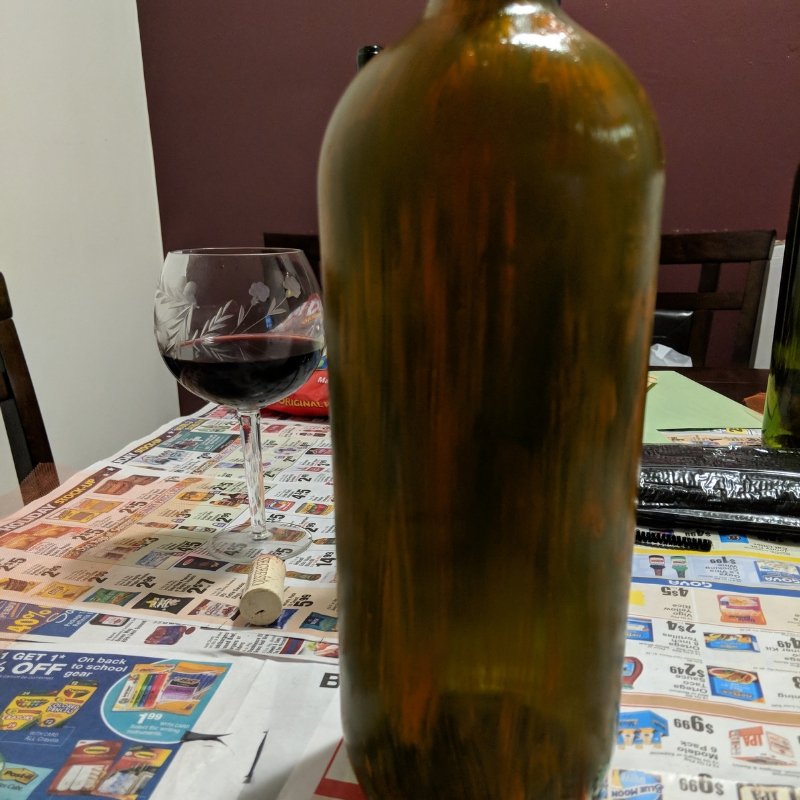
I didn't tell you how to empty your wine bottles, but here you get a sneak peek at how I emptied mine!
Here's what you'll need to make some cute, creepy ghouls for your home, inspired by Hinzpirations on Etsy:
- Gesso
- Acrylic paint
- A ribbon (optional)
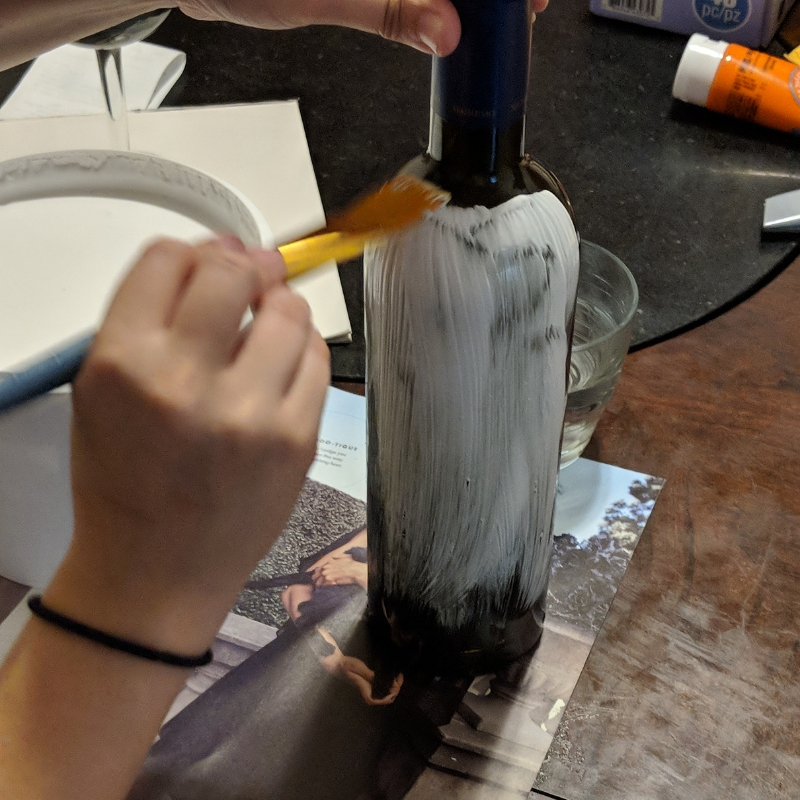
If you're not a regular in the acrylic paint world, you might be wondering what the heck gesso is. It's a primer. Remember earlier when I said the glass bottles might be too slick for paint? A coat or two of this will add the texture needed to use acrylics.
Paint the bottle in a few coats of gesso. You can also do a coat or two of gesso and then white acrylic paint, but since this is a white bottle craft, you won't need the paint if you're careful with the gesso.
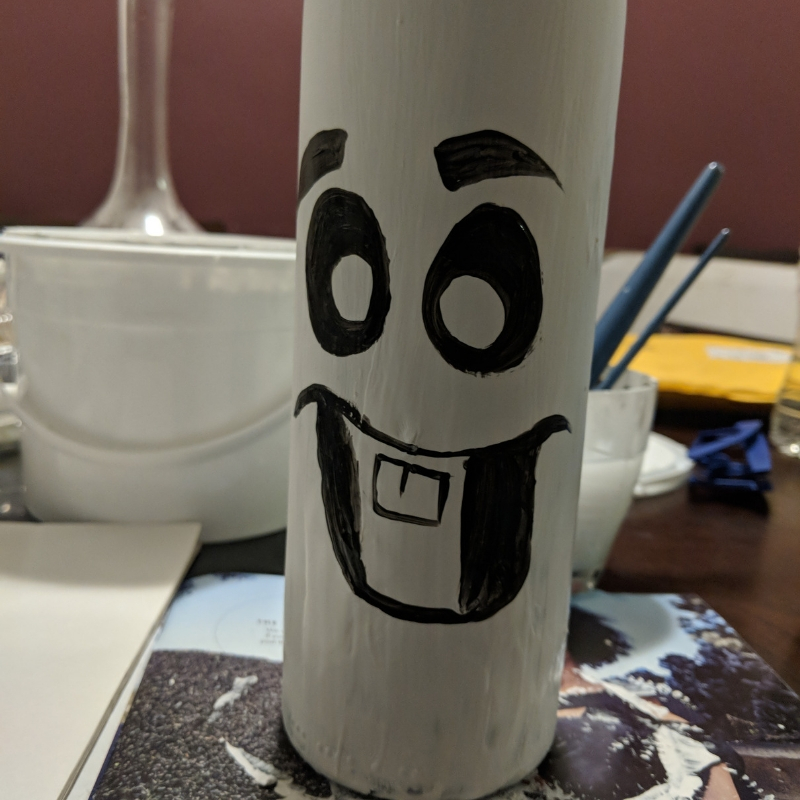
Gesso takes longer to dry than paint, so you might need to leave it an hour or two, depending on how thick you layered on the coats. Once it's dry, paint a spooky, silly face that screams "BOO!"
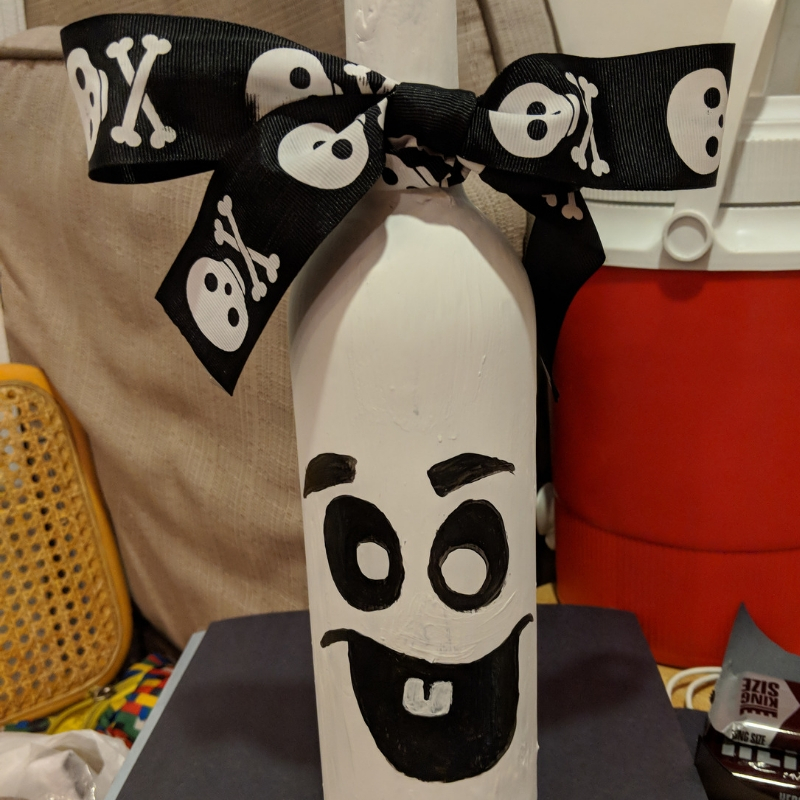
Add a ribbon around the neck for a little extra flair!
5. Scarecrow Bottle
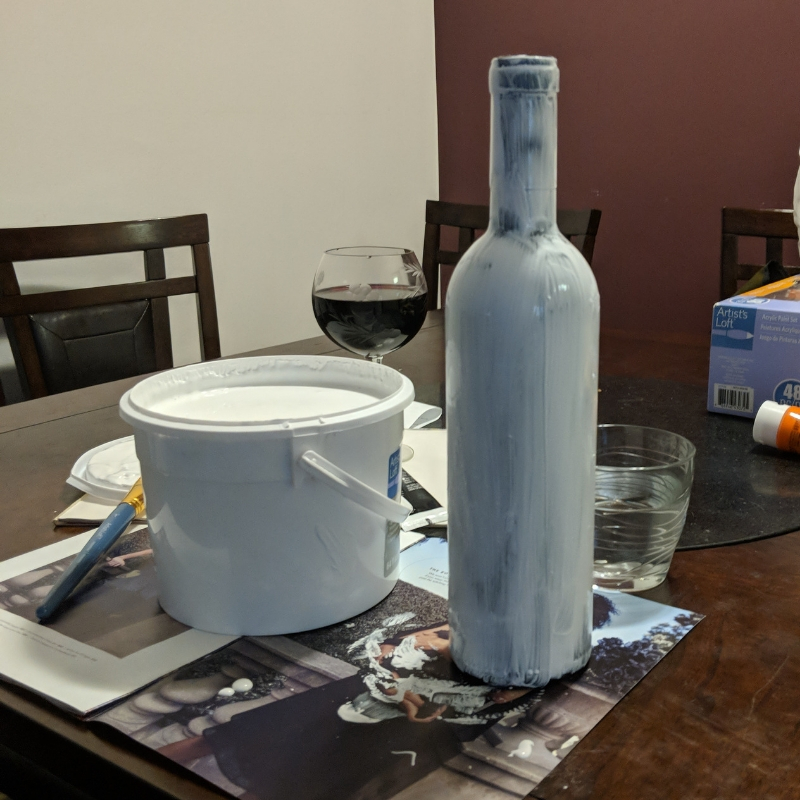
I saw these adorable scarecrow bottles by Kitchen Fun With My 3 Sons and was looking for a way to create a similar vibe with paint. Here's what you'll need:
- Gesso
- Acrylic paint
- Straw
- Twine
- Hot-glue gun
- Cardboard
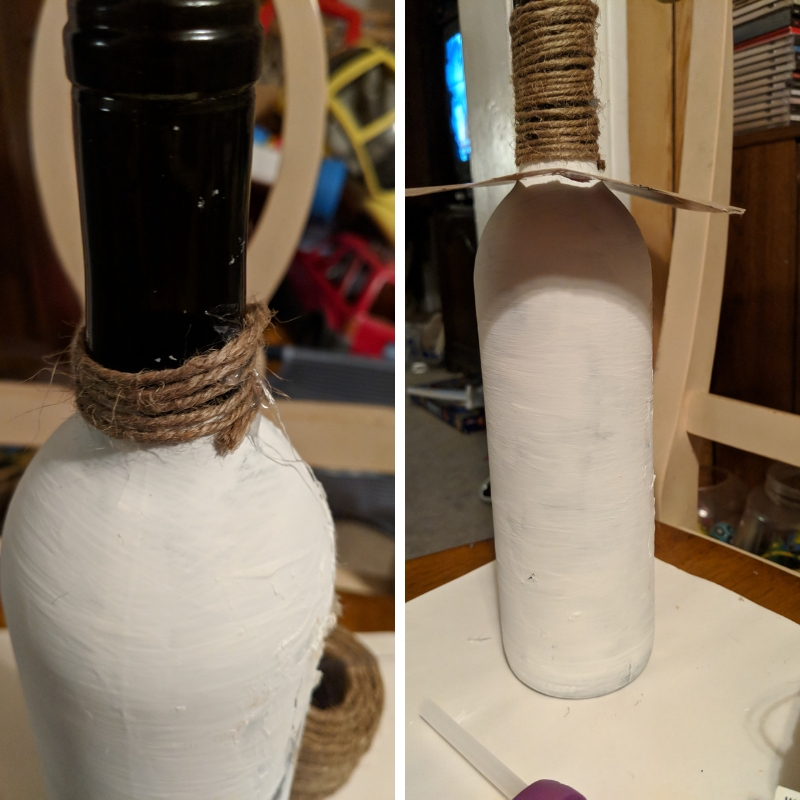
Throw a coat or two of gesso on the bottle so that you'll be able to paint it easily. Allow it to dry. Measure out enough twine to wrap around the neck of the bottle. Put a dot of hot glue at the point you'll start. Carefully wrap the twine, putting dots of hot glue to adhere it as you go until the neck is covered.
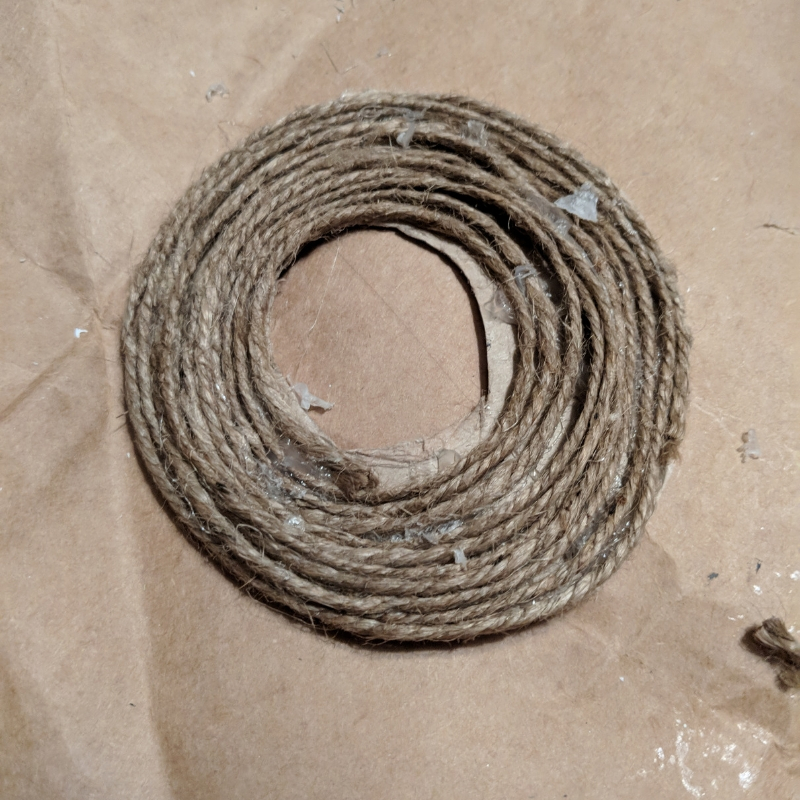
Cut a piece of cardboard to serve as the brim of the scarecrow's hat. Cut a circle in the middle so that you can slide it down to the base of the bottleneck. Using the glue, wrap the twine around until the whole brim is covered. Give it a few minutes to set before repeating on the other side.
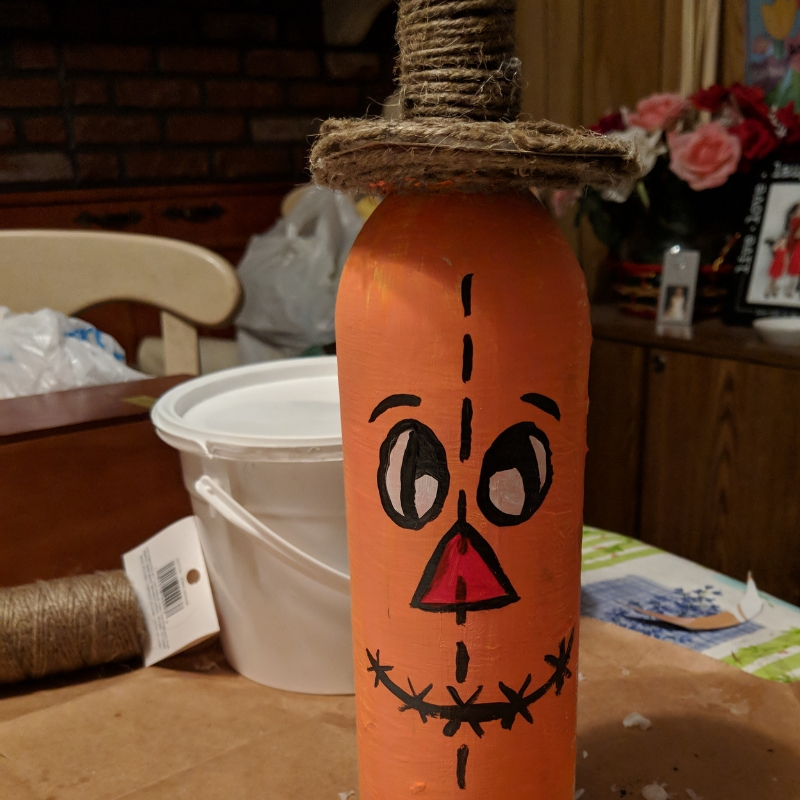
Once your hat is all done, paint the face on your scarecrow. You can make it cute or creepy, whichever you prefer. Mine came out a little more orange than anticipated, but I still think it's pretty cute!
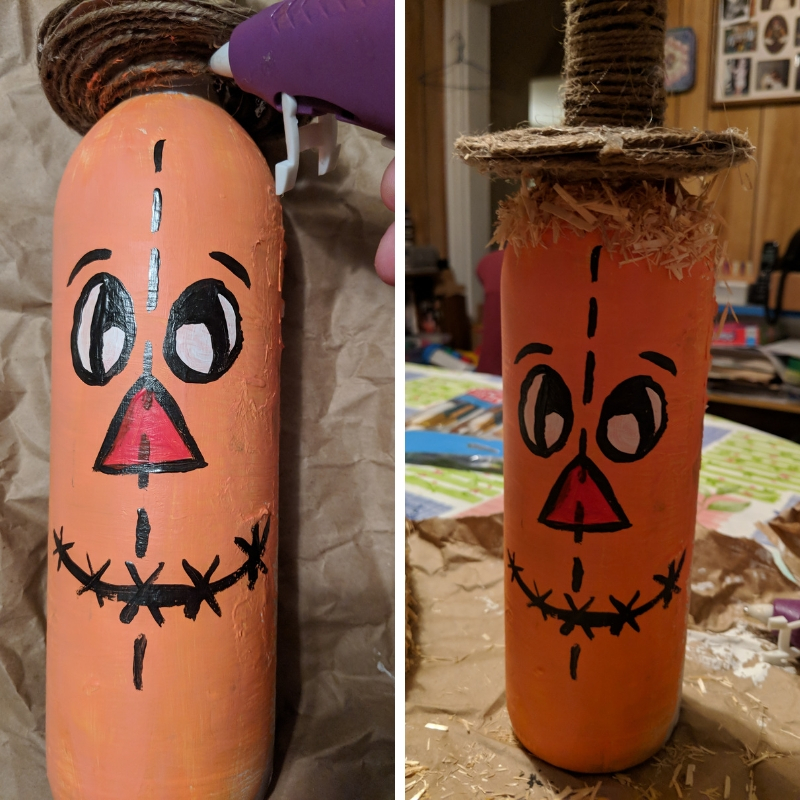
Once the paint is dry, lay the bottle down. Carefully apply some dots of hot glue under the hat brim and sprinkle the straw on it, just like you'd do with glitter. Do this over a garbage pail or sink to avoid making a huge mess.
Final Thoughts
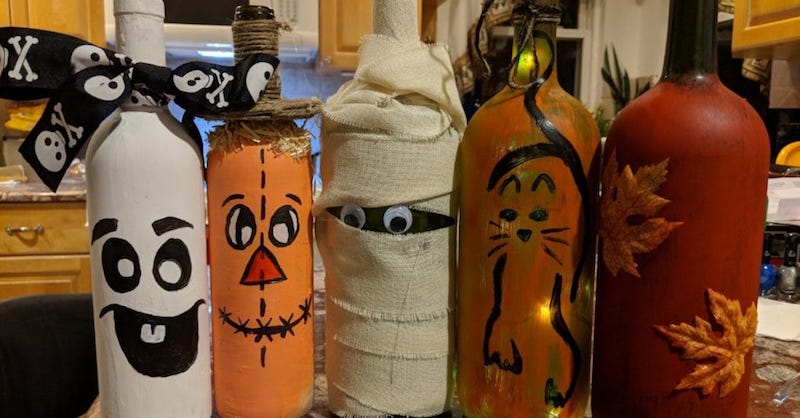
By the time you're finished with these crafts, I hope you're filled with all the pumpkin spice, leaf-falling, crisp-aired joy that autumn brings. And if you went about emptying your bottles the way I did — the good, old-fashioned way — you might even have a nice buzz to keep you warm on those crisp nights!


